Extend Your Twitter Integration With Third-Party Libraries
by Terence Bennett • December 4, 2018

Integrating Third-Party Libraries With DreamFactory Scripting
Being able to script business logic into your endpoints to further extend and customize the data response(s) and request(s) is one of the best features inside of DreamFactory. As a form of ETL data integration, DreamFactory can help you create a data lake or data warehouse, especially when combined with a service such as Integrate.io. Sometimes cases arise where you need to take advantage of the robust third-party library community to help extend your API. In the example below, we are going to use a third-party library to help us connect our DreamFactory instance to a Twitter Account to post updates. We also bring in the concept of connecting the Twitter service to our Raspberry Pi IoT device to post temperature information to show you how can connect multiple services through DreamFactory to manage your data needs in a simple, robust method that makes API management a snap.
How do we connect to Twitter?
The Twitter API requires OAuth authentication, but because we're going to interact with the API programmatically rather than on behalf of an authenticated user we'll need to take advantage of a third-party library to handle the OAuth logic. For PHP we recommend TwitterOAuth, created and maintained by Abraham Williams.
To install the package, navigate to your DreamFactory root directory and execute this command:
$ composer require abraham/twitteroauth --no-dev
Configuring The Service Inside of DreamFactory
With that done, it's time to configure the service. Login to your DreamFactory instance as an administrator and follow these steps:
1. Select Services > Create > Script
2. Choose one of the four supported scripting engines (Node.js, PHP, Python, V8)
3. On the Info tab, enter a name, label, and description. Remember, the name will constitute part of the service URL, so be sure to enter something meaningful such as twitter.
4. Click the Config tab.
Within this tab you'll be presented with several options for configuring your script. For the sake of simplicity we'll leave the options untouched and just embed the script directly into the textarea field.
$consumerKey = YOUR_CONSUMER_KEY;
$consumerSecret = YOUR_CONSUMER_SECRET;
$oauthToken = YOUR_OAUTH_TOKEN;
$oauthSecret = YOUR_OAUTH_SECRET;$connection = new \Abraham\TwitterOAuth\TwitterOAuth($consumerKey, $consumerSecret, $oauthToken, $oauthSecret);
if ($event['request']['method'] == "GET") {
$response = $connection->get("statuses/home_timeline", ["count" => 10, "exclude_replies" => true]);
} elseif ($event['request']['method'] == "POST") {
$response = $connection->post("statuses/update", ["status" => "hello world"]);
}
return json_encode(["response" => $response]);
Now What?
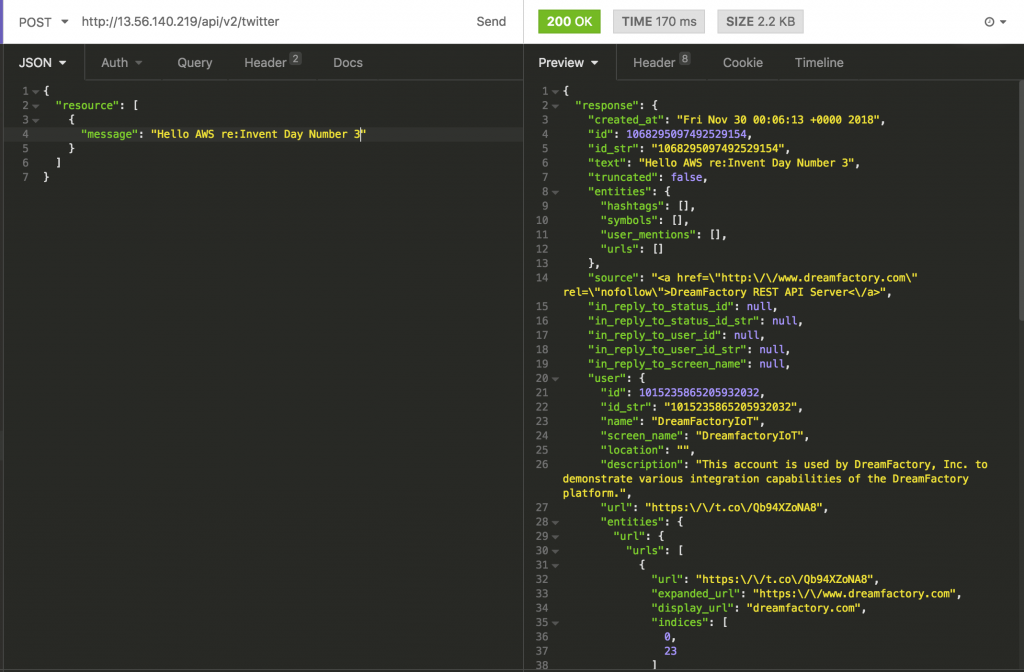
With the service saved, you'll want to create the usual role and companion API key to limit access. Once done, use an HTTP client such as Insomnia to test the service. Send an GET request to /api/v2/twitter to retrieve the tweets made by the associated API account. Send a POST request to the same URL to post hello world to the account. One easy modification of the latter behavior would be to send a JSON body along with the POST request containing the desired tweet text!
Extra, Extra!! Part 2 Coming Soon
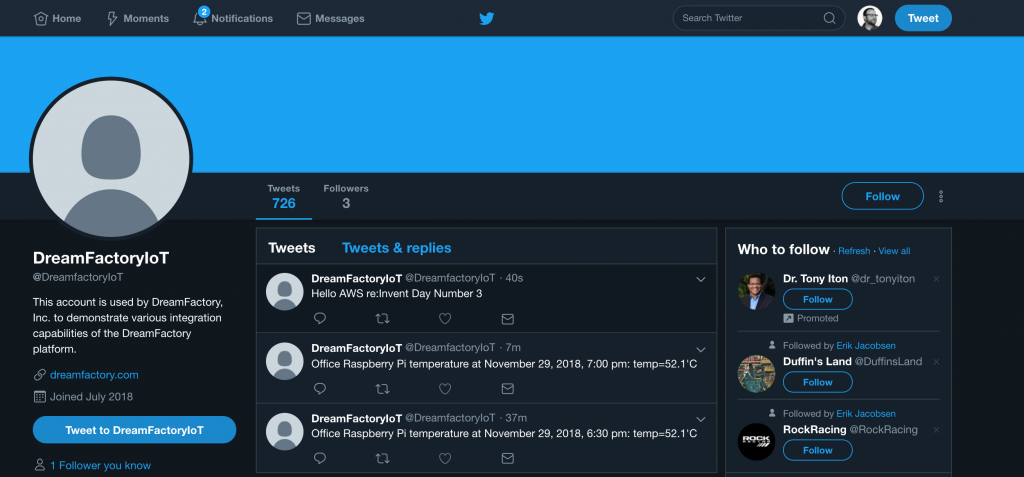
If you look at the other tweets there, you can see we are also passing along some temperature information from one of our engineers’ Raspberry Pi. They have configured it to talk to the CloudMQTT service we have set up, using the message broker to send the tweet instead of sending it automatically. Be on the lookout for another post showing how to accomplish this with DreamFactory and the MQTT connector available in our commercial offerings.
Related reading: Why Fortune 500 Companies are Rebuilding Their API Integrations
TL;DR - GET AN AI SUMMARY
Terence Bennett, CEO of DreamFactory, has a wealth of experience in government IT systems and Google Cloud. His impressive background includes being a former U.S. Navy Intelligence Officer and a former member of Google's Red Team. Prior to becoming CEO, he served as COO at DreamFactory Software.