
DreamFactory lets you create a secure Microsoft SQL Server API in just minutes - no coding required. Here's why and how it works:
Why Use DreamFactory?
- Automates API creation for Microsoft SQL Server and other databases
- Includes built-in security (RBAC, API key management, OAuth).
- Generates Swagger documentation automatically.
What You Need:
- A DreamFactory account (free trial available).
- SQL Server credentials (database name, username, password, server address).
How It Works:
- Log in to DreamFactory and create a new service.
- Enter SQL Server connection details.
- Save, and DreamFactory generates a fully functional REST API.
Security Features:
- Role-based access control (RBAC).
- API key management.
- SSL encryption.
DreamFactory simplifies API creation, saving time and ensuring secure, real-time access to your SQL Server data. Perfect for developers building modern apps.
How to set up a Microsoft SQL Server API in DreamFactory
Requirements for SQL Server API generation
Before you start building an API with DreamFactory, make sure you have a few important elements ready. This preparation ensures a smoother setup and avoids unnecessary hurdles.
Creating a DreamFactory Account
Head over to the DreamFactory website and click "Sign Up." You'll need to provide:
- A valid email address
- A strong password
- Basic organization details
Once you've signed up, you'll get access to the DreamFactory admin interface. From there, you can manage your API services and configurations. DreamFactory also offers a free trial, so you can explore its features before deciding on a paid plan.

Gathering SQL Server Database Credentials
To connect DreamFactory to your SQL Server database, you'll need the following information:
|
Credential Type |
Description |
Example |
|
Database Name |
Name of your database |
inventory_db |
|
Username |
Database login name |
db_user |
|
Password |
Secure password for access |
********** |
|
Connection Details |
Server address and port |
server.domain.com:1433 |
Tip: Make sure you have the proper permissions to access this information. If you're unsure, reach out to your database administrator.
Understanding APIs
DreamFactory simplifies API creation, but having some basic API knowledge can help you get the most out of the platform. APIs are a key part of modern development - 94% of developers use APIs in their work, according to Postman’s developer survey [1].
Take some time to learn about REST API fundamentals, HTTP methods like GET, POST, PUT, DELETE, and how to structure endpoints. Also, get familiar with request and response formats such as JSON and XML.
When managing database credentials, follow best practices: use strong, unique passwords, encrypt data during transit, store credentials securely, update them regularly, and apply role-based access control.
Once you have these essentials ready, you can start creating your Microsoft SQL Server API with DreamFactory.
Guide to Creating a Microsoft SQL Server API
Ready to set up your Microsoft SQL Server API? Here's how you can do it step-by-step using DreamFactory.
Accessing DreamFactory
Start by logging into your DreamFactory account. Once you're in the main dashboard, head over to the API Generation & Connections tab. This is where you'll create and manage your APIs.
Configure SQL Server Service
Follow these steps to configure your SQL Server connection:
1. Create a New Service
Click the "+" button, then choose "SQL Server" from the list of database connectors.
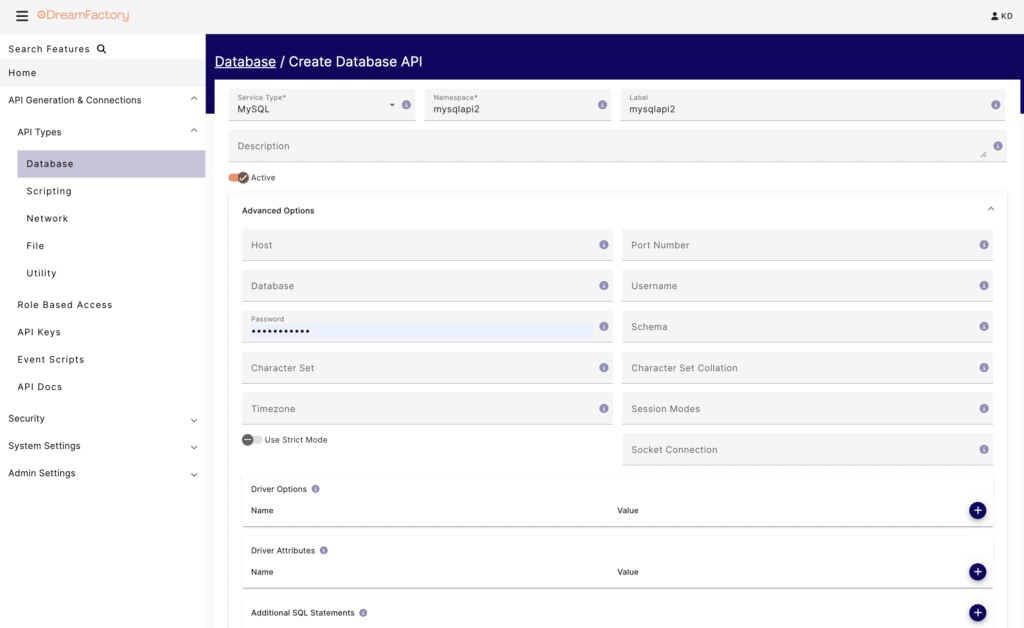
2. Fill in Connection Details
Provide the necessary information to connect to your SQL Server:
|
Configuration Field |
Description |
Example Value |
|
Service Name |
A unique name for your API |
inventory_api |
|
Host |
Your database server address |
sql.mycompany.com |
|
Port |
SQL Server's port number |
1433 |
|
Database Name |
The name of the target database |
inventory_db |
|
Username |
Your database username |
db_user |
|
Password |
Your database password |
*********** |
3. Enable Advanced Settings
To keep your data secure, enable SSL encryption. This step helps protect against common API vulnerabilities, as noted by Gartner [2].
Once these details are entered, DreamFactory will handle the rest to build your API.
API Generation Process
After configuring the connection, hit "Save". DreamFactory will instantly generate a fully functional API. This includes REST endpoints, CRUD operations, stored procedure interfaces, and support for complex queries.
Using API Documentation
Now that your API is live, DreamFactory provides detailed documentation to help you test and implement it. Go to the API Docs tab to:
- Test endpoints directly in your browser.
- View request and response formats.
- Learn about available parameters.
- Generate ready-to-use code samples in various programming languages.
Here’s an example of retrieving records using cURL:
curl -X GET "https://instance.dreamfactory.com/api/v2/inventory_api/_table/products" \
     -H "X-DreamFactory-API-Key: YOUR_API_KEY"
Pro Tip: Use Swagger's "Try it out" feature to test endpoints and verify responses before integrating them into your application.
Securing Your Microsoft SQL Server API
Once your Microsoft SQL Server API is live, the next priority is keeping it safe from unauthorized access. With data breaches costing organizations an average of $4.35 million in 2023 [1], securing your API is a must.
Setting Up Role-Based Access Control
DreamFactory includes a role-based access control (RBAC) system that lets you assign permissions based on user roles. This ensures only the right people have access to the right data.
|
Role Type |
Access Level |
Typical Use Case |
|
Admin |
Full access |
Database administrators |
|
Developer |
Read/Write |
Application developers |
|
Analyst |
Read-only |
Data analysts |
|
Service |
Limited API |
External applications |
With DreamFactory's RBAC, you can define permissions like:
- Table-level access
- Field-specific restrictions
- API endpoint control
- IP address limitations
Managing API Keys
Follow these best practices to manage API keys effectively:
- Generate unique keys for every application or service.
- Store keys securely using environment variables.
- Rotate keys frequently, ideally every 90 days.
- Monitor key usage through DreamFactory's logging system.
Additional Security Measures
Take your API security a step further with these practices:
- Request Validation
Add extra layers of validation, such as:- Custom authentication headers
- Verifying the source of requests
- Implementing IP-based access controls
- Traffic Management
Control API traffic with:- Request limits per minute
- Burst handling
- IP-specific throttling
- Security Monitoring
Stay ahead of potential threats by:- Tracking authentication attempts
- Analyzing API usage patterns
- Logging security events
- Setting up alerts for access violations
DreamFactory also ensures all API communications use TLS 1.2 or higher, encrypting data during transfer. Its detailed logging system helps you meet regulatory compliance effortlessly.
Conclusion
Why Choose DreamFactory?
DreamFactory simplifies API creation by automating the process, reducing development time by up to 90%. This allows businesses to launch database-driven applications faster. Its user-friendly interface and extensive features make it suitable for businesses of any size.
Here’s what stands out:
- Automated API creation with instant deployment
- Strong security protocols and compliance support
- Compatibility with multiple databases and integration tools
- Custom scripting options using languages like Python and PHP
- Deployment flexibility on platforms like Kubernetes and Docker
By combining ease of use, strong security, and deployment versatility, DreamFactory helps teams focus on building innovative applications instead of managing infrastructure.
Explore More
To get the most out of DreamFactory, check out these resources:
- Official Documentation: Find detailed guides at docs.dreamfactory.com
- Video Tutorials: Step-by-step videos to help with setup and usage
- Community Forums: Connect with developers for tips and advice
For enterprise users, the Commercial plan offers advanced support and customization options, ensuring smooth API deployment at scale.
FAQs
Here are some quick answers to common questions about setting up and managing SQL Server APIs using DreamFactory.
How do you create an API for your database?
With DreamFactory, creating a SQL Server API is simple. Just sign up for a free trial, input your SQL Server credentials, and DreamFactory will generate a fully operational REST API for you in minutes.
What security features are available?
|
Security Feature |
Description |
|---|---|
|
API Key Management |
Create and manage unique API keys to control access. |
|
Role-Based Access |
Set detailed permissions for different user roles. |
|
SSL/HTTPS |
Protect data transmission with encryption. |
|
Rate Limiting |
Manage API usage and avoid overuse or abuse. |
Can the generated API be customized?
Absolutely. DreamFactory lets you modify APIs with server-side scripting in languages like Python, PHP, and NodeJS to fit your specific needs.
What kind of documentation is provided?
DreamFactory automatically creates OpenAPI documentation. This makes testing and integrating APIs easier by offering detailed, interactive endpoint information and sample requests.
Is DreamFactory suitable for enterprise-level use?
Yes, the Commercial plan offers features designed for enterprise needs, including GDPR/HIPAA compliance, advanced security measures, unlimited API creation, and deployment options like Kubernetes, Docker, and Linux.
If you have any questions about the platform, or just APIs in general, we'd love to hear from you! Contact us.