DreamFactory and GitHub - Event Scripting Bliss
by Terence Bennett • December 11, 2018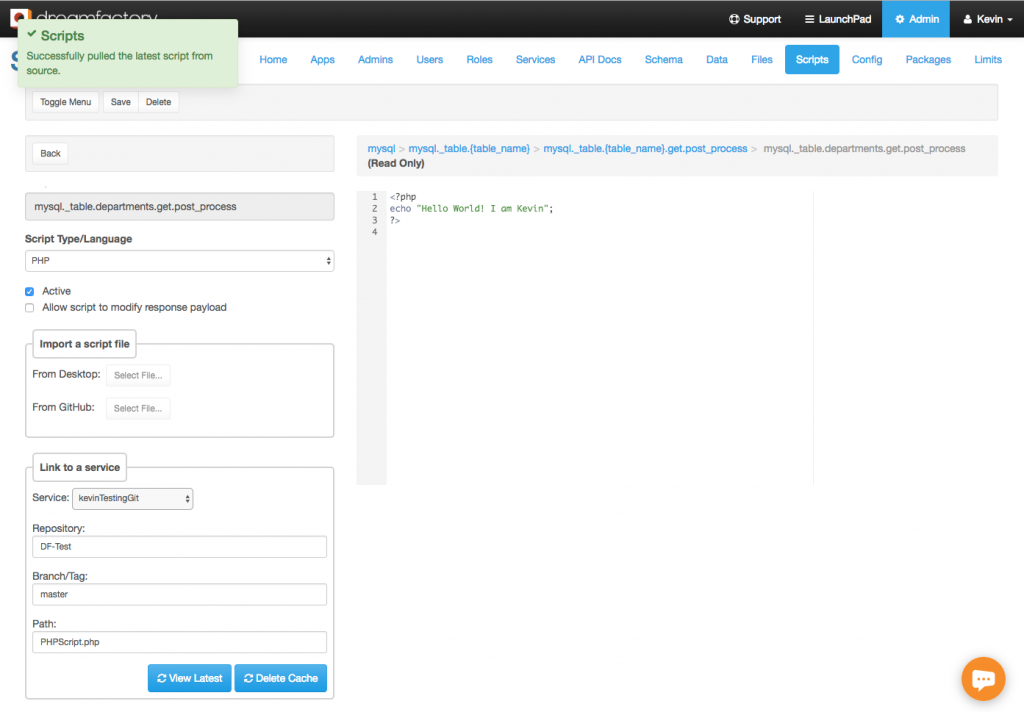
DreamFactory's Event and Platform Scripting
The DreamFactory scripting objects enable you to create a custom delivery of data through a unified URL structure. Ok, this is a pretty well-known fact if you have spent some time digging around DreamFactory. DreamFactory allows you to link your event scripts and custom scripts to a file that is managed in your GitHub account. This eliminates the need to manually update your DreamFactory scripts when you update those scripts in your source control repo.
In addition to linking your scripts to a Git service, DreamFactory also supports linking your script to a file sitting in any location exposed by DreamFactory's file services. This means you can even link your script to a file that resides in your local file system, S3, Azure Blob, Rackspace, Openstack Object Storage, FTP, SFTP, or in a WebDAV account.
When you add an event script and/or custom scripting service, you now have the option to select any of your existing Git or storage services. When you select a storage service, you have the option to enter your script file path. When selecting a Git service, you can enter a Git repository name, branch/tag name, and path to your script file in relation to your repository root. Then click on the ‘Refresh’ button to load the content of your script in the DreamFactory script editor. This is a read-only view and you won’t be able to update your script from DreamFactory since the file resides in remote storage. Save your script to complete the linking.

Handling Script Execution
The following flowchart shows how DreamFactory handles script execution.
1. First DreamFactory checks to see if there is a copy of the script in cache.
2. Script is found in cache. Retrieves script from cache and executes it.
3. Script is not found in cache. Check to see if the script is remote or local.
4. Script is local. Retrieve script from local database, cache it for future use and execute it.
5. Script is remote. Retrieve from remote storage, cache it for future use and execute it.
An important thing to note about this flowchart is that all scripts (remote and local) are cached forever (never expires) in DreamFactory when the script runs for the first time. After the first run, all subsequent runs use the cached copy. This is done to reduce the overhead of fetching a script from source every time it runs. This drastically improves performance. This also means every time you update your script outside of DreamFactory you'll need to clear the DreamFactory cache so that it can fetch the latest copy of your script the next time it runs.
This may seem like an annoying thing to do every time you update your script. Clearing the entire DreamFactory cache just to pull your latest script doesn’t sound all that exciting! But fear not, there's a solution for this as well. You don’t really have to clear the entire DreamFactory cache for this purpose. Rather, you can target the specific cache that needs to be cleared.
Adding In The GitHub Webhook
Log in to your GitHub account and select the repository where your script exists. Then follow the steps below:
1. Go to Client on the ‘Settings’ tab from the repository page.
2. Select ‘Webhooks’ from left menu.
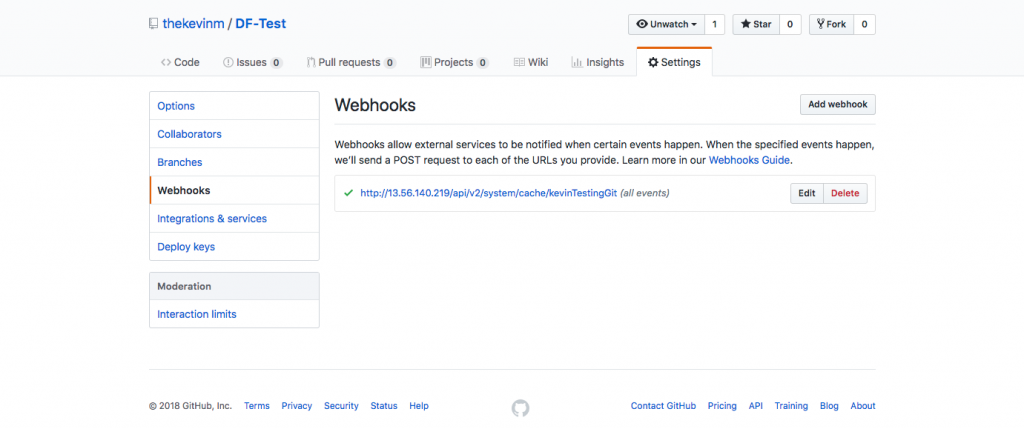
3. Click on the ‘Add Webhook’ button.
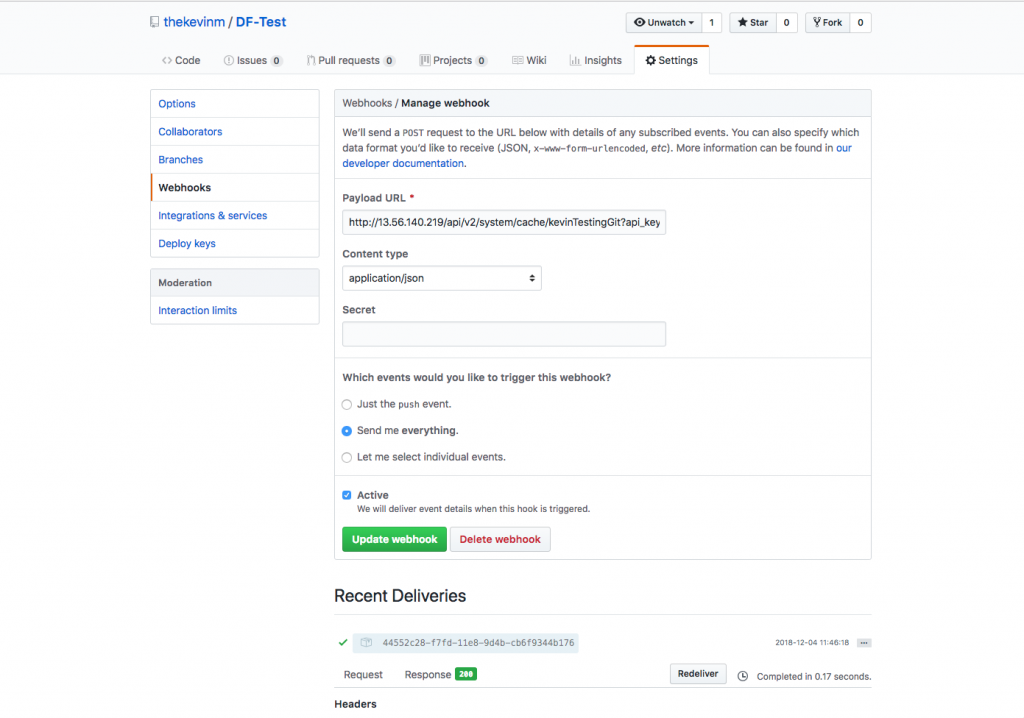
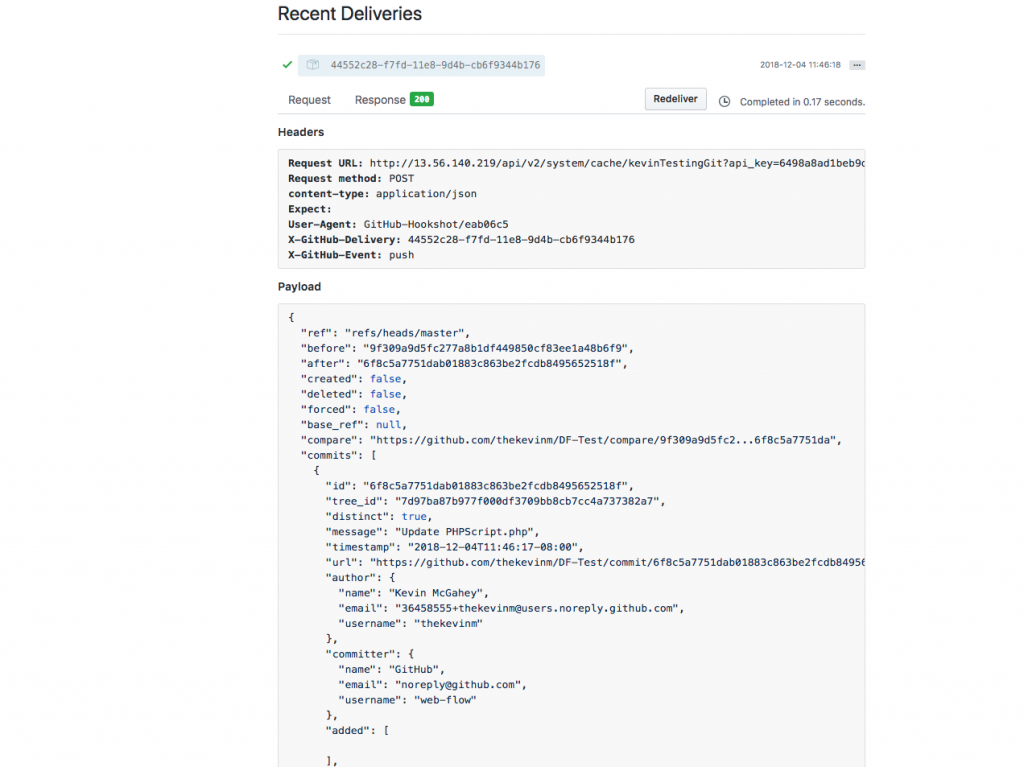
4. In the ‘Payload URL’ field you can enter the DreamFactory cache endpoint for your event script or custom scripting service. Here's an example for a custom script in DreamFactory.
https://example.com/api/v2/system/cache/php-test?api_key=api-key&method=DELETE
Replace the api-key with your App’s API key that you created in DreamFactory. Note that we're providing a parameter called method=DELETE. This is because GitHub webhook only makes a POST call. But the DreamFactory cache endpoint requires a DELETE call. By providing the method=DELETE parameter, you are tunneling the DELETE call over POST to DreamFactory.
5. For Content Type field select application/json.
6. Leave the secret field blank.
7. For events you can either select a specific event by choosing ‘Let me select individual events’ or select ‘Send me everything’ for all events.
8. Check the Active checkbox.
9. Click on ‘Add Webhook’ button to create the webhook.
But How Do You Know It Works?
That’s it, you're all set! Now every time your script changes, GitHub will fire the DreamFactory cache API which will clear your script cache in DreamFactory, thereby forcing it to fetch the updated script the next time the script runs. Below is an example of the log showing the DELETE call to the cache and the execution of the event script (a get.post_process event script on our MySQL service).
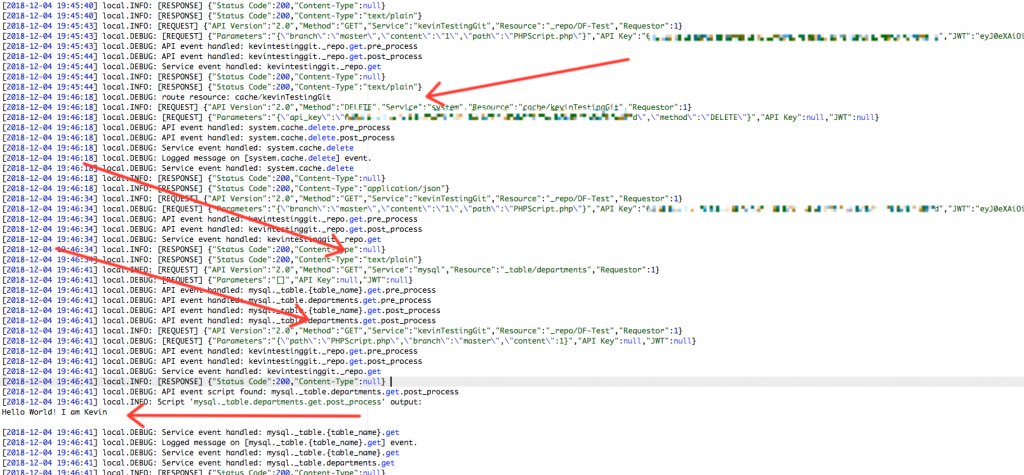
As you can see, there are some very good ways to handle scripting and source control within DreamFactory. ETL and data transformation are a big part of any digital data strategy, and being able to control the output of any API call greatly enhances the useability of a tool such as DreamFactory.
Terence Bennett, CEO of DreamFactory, has a wealth of experience in government IT systems and Google Cloud. His impressive background includes being a former U.S. Navy Intelligence Officer and a former member of Google's Red Team. Prior to becoming CEO, he served as COO at DreamFactory Software.