Apigee is great at managing your existing APIs - but how can you bring new technologies into your Apigee suite that lack an appropriate API?
As it happens, DreamFactory is perfectly suited to creating a REST API fast for whatever datasource you need, and it can now be plugged straight into Apigee. In this blog post I will be breaking down how to go from a datasource with no API to having a fully Swagger documented and secure API managed in Apigee in no time, courtesy of DreamFactory's Apigee API Generator.
Creating an API for Apigee
First, you will need a DreamFactory environment. You can easily activate a free trial here and follow along in real-time.
Once we are in our DreamFactory platform, we need to create our first API. Luckily DreamFactory supports a plethora of databases and file systems such as MySQL, Microsoft SQL Server, AWS S3, and can even convert SOAP to REST. You can see the full list of integrations here.
In this example we will be connecting our MySQL database to automatically generate an API for Apigee to consume. However, regardless of what API-integration you need, the creation process uses the same standardized method.
Step 1. Applying MySQL Credentials
Navigate to Services and then enter the service creation interface by clicking on the Create button located to the left of the screen. From there you’ll select the MySQL service type by navigating to Database > MySQL.
You’ll then be prompted to provide a name, label, and description, it is best to keep the name all lowercase without spaces or special characters as that will be apart of our URL structure later on.
Finally, click on the Config tab. Here you’ll be prompted to provide the database connection credentials (see below screenshot). This should really be nothing new; you’ll supply a host name, username, password, and database. Additionally, you can optionally specify other configuration characteristics such as driver options, the time zone, and caching preferences. For the purpose of this tutorial I’ll stick to the required fields and leave the optional features untouched.
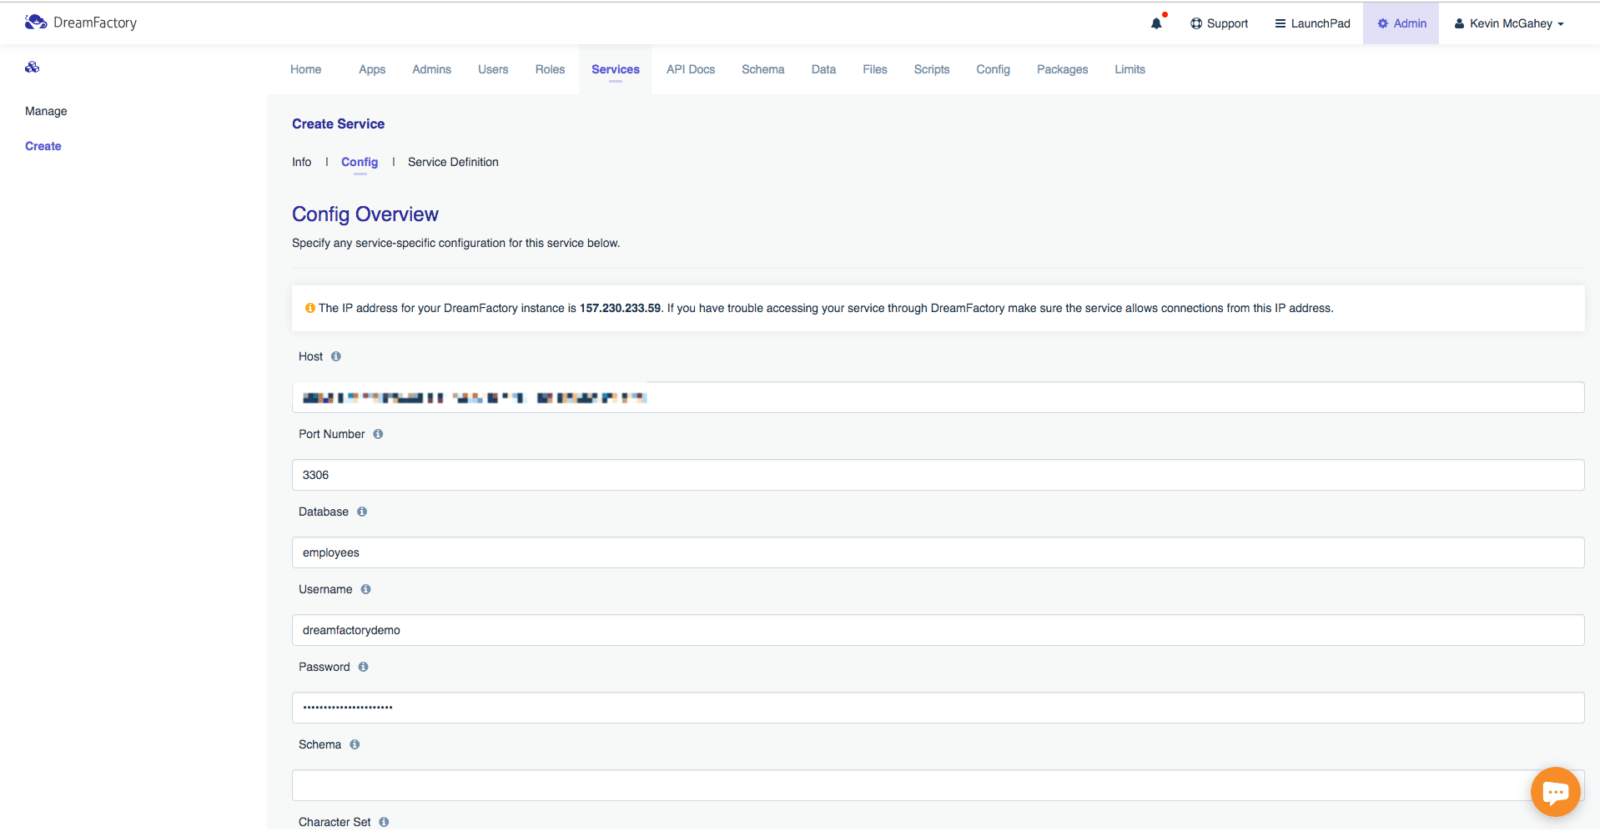
Now just press the Save button at the bottom of the screen, and believe it or not the REST API has been generated!
Related reading: Creating a MySQL REST API in Minutes with DreamFactory
Step 2. Generating a Role
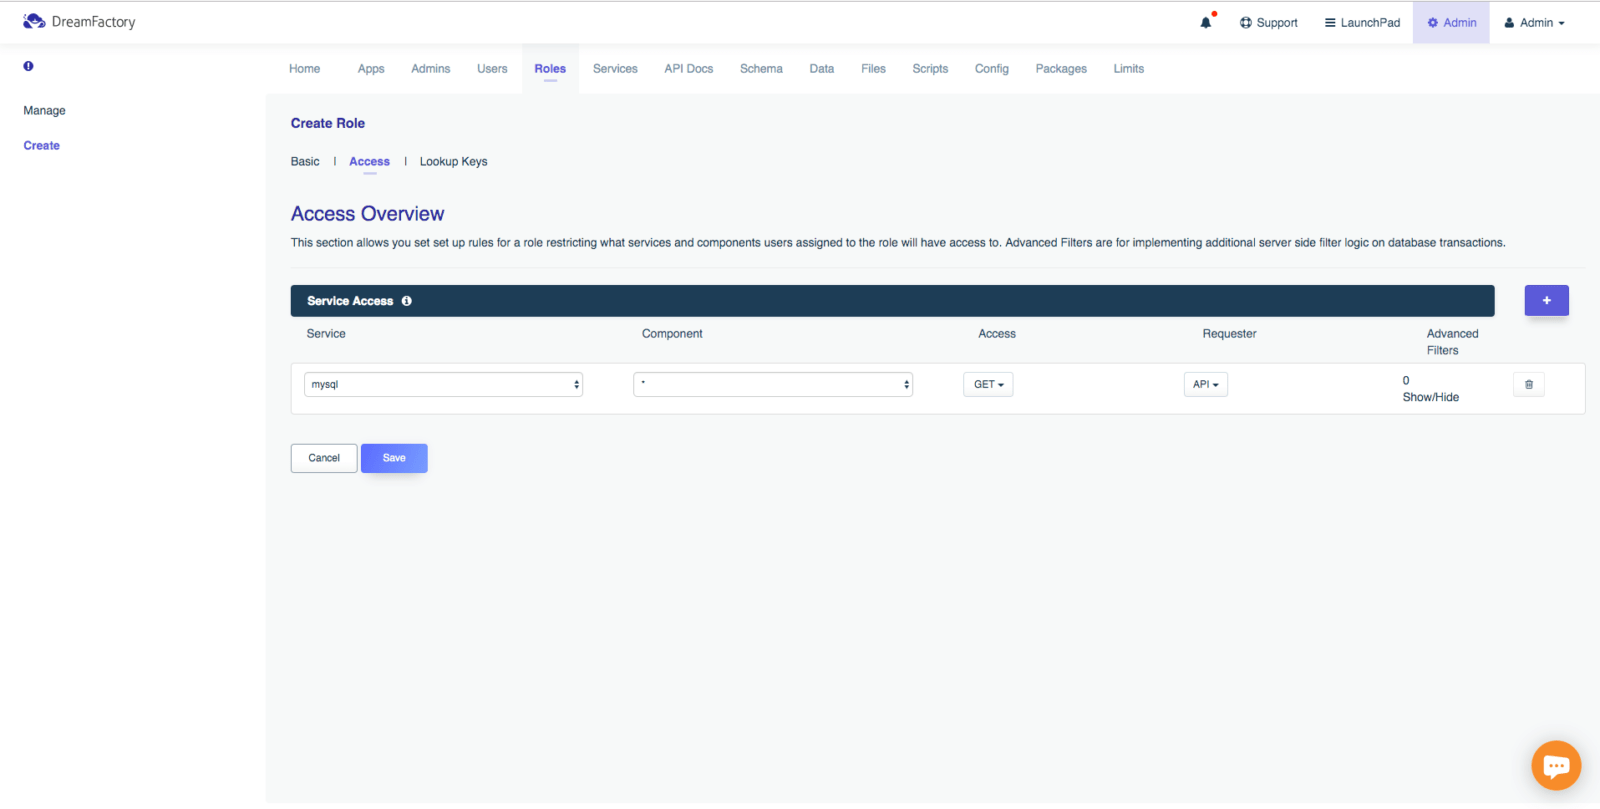
All DreamFactory-generated APIs are automatically protected by (at minimum) an API key. For us to be able to connect the newly created API with Apigee we will have to attach an API Key from DreamFactory to pass along to Apigee. Let’s create a new role which restricts the associated API key to interacting with the API in a read-only fashion within the newly created MySQL API. To do so, navigate to the Roles tab, and click the Create button. Again we will provide a name and description. Next, click the Access tab. This is where you’ll define what the role can do. In the below screenshot you’ll see I’ve limited the role to interacting with the MySQL service, and within that service the role can interact with * or all endpoints via the GET method. This means we are only allowing read access to all the endpoints.
Step 3. Generating an API Key
Now we’ll create a new API key and associate the key with this role. To do so, click on the Apps tab located at the top of the screen, and then click the Create button. Assign your new App a name and description, ensure it is set to Active, and then assign it the default role of MySQL just as I’ve done in the below screenshot. Regarding the App Location setting, you can select “No storage required”. Upon saving you’ll be returned to the Apps index screen where the new API key can be copied!
Connecting our API with Apigee
After we have our fully Swagger documented API from DreamFactory we can take it over to Apigee. We will want to go to the Develop tab and API Proxies within our Apigee dashboard. From there we will select the add proxy button in the top right corner. You will be shown this screen:
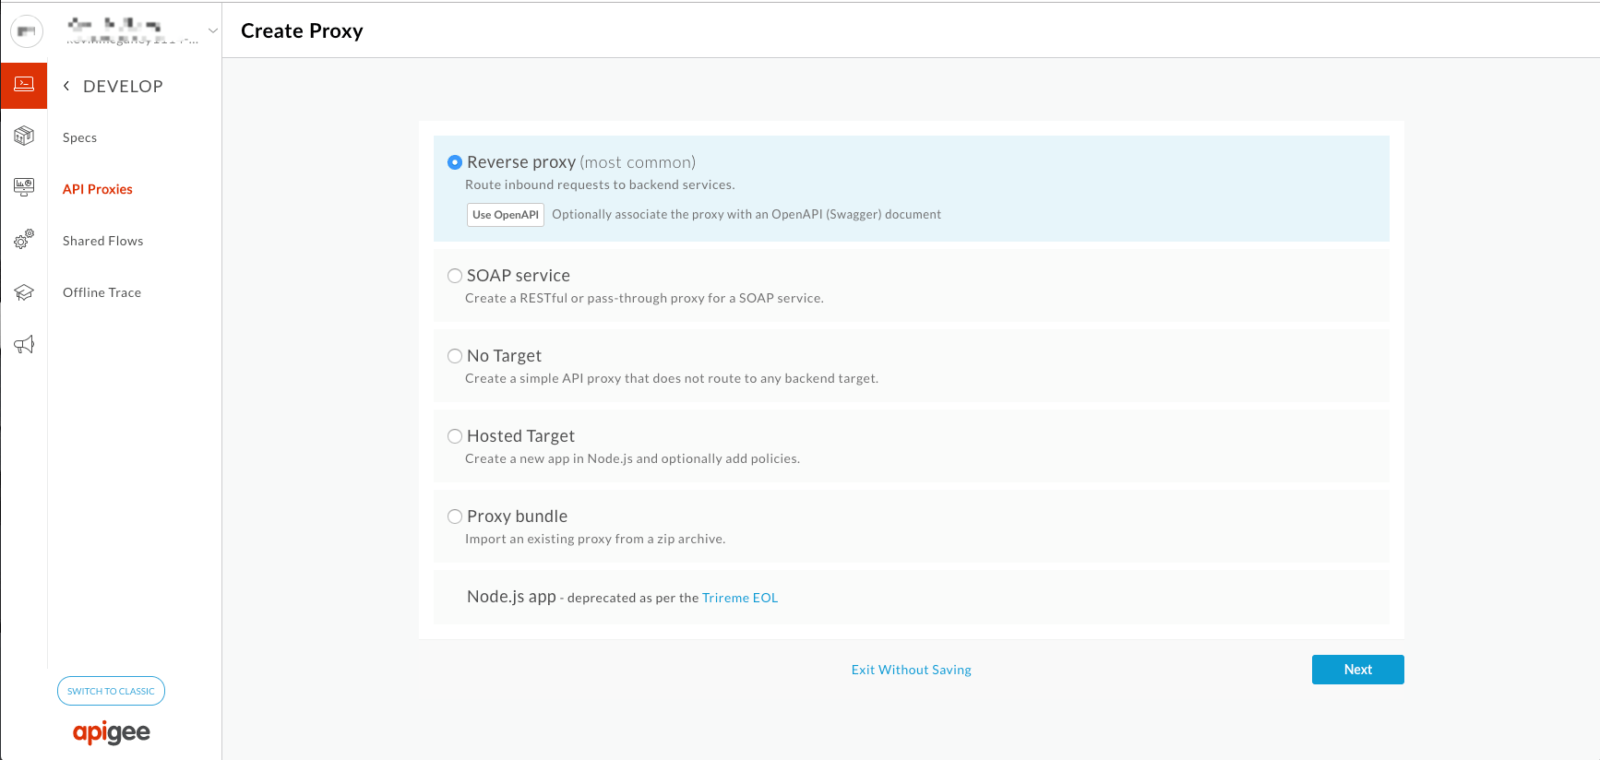
We will want to select the default, Reverse Proxy and click Next. This will now bring us to the details page where we will apply our DreamFactory API. Providing a name and the existing API endpoint we created which we can find within the DreamFactory API Docs tab here:
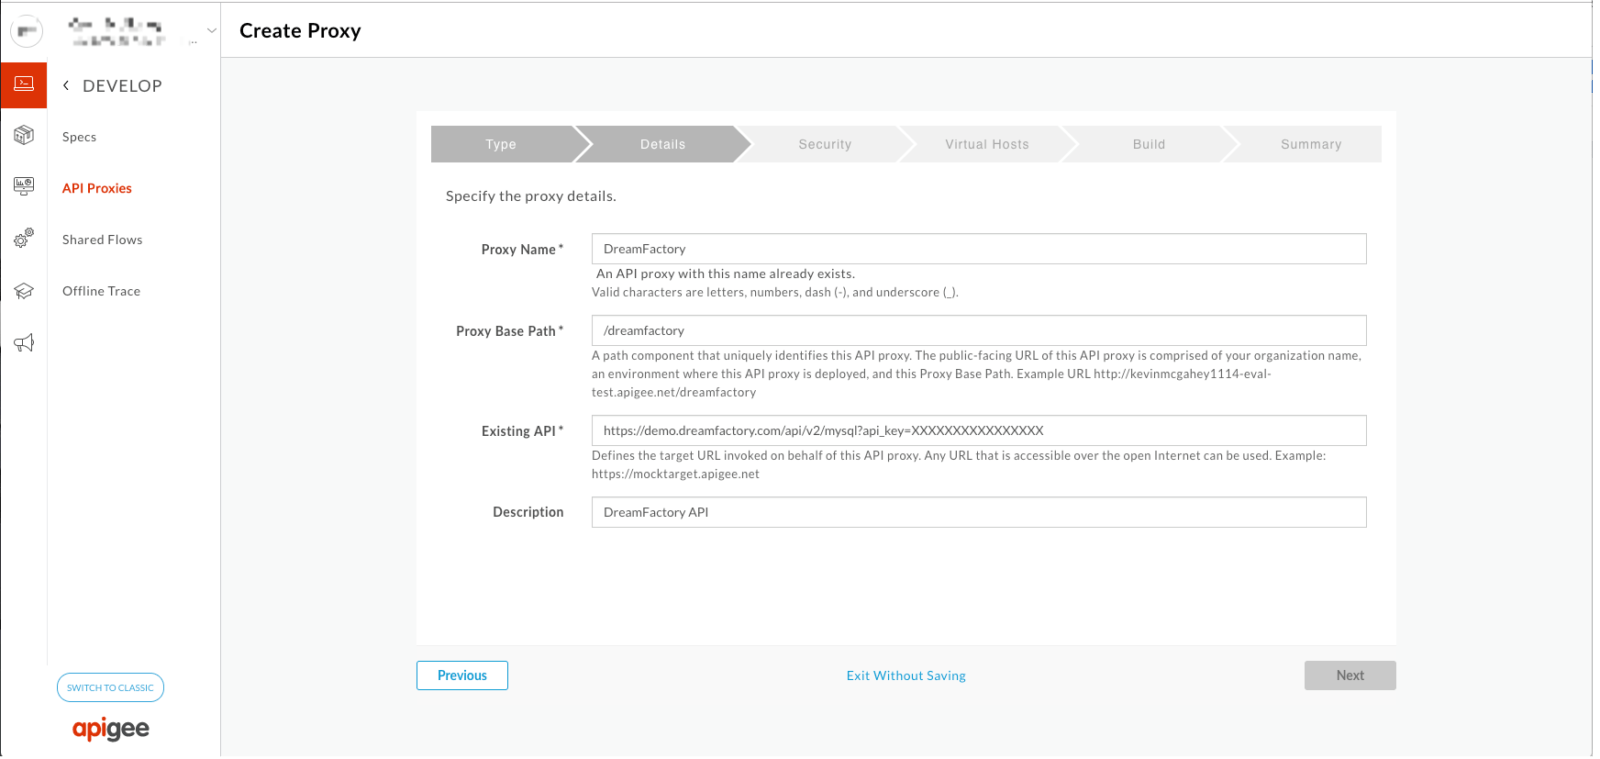
After inserting this base URL and the attached API Key to Apigee we can click Next. On the Security tab since we already have our API secured in DreamFactory lets just select Pass Through and Next. For Virtual Hosts we will keep the default and Next. In this example we will keep this deployment as a test environment and select Build and Deploy.
Congratulations - just like that, we have our DreamFactory API being proxied via Apigee.
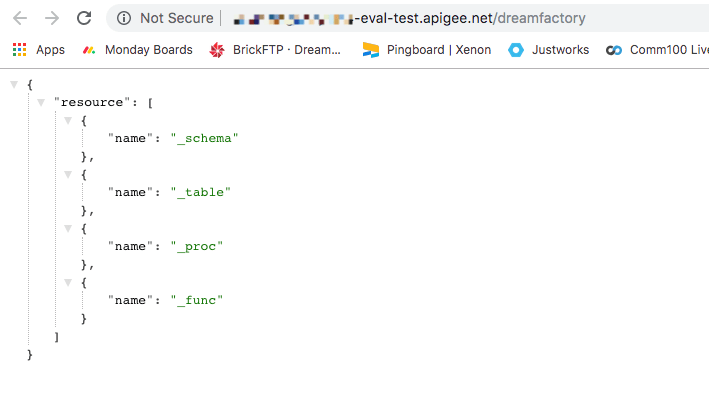
To confirm let’s go to the new URL Apigee generated. As you can see, we are getting back our available options in the API such as the schema, tables, stored procedures, and functions.
Now we have successfully added a new datasource that previously lacked an API to Apigee without writing a single line of code. If you need to build multi-datasource applications that incorporate difficult legacy or modern technologies - you now have a method of bringing them all into your existing API Management system via DreamFactory!
As previously mentioned, if you would like to walk through this step by step, download our free hosted trial here to instantly create your Apigee REST APIs.