5 Facts on DreamFactory | Dreamfactory
by Terence Bennett • July 6, 2018

DreamFactory is an incredible piece of software, but like with any new tech, there's something to learn every day.
We'll cover:
Where is everything?
How to backup data
Creating an API key
Checking the log file
Using the testing tool
Did you know you can generate a full-featured, documented, and secure REST API in minutes using DreamFactory? Sign up for our free 14 day hosted trial to learn how! Our guided tour will show you how to create an API using an example MySQL database provided to you as part of the trial!
1. Where’s my stuff?
The location of the all powerful DreamFactory code will be located in a different place depending on what type of installation you did. We call this location the installation directory. In many cases, the version number is included as part of the path. In this example, we’ll assume you got version 2.2.1-2 from Bitnami.
Bitnami local installs
- Linux: ~/dreamfactory-2.2.1-2/apps/dreamfactory/htdocs
- Mac: /Applications/dreamfactory-2.2.1-2/apps/dreamfactory/htdocs
- Windows: C:\Bitnami\dreamfactory-2.2.1-2\apps\dreamfactory\htdocs
Bitnami cloud VMs
/opt/bitnami/apps/dreamfactory/htdocs
Manual install (GitHub)
This is completely custom. I hope you paid attention while installing =)
The location used in the documentation is /opt/dreamfactory.
Before you make changes to your installation (like upgrading) you should make a backup, and with DreamFactory, it’s a piece of pie (cake is overrated.)
2. Backups are easy
Here are the default locations:
File backup
You need to make a copy of the installation directory (see tip #1). So, if I have a directory called /backups I can copy my Bitnami Cloud VM install directory like this:
cp -r /opt/bitnami/apps/dreamfactory/htdocs /backups/htdocs.old
Or, if you want to get really fancy, you can compress it and add the date to the file name
tar -czf /backups/htdocs-$(date +"%Y%m%d%H%M").tar.gz /opt/bitnami/apps/dreamfactory/htdocs
The point is no matter what Operating System or tools you use, you really just need to copy those files. They’re important.
What about the database?
Did you use sqlite as the system db? Then you already did your backup with file backup above. The sqlite system database is just a file:
{installation directory}/storage/databases/database.sqlite
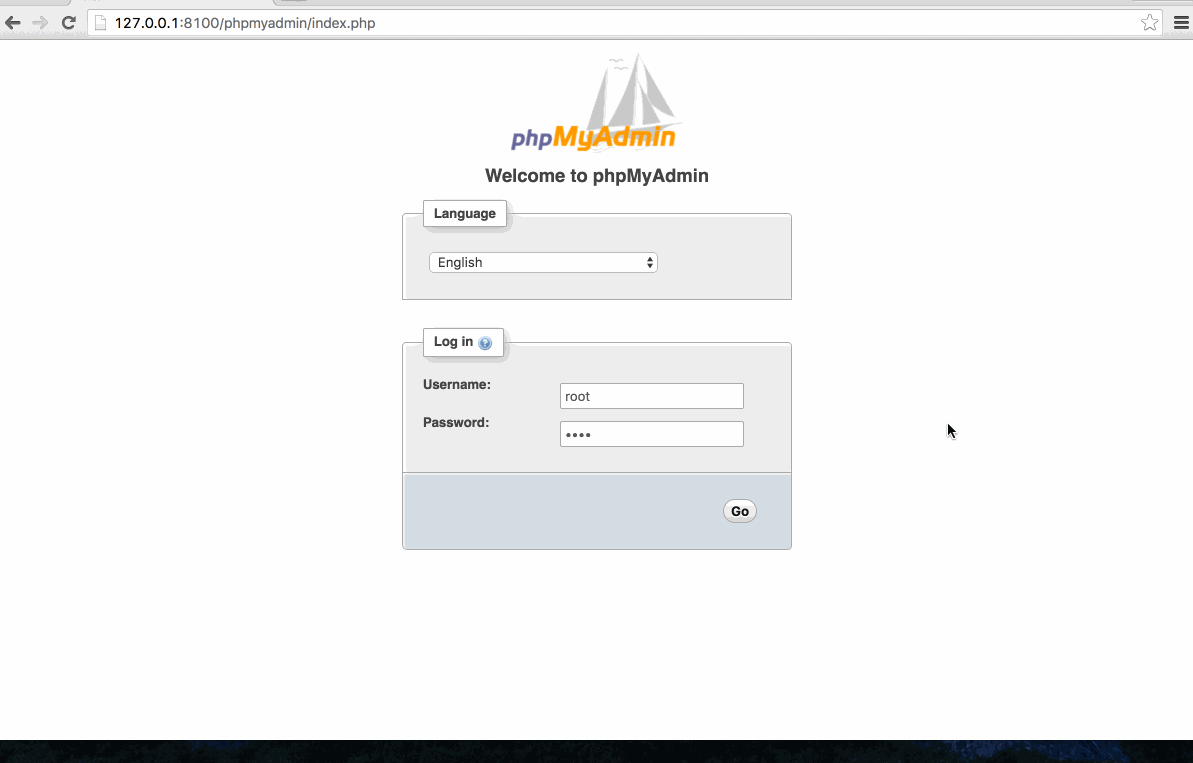
MySQL? You can use the mysqldump command to do a backup, or if you have a tool like phpMyAdmin (comes with Bitnami local installs), you just log in, select the database and click the Export tab. The default settings should be fine (Quick method and SQL format.) Click Go. This file can be used to restore the data in the system database if you need to revert changes made.
3. You need an API key
In DreamFactory nearly all calls need an API Key. There are a few exceptions (calls made with admin user session info and calls for logging in,) but generally, assume you need an API Key to make your calls. Not sure what API Key to use? You can create one or get an existing one from Apps tab of the admin console. If your API Key has a default Role associated with it, that’s all you need to make your call. If not, you’ll need a session token too. The DreamFactory authorization and authentication system is heavily documented with a plethora of examples.
The DreamFactory log file is a key part of the troubleshooting process. If you’re having trouble with a service or API call, you can find valuable information in the log.
The DreamFactory log file is located in:
{installation directory}/storage/logs/dreamfactory.log
By default the application is not writing full debug information to the log file. You’ll want to enable debug logging by setting the DF_LOG_LEVEL equal to DEBUG in the .env file and clearing the config cache and the application cache.
Let’s take the example of a mysql service. I’ve put in my connection information, but when I try to load the schema in the schema editor, nothing happens.
I take a look at the log file and see:
SQLSTATE[HY000] [1045] Access denied for user 'localadmin'@'localhost' (using password: YES)
AHA! I must have put in the wrong credentials. I can now fix my service configuration and proceed with my API masterpiece. These types of hints in the log can be a huge help in figuring out what went wrong.
Did you know you can generate a full-featured, documented, and secure REST API in minutes using DreamFactory? Sign up for our free 14 day hosted trial to learn how! Our guided tour will show you how to create an API using an example MySQL database provided to you as part of the trial!
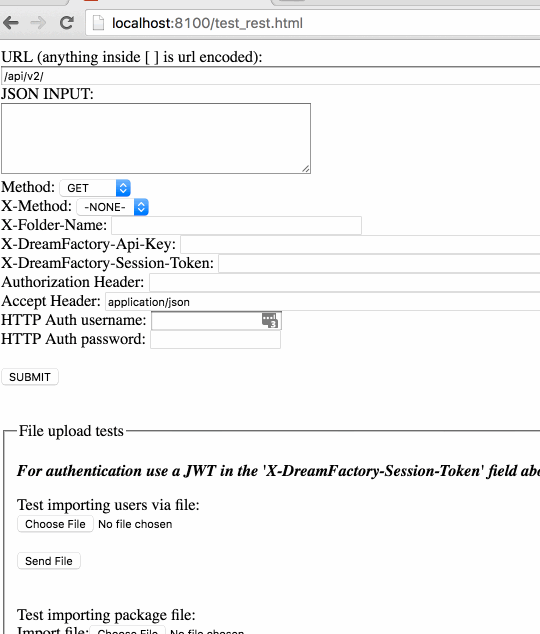
5. You’ve got a built-in testing tool
Swagger (API Docs) is great for learning how your API calls work, but it has a lot of overhead for your browser, and it grows and grows as you add more services. What if you’ve gotten a handle on how the DreamFactory APIs work, and you just need to test a quick API call? Enter Test Rest.
We provide a built-in testing tool with every install—a lightweight JavaScript REST client called Test Rest. It’s located in test_rest.html at the root path of the web site (for example https://localhost:8080/test_rest.html). With this tool you can quickly make calls to the API and see the results without all the hassle and bulk of logging in to the admin console and loading up API Docs. It has quick access to common headers and authentication methods, including API Keys, Session Tokens, and HTTP Basic Auth.
TL;DR - GET AN AI SUMMARY
Terence Bennett, CEO of DreamFactory, has a wealth of experience in government IT systems and Google Cloud. His impressive background includes being a former U.S. Navy Intelligence Officer and a former member of Google's Red Team. Prior to becoming CEO, he served as COO at DreamFactory Software.