For my internship this summer, I’ve been working on DreamFactory’s iOS SDK, sample app, and documentation. I’m excited to announce that the new and improved iOS SDK, as well as more detailed documentation, is now available on GitHub. This blog summarizes some important things to know about getting started with the DreamFactory iOS SDK.
iOS SDK 101
The DreamFactory iOS SDK provides user-friendly wrapper functions for commonly used API calls. This provides easier access to native REST services available in DreamFactory and to other remote web services that you make available in DreamFactory. Built to handle iOS versions 6.0 and higher, the SDK is a super-light wrapper on NSUrl HTTP requests. In case it doesn’t support your needs (or you’re just naturally suspicious), the SDK exposes its request formating to play nice with third-party APIs.
Code Examples
Here is the iOS SDK in action with some examples of authentication and database CRUD operations.
Login
Build the URL for the REST request. The general form of the URL is <instance url>/api/v2/service/endpoint. Logging in uses the user service and the session endpoint.
NSString *baseUrl = kBaseInstanceUrl;

NSString *serviceName = @"user"; // your service name here

NSString *resourceName = @"session"; // resource or table name

NSString *restApiPath = [NSString stringWithFormat:@"%@/%@/%@",baseUrl, serviceName, resourceName];
Create the header parameters, which typically contain the session token and the application API key. Just provide the application API key when logging in because we don’t yet have a session token.
NSMutableDictionary* headerParams = [[NSMutableDictionary alloc] init];

[headerParams setObject:kApiKey forKey:@"X-DreamFactory-Api-Key"];

[headerParams setObject:swgSessionToken forKey:@"X-DreamFactory-Session-Token"];
Send the login credentials to the instance in the request body. Use an email and password pair to authenticate with the instance.
NSDictionary* requestBody = @{@"email":self.emailTextField.text,

                            @"password":self.passwordTextField.text};
Finally, make the REST call. The completion block is called once the request is done and contains the response parsed to a dictionary and an error if there is one. On success from the login call, store the session token to authenticate calls to other services.
// use the generic API invoker
NIKApiInvoker *_api = [NIKApiInvoker sharedInstance];
NSMutableDictionary* queryParams = [[NSMutableDictionary alloc] init];
NSString* contentType = @"application/json";[_api restPath:restApiPath
method:@"POST"
queryParams:queryParams
body:requestBody
headerParams:headerParams
contentType:contentType
completionBlock: ^(NSDictionary *responseDict, NSError *error) {
if (error) {
NSLog(@"Error logging in user: %@",error);
dispatch_async(dispatch_get_main_queue(),^ (void) {
UIAlertView *message=[[UIAlertView alloc]initWithTitle:@"" message:@"Error, invalid password" delegate:nil cancelButtonTitle:@"ok" otherButtonTitles: nil];
[message show];
});
}
else{
[[NSUserDefaults standardUserDefaults] setValue:baseUrl forKey:kBaseInstanceUrl];
[[NSUserDefaults standardUserDefaults] setValue:[responseDict objectForKey:@"session_token"] forKey:kSessionTokenKey];
[[NSUserDefaults standardUserDefaults] setValue:self.emailTextField.text forKey:kUserEmail];
[[NSUserDefaults standardUserDefaults] setValue:self.passwordTextField.text forKey:kPassword];
[[NSUserDefaults standardUserDefaults] synchronize];dispatch_async(dispatch_get_main_queue(),^ (void){
[self showAddressBookViewController];
});
}
}];
Getting records
The notes in this example primarily highlight differences between it and the login example. Otherwise they are fairly similar.
Here we are getting records from a MySQL database for a view that displays a contact in a contact book application. A contact_info record might represent a mobile or a work contact. We are accessing records in the contact_info table through the db service.
NSString *serviceName = kDbServiceName;

NSString *tableName = @"contact_info";

NSString *restApiPath = [NSString stringWithFormat:@"%@/%@/%@",baseUrl,serviceName, tableName];
Records from the contact_info table have one contact but a contact may have multiple contact_info records. Use a filter to get only this contact’s info records.
NSMutableDictionary* queryParams = [[NSMutableDictionary alloc] init];

NSString *filter = [NSString stringWithFormat:@"contact_id=%@", contact_record.Id];

queryParams[@"filter"] = filter;
The header params provide the application API key and a valid session token to authenticate access.
NSMutableDictionary* headerParams = [[NSMutableDictionary alloc] init];

[headerParams setObject:kApiKey forKey:@"X-DreamFactory-Api-Key"];

[headerParams setObject:swgSessionToken forKey:@"X-DreamFactory-Session-Token"];
Make the REST call. The response to this request is an array of contact info records. Loop through and build each record then insert it into an array of contact_info objects. The conversion of dictionaries to contact_info POD classes is abbreviated, but is available in the sample app source code.
NIKApiInvoker *_api = [NIKApiInvoker sharedInstance];
NSString* contentType = @"application/json";
id requestBody = nil;
[_api restPath:restApiPath
method:@"GET"
queryParams:queryParams
body:requestBody
headerParams:headerParams
contentType:contentType
completionBlock:^(NSDictionary *responseDict, NSError *error) {
if (error) {
NSLog(@"Error getting contact info: %@",error);
dispatch_async(dispatch_get_main_queue(),^ (void){
[self.navigationController popToRootViewControllerAnimated:YES];
});
}
else {
NSMutableArray* array = [[NSMutableArray alloc] init];
// put the contact ids into an array// double check we don't fetch any repeats
NSMutableArray* existingIds = [[NSMutableArray alloc] init];
for (NSDictionary *recordInfo in [responseDict objectForKey:@"resource"]) {
@autoreleasepool {
NSNumber* recordId = [recordInfo objectForKey:@"id"];
if([existingIds containsObject:recordId]){
continue;
}
ContactDetailRecord* new_record = [[ContactDetailRecord alloc] init];
[new_record setId:[recordInfo objectForKey:@"id"]];
[new_record setAddress:[self removeNull:[recordInfo objectForKey:@"address"]]];
[new_record setCity :[self removeNull:[recordInfo objectForKey:@"city"]]];
...
[new_record setContactId:[recordInfo objectForKey:@"contact_id"]];
[array addObject:new_record];
}
}
// tell the contact list what group it is looking at
self.contactDetails = array;dispatch_async(dispatch_get_main_queue(),^ (void){
self.waitReady = YES;
[self.waitLock signal];
[self.waitLock unlock];
});
}
}];
iOS SDK Sample App
More demo code showing database CRUD operations as well as file CRUD operations are available at the GitHub repo. The SDK also supports operations on other resources such as emails and system objects.
To get the sample app up and running, just set up DreamFactory using one of the methods listed on the wiki.
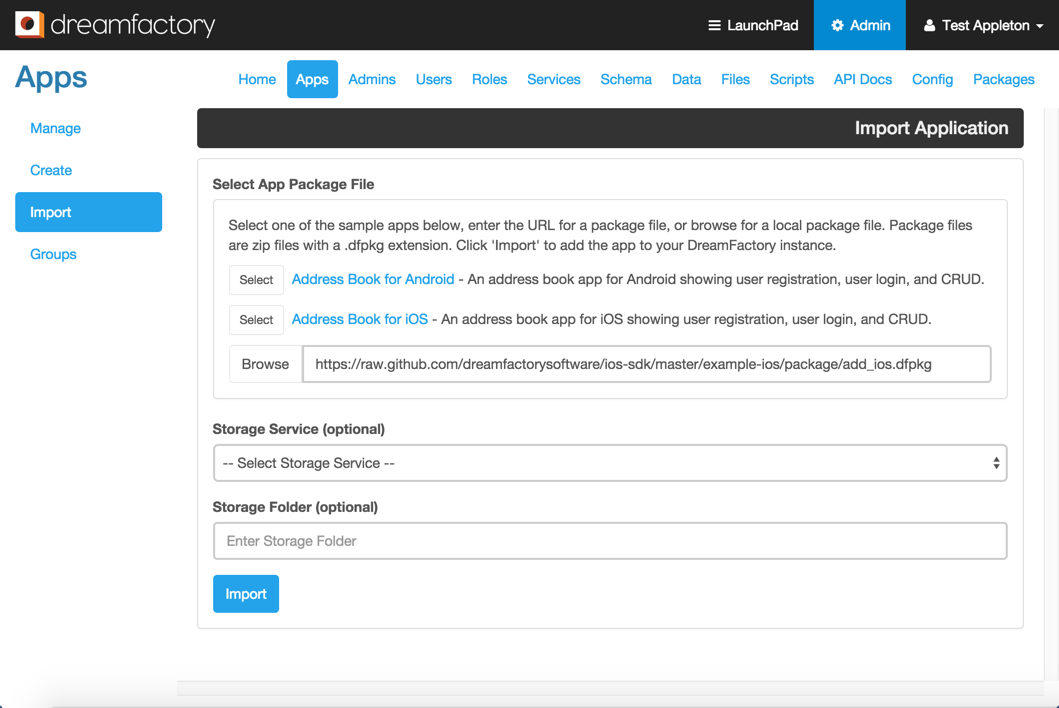
Import the provided application package file:

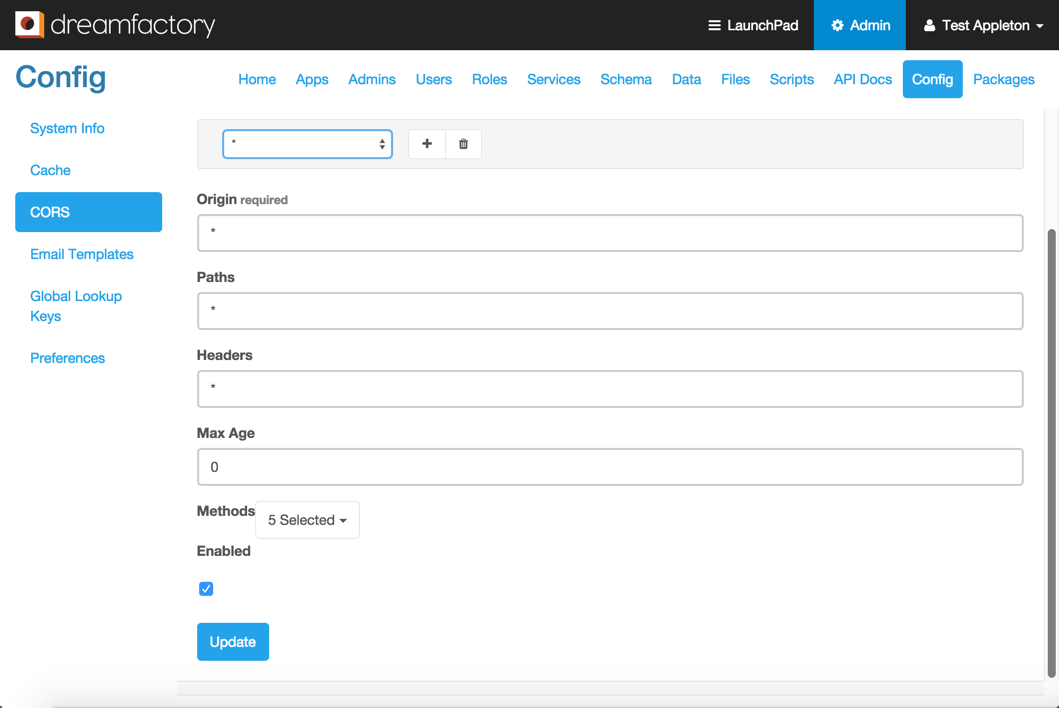
configure CORS:

Then simply point the sample code to the URL of your DreamFactory instance and you’re good to go!
#ifndef example_ios_MasterViewController_h
#define example_ios_MasterViewController_h#import <UIKit/UIKit.h>
// change these values to match your instance
// API key for your app goes here, see apps tab in admin console
#define kApiKey @"ede6ff689bbfe84ba3c0d14c668cd6d523f388e46f165ded4e81f7a18a5301f4"
#define kSessionTokenKey @"SessionToken"
#define kBaseInstanceUrl @"https://localhost:8080/api/v2"
#define kDbServiceName @"db/_table"
#define kUserEmail @"UserEmail"
#define kPassword @"UserPassword"
#define kContainerName @"profile_images"@interface MasterViewController : UIViewController
@end
#endif
See the readme for more detailed instructions.
I hope you find the SDK and documentation useful. If you have any feedback or questions, feel free to let me know by posting to the forum thread here.
Terence Bennett, CEO of DreamFactory, has a wealth of experience in government IT systems and Google Cloud. His impressive background includes being a former U.S. Navy Intelligence Officer and a former member of Google's Red Team. Prior to becoming CEO, he served as COO at DreamFactory Software.


 Blog
Blog
