
The Heroku cloud platform has long been a popular solution for teams seeking a convenient application hosting solution. Today we're thrilled to contribute to the Heroku ecosystem with the release of our DreamFactory Heroku Add-on. Heroku users can now launch hosted DreamFactory instances directly from the Heroku dashboard, and easily generate APIs for a wide variety of data sources, including PostgreSQL.
In this post we'll walk you through the steps required to install the DreamFactory Heroku Add-on and generate a REST API for a Heroku-hosted Postgres database.
NOTE. The DreamFactory Heroku Add-on is currently an Alpha release, meaning it's not yet publicly available. If you'd like to test the add-on using a free hosted DreamFactory instance, please email us at code@dreamfactory.com.
Create a New Heroku Application
If you'd like to test the add-on using a non-production Heroku application, you can easily create a new Heroku application for testing purposes. Login to your Heroku account and click the New button located at the top right of the page (see below screenshot). Select Create new app.

You'll next be prompted to define an application name and specify the region:
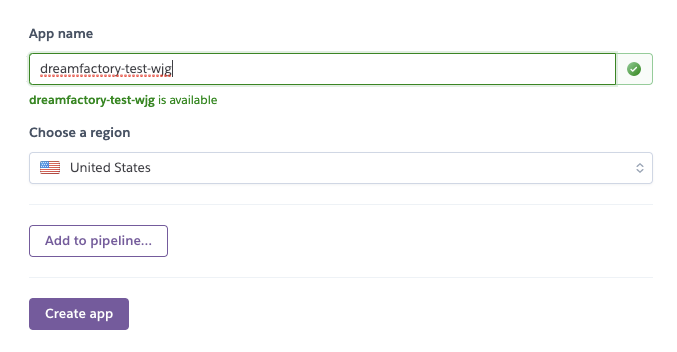
Press the Create app button and Heroku will create the app, subsequently redirecting you to the new app dashboard:
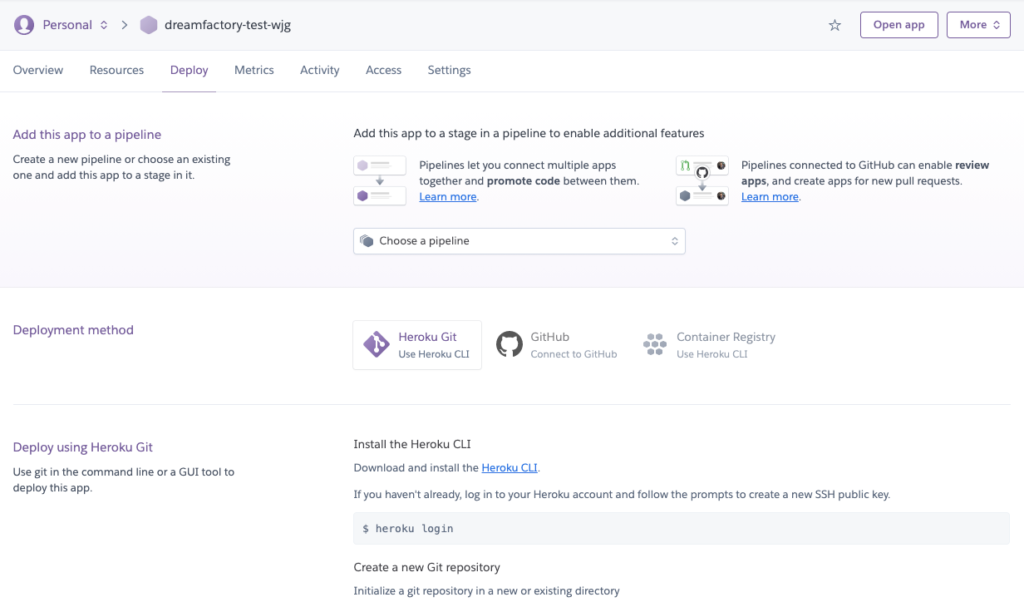
Installing the Postgres Add-on
Next we'll add a Postgres database to the application via the Heroku Add-on Marketplace. At the top of your app dashboard you'll see a Resources tab. Click on it and you'll be taken here:
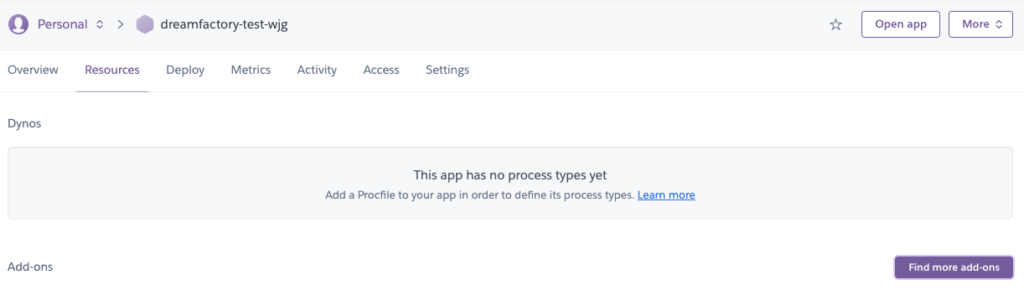
Click the Find more add-ons button. A new tab will open to the Heroku Marketplace. Scroll down the page a bit and click on Heroku Postgres. Next, click the "Install Heroku Postgres" button. You'll be prompted to use the plan tier:
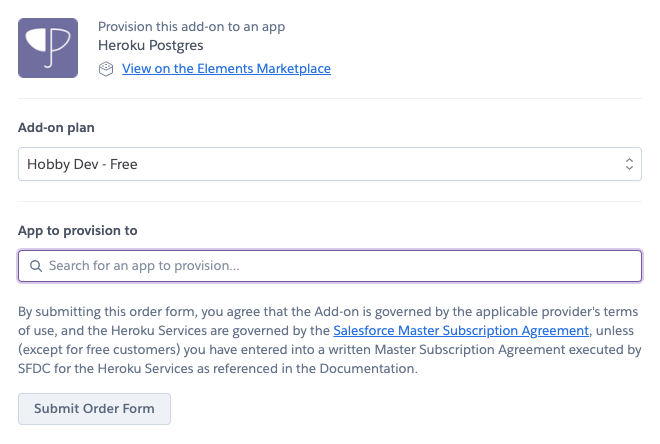
Heroku offers quite a few different Postgres plans. For the purpose of this tutorial we'll choose the Hobby dev - Free tier. You'll also want to attach the Postgres add-on to your newly created app, which earlier in the tutorial we called dreamfactory-test-wjg. After selecting the desired app, you'll see this:
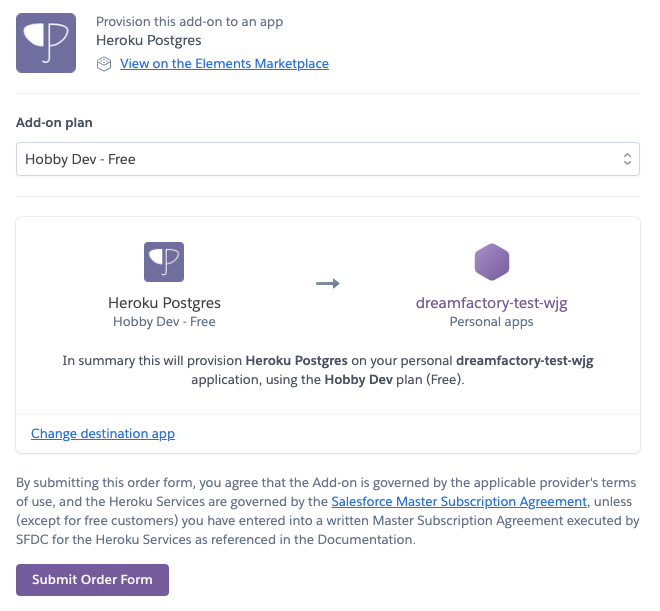
The Hobby Dev - Free plan is supported by DreamFactory (along with all other tiers), therefore if you've chosen this plan pressing the Submit Order Form button won't actually charge your credit card. Once pressed, you'll be returned to the application resources tab.
Configuring the DreamFactory Add-on
Because at the time of this writing the DreamFactory Add-On is an Alpha release, it's not searchable through the Heroku Add-ons Marketplace. You can however access the page directly by navigating to:
https://elements.heroku.com/addons/dreamfactory
At the top of this page you'll see the following notification:
DreamFactory is an alpha add-on and is invite only.

If you have an invitation, install this add-on via the CLI.
If you've received an invitation from us (invitations to join the alpha are free! Email us at code@dreamfactory.com), open your terminal, login to your Heroku account using this command:
<code>$ heroku login</code>
Once logged in, run this command:
$ heroku addons:create dreamfactory:test --app dreamfactory-test-wjg

Creating dreamfactory:test on ⬢ dreamfactory-test-wjg... free

Your add-on is being provisioned. It will be available shortly.

dreamfactory-spherical-22406 is being created in the background. The app will restart when complete...

Use heroku addons:info dreamfactory-spherical-22406 to check creation progress

Use heroku addons:docs dreamfactory to view documentation
You can check installation progress by running heroku addons:info:
heroku heroku addons:info dreamfactory-spherical-22406

 ›   Warning: heroku update available from 7.47.3 to 7.47.11.

=== dreamfactory-spherical-22406

Attachments:  dreamfactory-test-wjg::DREAMFACTORY

Installed at: Thu Jan 28 2021 09:31:06 GMT-0500 (Eastern Standard Time)

Owning app:   dreamfactory-test-wjg

Plan:         dreamfactory:test

Price:        free

State:        creating
Or just return to your Heroku web dashboard and click on the Resources tab:
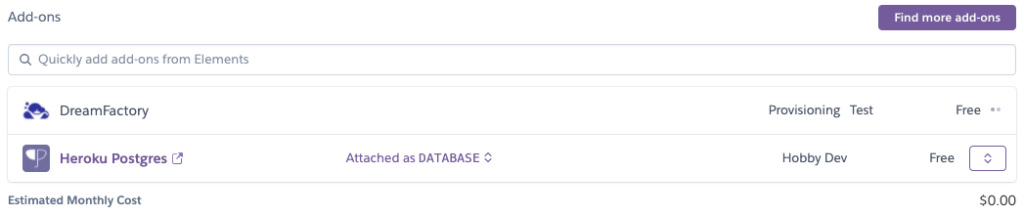
Note the "Provisioning" status message associated with the DreamFactory Add-on. Refresh the screen after a few moments and if that status message no longer appears, click on the DreamFactory Add-on link to open your new DreamFactory instance and you should be logged directly into the instance:

Generating Your PostgreSQL REST API
To generate your PostgreSQL REST API, you'll first need to obtain the database credentials from Heroku. Return to the Heroku app dashboard and click the "Settings" tab. Next, click the "Reveal Config Vars" button to retrieve the Postgres configuration variables. You should see a variable named DATABASE_URL. This is the PostgreSQL DSN. It follows this pattern:
postgres://USERNAME:PASSWORD@HOST_NAME:PORT/DATABASE_NAME
Copy this variable value into a text file and break the string into its respective parts. We'll need to copy and paste each separately into the DreamFactory administration console.
Next return to your DreamFactory environment. To begin, click on the Services tab and then click on the "Select Service Type" dropdown. Choose PostgreSQL from the Databases menu, and then click "Create" to begin generating your PostgreSQL REST API.
From this point we suggest reading reading our "Getting Started with DreamFactory" guide, because it will walk you through the entire API generation process, including guidance regarding subsequent configuration of role-based access controls, API key generation, and finally querying the API.
Conclusion
If you'd like to join the free DreamFactory Heroku Add-on alpha release program, please email us at code@dreamfactory.com. Be sure to include your Heroku e-mail address in the request so we can add you!