Integrating Snowflake with MS SQL Server using DreamFactory
by Spencer Nguyen • October 20, 2021

Integrating Snowflake with MS SQL Server is a common situation we see here at DreamFactory. This article will break down exactly how to integrate MS SQL server and Snowflake and what are the benefits of the integration.
Integrating Snowflake with MS SQL Server: The Purpose
Microsoft SQL Server is a database that fits the needs of most SME workloads. However, even though MS SQL Server is a broadly applicable database management system, there are still some things that Snowflake is better at. Snowflake is good for big data needs. It gives its users limitless size and scalable compute in a SQL and traditional data warehouse setting. That being said, if your dataset is relatively small, you will not see the benefit of Snowflake.
Snowflake has a friendly user interface, unlimited storage capacity, security, control, and the kind of performance that you would expect from a data warehouse. This is something you won’t find in SQL Server. Snowflake also has a unique cloud architecture that enables concurrency and unlimited scale without contention for resources. Therefore, many start out using SQL Server to manage their typical small volumes of data. Then, once you need to build a data warehouse for your big data, Snowflake becomes the ideal choice.
By integrating MS SQL Server with Snowflake, you will be able to move your data from MS SQL Server into Snowflake and enjoy all the above features offered by Snowflake. In this article, we will be discussing how to integrate Snowflake with MS SQL Server using Dreamfactory.
Building a REST API for MS SQL using DreamFactory in Snowflake
The process of building a REST API in Dreamfactory begins with the service creator. You should start by specifying the Namespace, label, and description. The latter two are good for referential purposes, but the namespace is used as a namespace within the API URI structure that is generated. The following steps will help you to create a REST API for MS SQL Server in Dreamfactory:
Step 1: Log into your Dreamfactory account. Click the “Services” menu from the top and choose “Create” from the left.
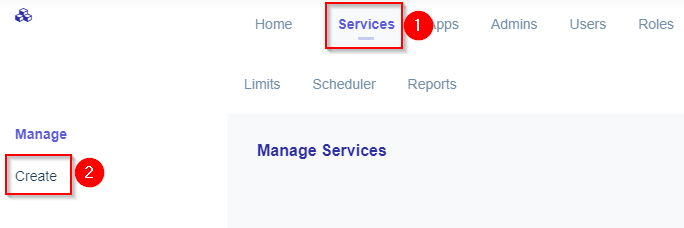
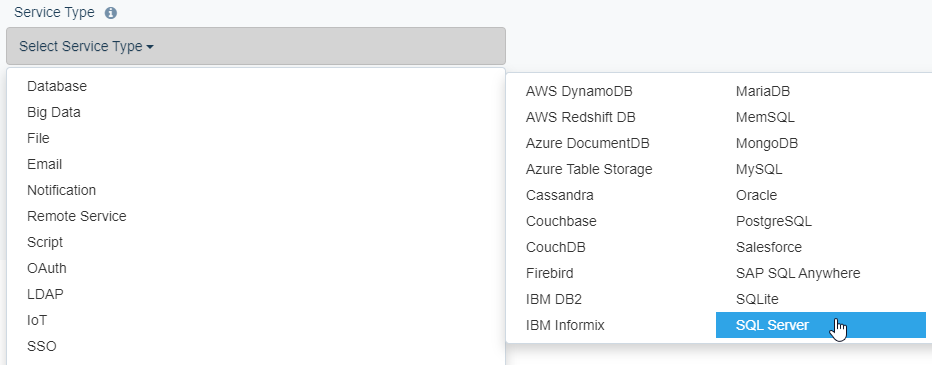
Step 2: Click the “Service Type” dropdown. Choose “Database” and then “SQL Server”.
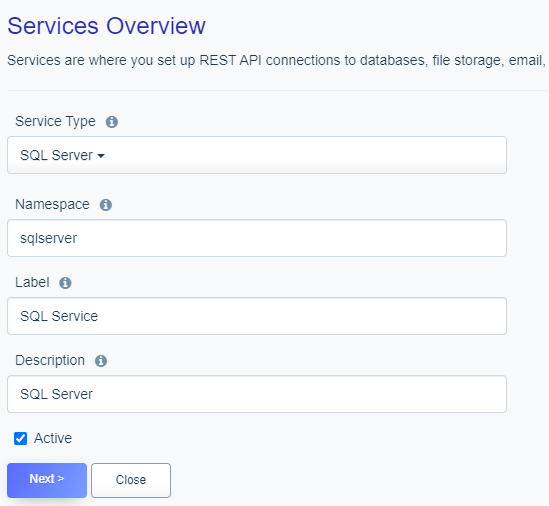
Step 3: Enter the Namespace, the Label, and the Description for the API. Since we want to use the API right away, ensure that you’ve activated the “Active” checkbox.
Step 4: Click the “Config” tab at the top and configure the database-specific credentials for your SQL Server database. You must ensure that the correct details are entered to avoid errors when trying to establish a connection to the SQL Server using the generated REST API.
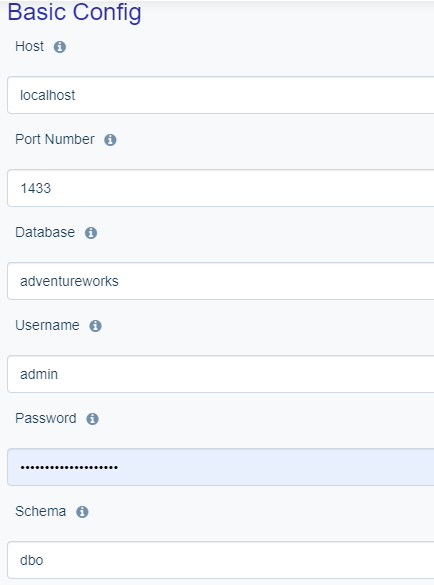
Note that we have entered a value for the “Schema” field above. This means that the generated API will be limited to only that schema. If you need to use the API to access objects across different schemas, just leave the Schema field blank. There are also advanced security options that involve generating a read-only API and configuring SSL-based communication.
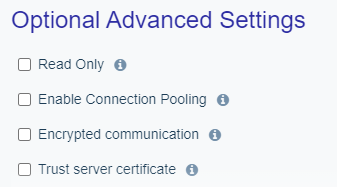
You can leave them in their default settings.
Step 5: Click the “Save” button to save the changes.
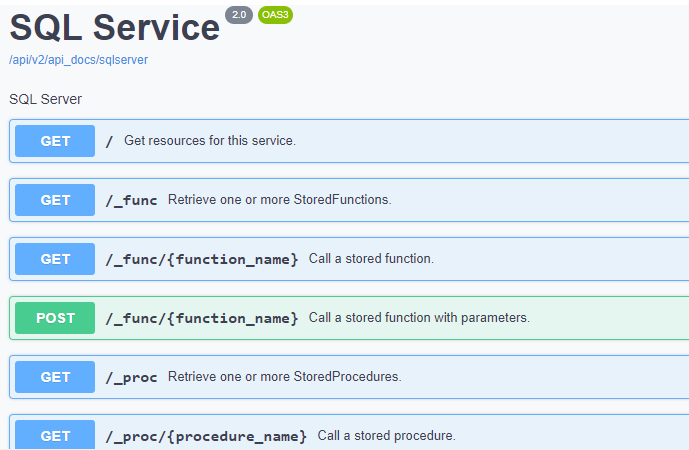
The API will be generated in a matter of seconds even if there are thousands of objects. It also generates a documentation for the API. To view its documentation, visit the API Docs tab. The API Docs tab shows all the available endpoints even the ones used for accessing schemas, tables, functions, views, and stored procedures as shown below:
Testing the REST API from MS SQL server
Now that we have created the API, we can test its functionality. We will demonstrate how you can use it to query data from the Person table of the AdventureWorks database in MS SQL Server. We want to return all the records of the Person table. Do the following:
Step 1: Click the “API Docs” tab from the top. Choose the SQL Server API.
Step 2: Choose the GET endpoint for retrieving one or more records from a table.

Step 3: Click the “Try it out” button and type the name of the table, that is, Person, in the “table_name” field shown at the bottom of the page.
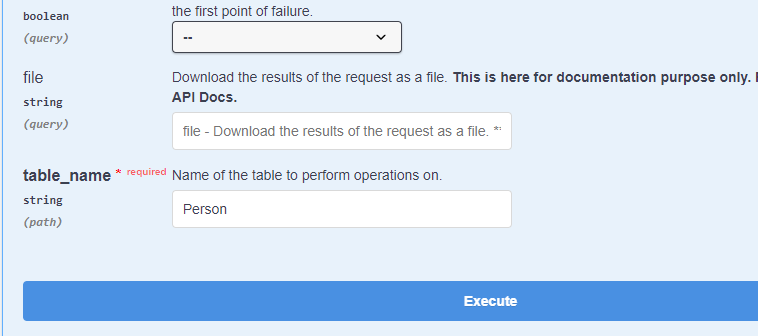
Step 4: Click the “Execute” button.
This will return all the records of the Person table in a JSON format.
Sync the API to Snowflake
We want to sync the above SQL Server API with Snowflake. Thus, we will have to run a POST to a Snowflake API. First, let’s create the Snowflake API. The steps are similar with minor differences as described below:
Step 1: Click the “Services” tab from the top and choose “Create” from the left.
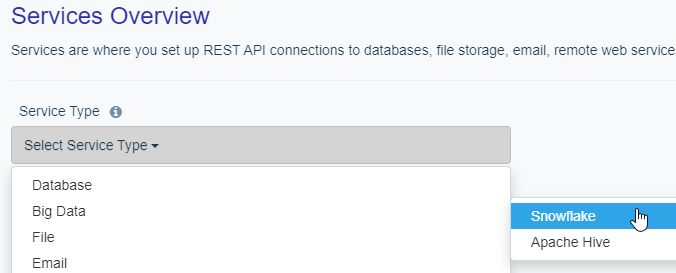
Step 2: Click the “Service Type” drop down menu and choose “Big Data”. Select “Snowflake”.
Step 3: To create a Snowflake API, you will be required to provide details like the account, username, password, database, warehouse, and schema. Ensure that you fill these details correctly according to your Snowflake database settings.
Once you save the details, you will receive a success message that says “Service saved successfully”. This means that you have successfully created a Snowflake REST API. If you click the API Docs tab, you will see that the API has been created.
We will copy the “Title” and “FirstName” values from the table Person of the AdventureWorks database in SQL Server and post it to the Snowflake API. Thus, we will be running a GET on the SQL Server API and a POST on the Snowflake API. Ensure that you have created a blank table named “Person” in your Snowflake API with two columns namely “Title” and “FirstName”. Next, follow the steps given below:
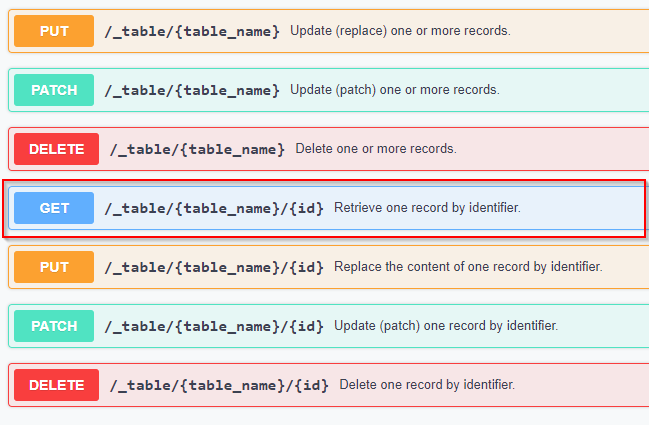
Step 1: Click the “API Docs” tab and choose the SQL Server API. Choose the GET method to retrieve a record by identifier.
Step 2: Click the “Try it out” button.
Step 3: Specify the two fields, the id of the record to retrieve, and the table name and click the “Execute” button.
 Source: apps.dreamfactory.com
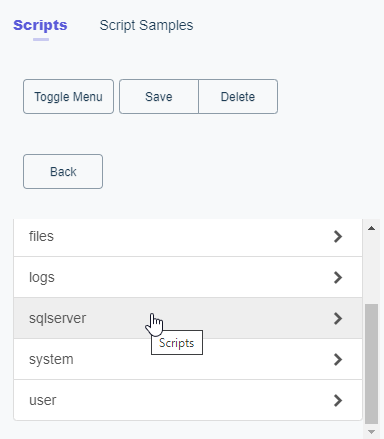
Step 4: Now, click the “Scripts” tab from the top and select sqlserver from the left.
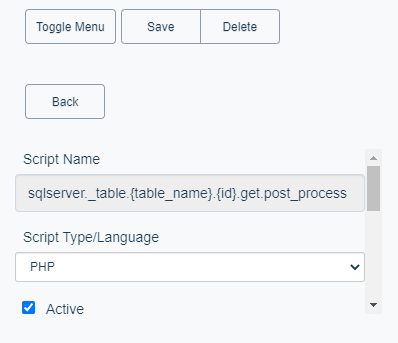
Step 5: Next, choose the endpoint that you want to target.
Let’s write a PhP script that will get the “Title” and “FirstName” columns of the table “Person” and post them into Snowflake:
$api = $platform['api'];
$responseBody = $event['response']['content'];
$record = [];
$record["resource"] = [
[
'title' => $responseBody["Title"],
'firstname' => $responseBody["FirstName"]
]
];
$url = "sqlserver/_table/person/";
$post = $api->post;
$result = $post($url, $record, []);
return $result;
Step 6: Once done, click the “Save” button.
Note that Dreamfactory supports four scripting languages namely Node.js, PhP, Python, and Python3 and they are all complete. Thus, you can choose your favorite language from these.
Step 7: Now, click the API Docs tab and choose the end point where you attached the script. Enter the field names, id, and the table name and click the “Execute” button.
Step 8: Click the “Back to Service List” button at the top and choose the Snowflake API. Call the previously blank endpoint. You will see duplicated data from the SQL Server API.
Securing the database objects in Snowflake
We need to ensure that the data objects are secure. Let’s generate an API key that will be paired with the REST APIs for security purposes. Dreamfactory doesn’t allow access to the API without authentication. Each Role should have a corresponding API key so that different users may have different privileges based on different API keys.
To Secure the APIs, follow the steps given below:
Step 1: Click the “Roles” tab from the top.
Step 2: Choose the “Create” option from the left, and then click the “Access” tab.
Step 3: Click the “+” icon on the right. Select the API from the Service dropdown menu and select remaining details as shown below:

Source: apps.dreamfactory.com
Click the “Save” button to save the changes. You will see a pop with the message “Role saved successfully”, which is a signal that the process was successful.
We have pointed the role to the SQL Server REST API that we have created and instructed it to only allow GET calls on the endpoints. Thus, anyone using the API key won’t be allowed to delete data from the database.
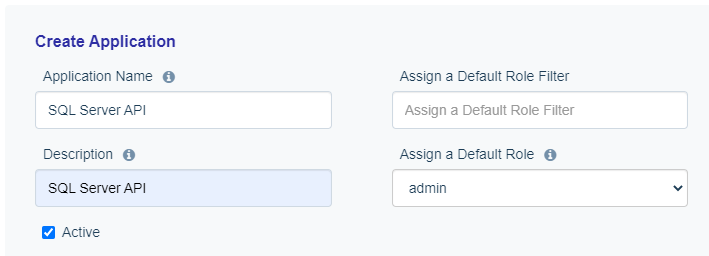
Step 4: We should now link the above role to an API key. We can do this from the “Apps” tab which is located at the top.
Step 5: Click the “Save” button.
You will then be able to see the API key generated for your use.
Do the same for the Snowflake REST API. However, grant the role a “POST” access.
Use DreamFactory to integrate Snowflake with MS SQL Server
Handwriting code for database APIs can be a complex, time consuming, and expensive process. It also exposes businesses to a number of risks including consistency, quality, and developer effort. DreamFactory is a REST API generation tool for a number of databases. It gives you the ability to generate secure and fully documented APIs in a matter of minutes. Ready to get started? Sign up for a 14-day free trial and start creating your APIs today.
Related reading:
Creating a Microsoft SQL Server API in Less Than 5 minutes with DreamFactory
TL;DR - GET AN AI SUMMARY
As a seasoned content moderator with a keen eye for detail and a passion for upholding the highest standards of quality and integrity in all of their work, Spencer Nguyen brings a professional yet empathetic approach to every task.