
DreamFactory 2.7 Silver and Gold now includes the OpenID Connect service . As you may know, OpenID Connect is a wrapper around OAuth 2.0. This means you can now easily authenticate your users into a DreamFactory-based application using any OAuth 2.0/OpenID Connect service provider.
OpenID Connect service is a native DreamFactory service that supports role-service-access, live API documentation, etc. Once you've configured your OpenID Connect service in DreamFactory, all the configuration details are securely stored on your DreamFactory instance database. This allows for a simple way to authenticate into a DreamFactory-based app using an external OAuth 2.0 provider.
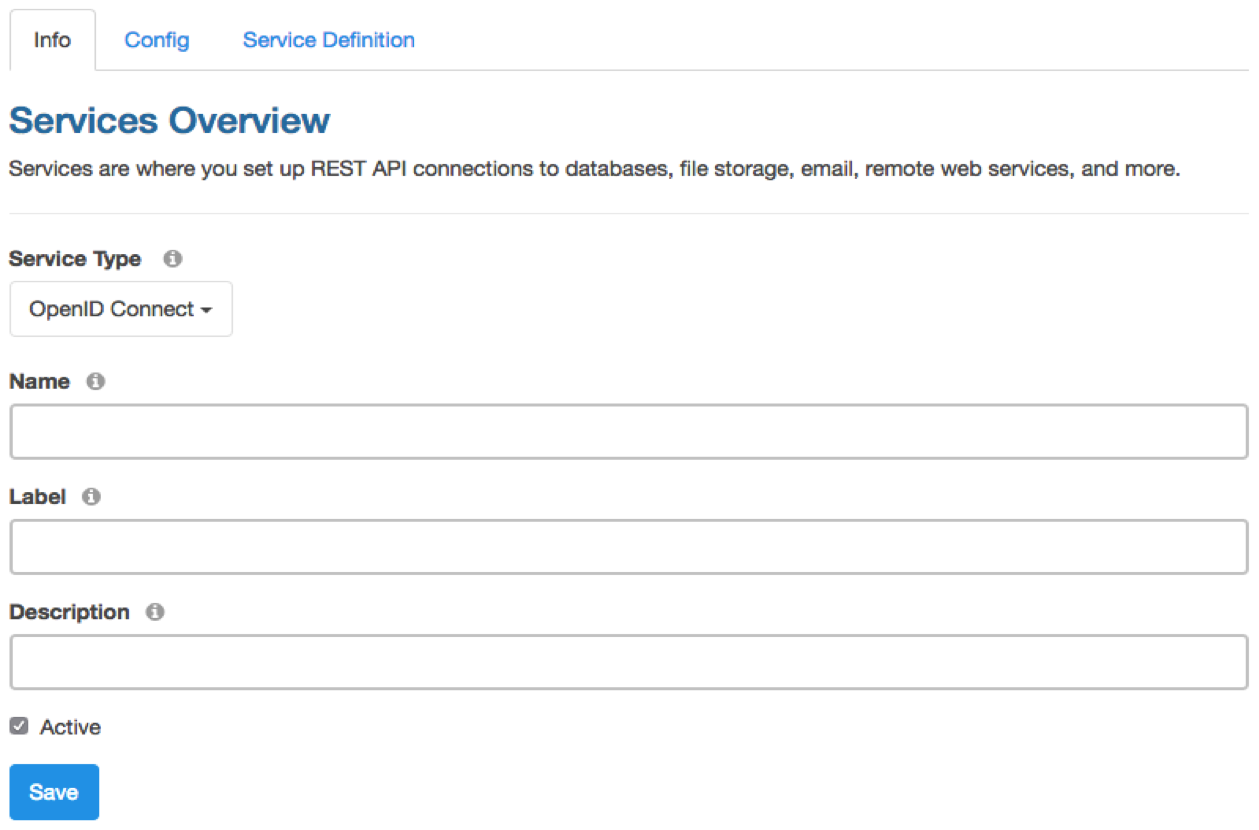
Configuring an OpenID Connect service is as simple as configuring any other service in the DreamFactory admin console. Start by logging into the admin console, head over to the ‘Services’ tab, and click on the ‘Create’ button on the left sidebar. Use the ‘Service Type’ drop down to select ‘OAuth’ -> ‘OpenID Connect’, complete the service configuration form, and save it to create your service.
Here’s what the OpenID Connect configuration looks like. In the ‘Info’ tab, provide basic service information: Name, Label, and Description.
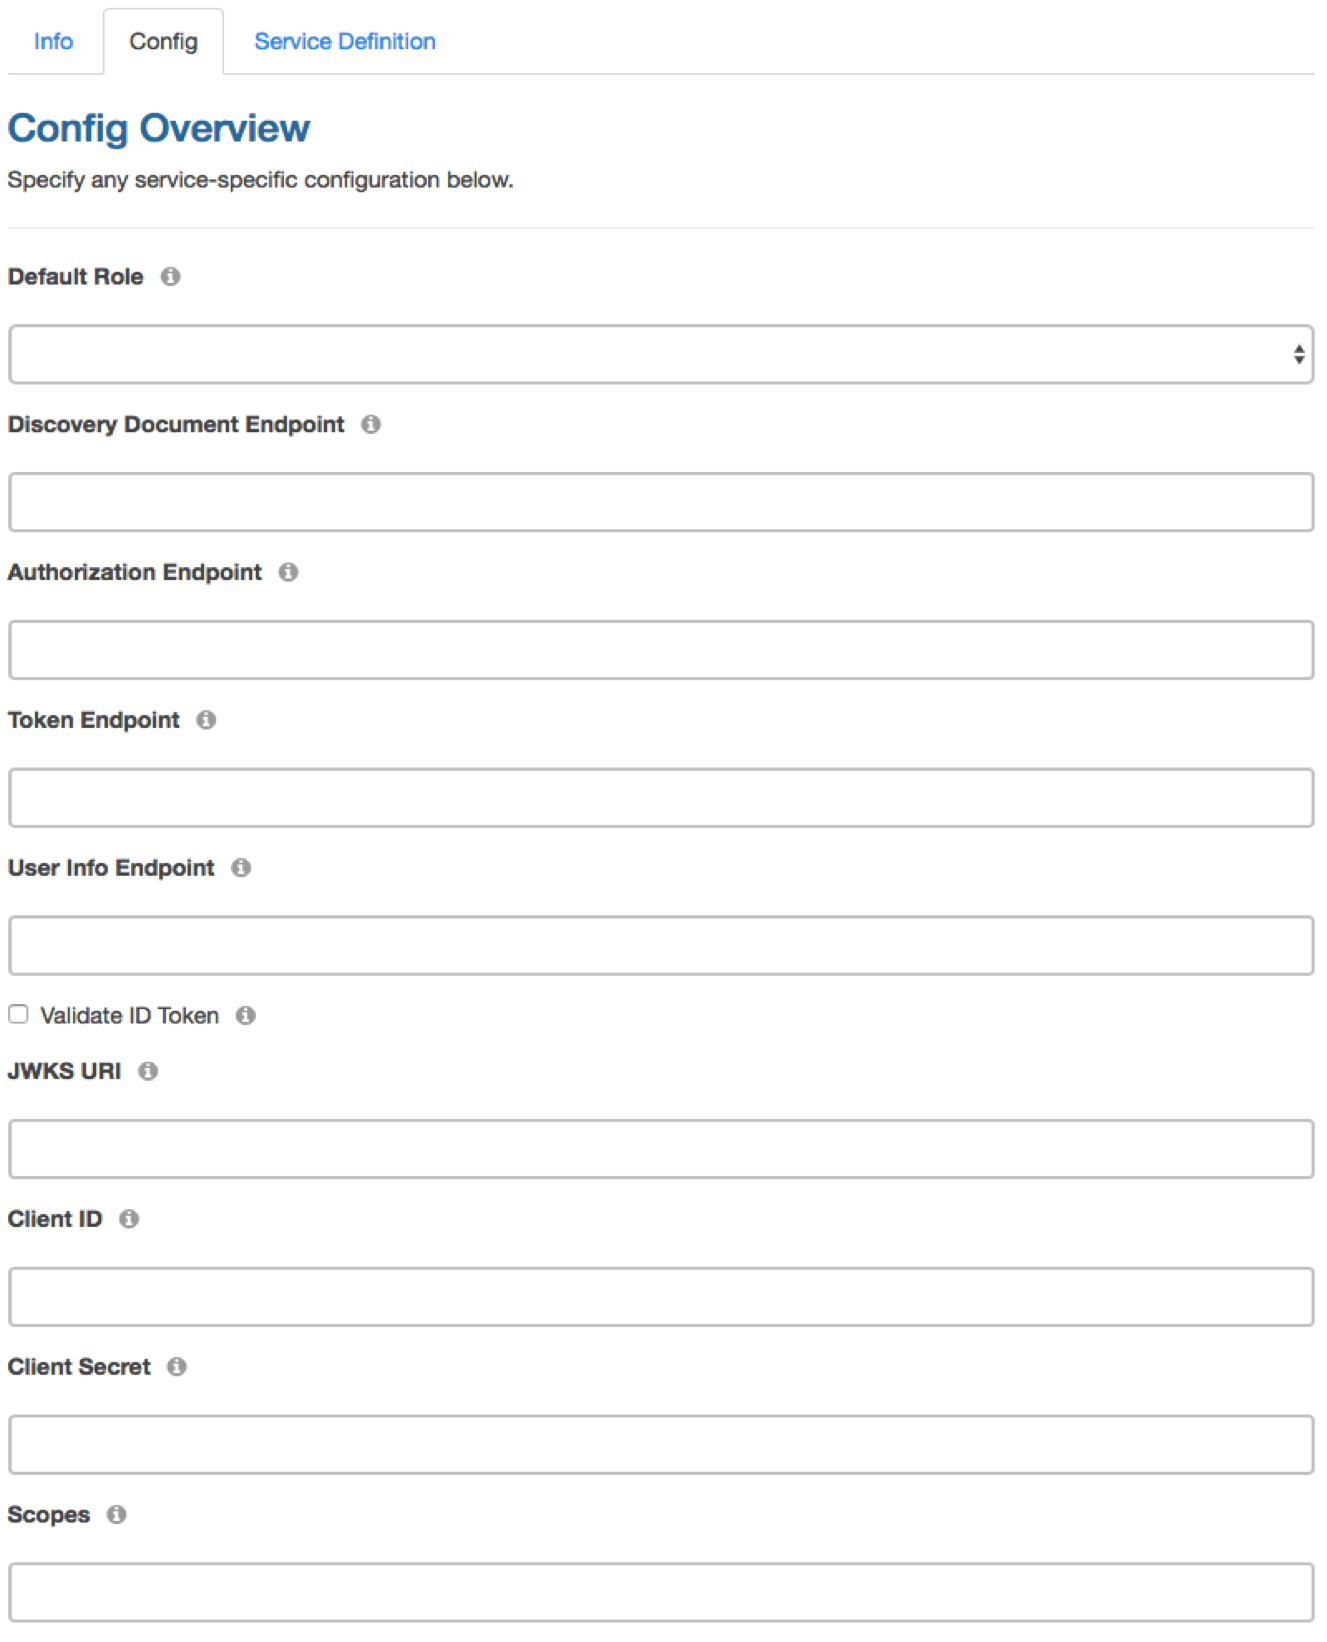
In the ‘Config’ tab, provide the following configuration information:
- Default Role - String. Optional. Select a default role for users logging in with this OpenID Connect service.
- Discovery Document Endpoint - String. Optional. OpenID Connect Discovery Document endpoint. When a valid endpoint is provided, the following configuration options will be set based on the Discovery Document. Therefore, you may leave these options blank: Authorization Endpoint, Token Endpoint, User Endpoint, JWKS URI, Scopes.
- Authorization Endpoint - String. Authorization endpoint of the provider. Not required when Discovery Document Endpoint is entered.
- Token Endpoint - String. Token endpoint of the provider. Not required when Discovery Document Endpoint is entered.
- User Info Endpoint - String. Optional. User information endpoint of the provider.
- Validate ID Token - String. Optional. Validate ID Token received from the provider.
- JWKS URI - String. JWKS endpoint that provides the necessary keys to decode and validate the ID Token. Required when Validate ID Token is checked.
- Client ID - String. Required. A public string used by the service to identify your app and to build authorization URLs.
- Client Secret - String. Required. A private string used by the service to authenticate the identity of the application.
- Scopes - String. Authorization scopes. Enter multiple scopes separated by comma. Not required when Discovery Document Endpoint is entered.
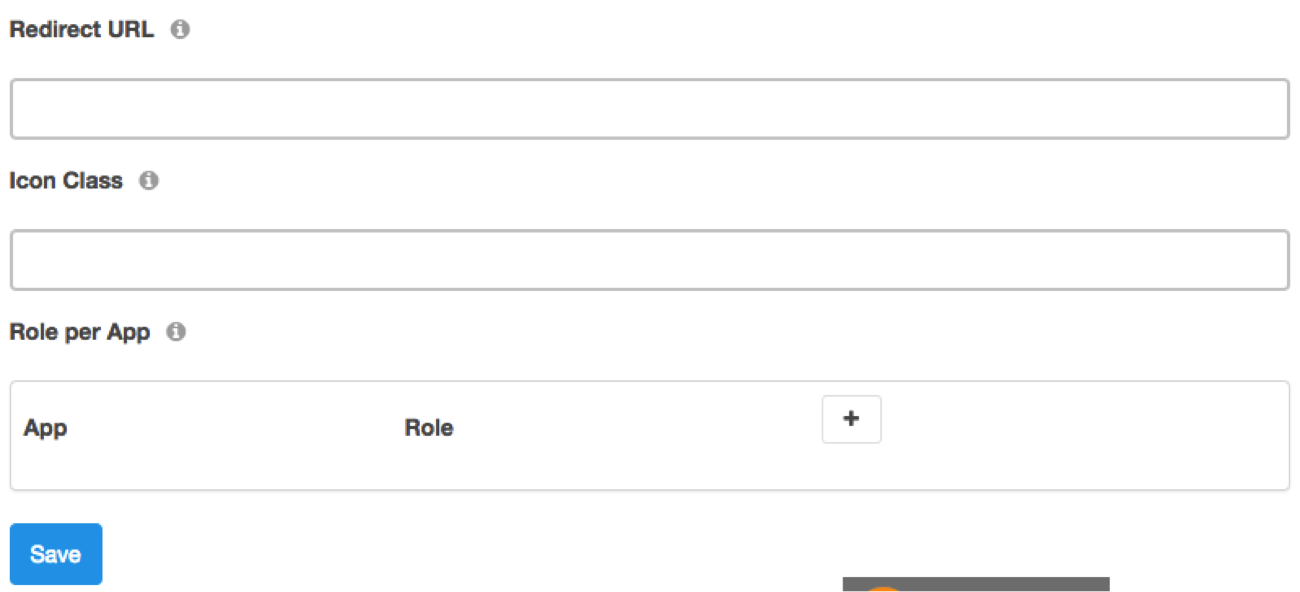
- Redirect URL - String. Required. The location the user will be redirected to after a successful login.
- Icon Class - String. Optional. The icon to display for this OAuth service.
- Role per App - Array. Optional. Select desired Role per Apps for your users logging in using this service.
Once your OpenID Connect service is configured, you're ready to authenticate your users into DreamFactory using your OAuth 2.0 provider.
Authenticating using OpenID Connect in DreamFactory
For ease of this discussion, let’s say we have created a new OpenID Connect service called ‘google’ that supports Google OAuth 2.0. Now our users are ready to authenticate into your DreamFactory-based app using their Google credentials. Users simply click on the ‘Login with Google’ button on your app. This should trigger the following POST call to your DreamFactory instance:
curl -i -k -X POST https://example.com/api/v2/user/session -d {“service”:”google”}
Or alternatively:
curl -i -k -X POST https://example.com/api/v2/user/session?service=google
If all goes well your app will get this response back:
{
   "response": {
   "redirect": true,
   "url": "https://accounts.google.com/o/oauth2/v2/auth?client_id=15..."
   }
}
The response includes a URL that redirects your users to the Google login page. Your app needs to handle this redirect in order to present the Google login page to your users. Once the user authenticates and authorizes access to their Google resources, the provider will redirect the user back to the app using the Redirect URL with the ‘Authorization Code’ as part of URL query string. Your app will need to extract this entire query string and make the following POST call to get a JWT (JSON Web Token) and successfully log into your DreamFactory instance.
curl -i -k -X POST https://example.com/api/v2/user/session?oauth_callback=true&<query_string_from_callback>
Your DreamFactory instance will then make necessary requests to the OAuth provider and fetch the user information. DreamFactory will create a shadow user (if not already existing) using the user information from the OAuth provider’s site. Once the user is there it will then create a JWT for this user and establish an internal session and respond back with the following data:
{
"session_token": “abc.123abc.efg”,
"session_id": “abc.123abc.efg”,“oauth_token”:”abc123efg”,"id": 1,
"name": "John",
"first_name": "John",
"last_name": "Doe",
"email": "jdoe@gmail.com",
"is_sys_admin": false,
"last_login_date": "2015-06-30 16:46:59",
"host": "example.com"
}
The app needs to save the session_token from this response locally. This is the JWT. The app will need to use this JWT for every request it makes to your DreamFactory instance. Your app can pass this JWT in three different ways:
- Using Authorization header: Authorization Bearer <jwt>
- Using X-DreamFactory-Session-Token header.
- Using session_token url query parameter.
DreamFactory also includes all active OAuth/OpenID Connect services in the system environment data. You can get the system environment data using a simple GET call.
curl -i -k -X GET https://example.com/api/v2/system/environment
The response from this call includes system authentication information, which shows the APIs and services available in the system for logging in. This will help you create a dynamic login UI based on the services available in the system. Here is a sample response from ‘system/environment’ call showing the OAuth services data.
{….."authentication": {
 …..
 "oauth": [
 {
 "path": "user/session?service=google",
 "name": "google",
 "label": "Google OAuth",
 "verb": [
 "GET",
 "POST"
 ],
 "type": "oauth_facebook",
 "icon_class": "fa-google"
 }
 ]}, }
In this post, we briefly covered how easy it is to use DreamFactory to add OpenID authentication to your applications. Head on over to the community forum to discuss or let us know what you think in the comments!