Organizations deploying Siemens SIMATIC PLCs (Programmable Logic Controllers) will logically want to track and manage PLC metrics. Exactly how these metrics are managed will depend upon the specific needs of the organization. For instance, organizations that would like to send PLC data directly to a Microsoft SQL Server database can use the TDS (Tabular Data Stream) protocol. But what if you wanted to subsequently access this data via a REST API? Doing so is surprisingly easy by integrating the DreamFactory API platform, and this article explains how.

Prerequisites
Before generating the SIMATIC PLC REST API, you’ll need to complete the following tasks:
- SIMATIC PLC: It goes without saying you’ll need to have an operational and accessible SIMATIC PLC.
- Microsoft SQL Server: You should have access to a Microsoft SQL Server database which is accessible via your PLC’s subnet over port 1433, or otherwise accessible via additional network modifications.
- PC/Workstation: This workstation should have the Siemens TIA Portal and necessary drivers installed. Specifically you’ll need to install the LSQL driver which is downloadable from the Siemens website. Further instructions for connecting the SIMATIC PLC to SQL Server are found here.
- DreamFactory Instance: Finally, you’ll want to have installed and configured DreamFactory. DreamFactory is a dual-licensed (open-core and commercial) software product, meaning you can get started for free by heading over to the company’s GitHub page and using one of the available installers. The easiest way to bring DreamFactory online is via Docker; if you’ve used Docker before then you’ll have DreamFactory up and running in less than five minutes.
Generating the MS SQL Server REST API
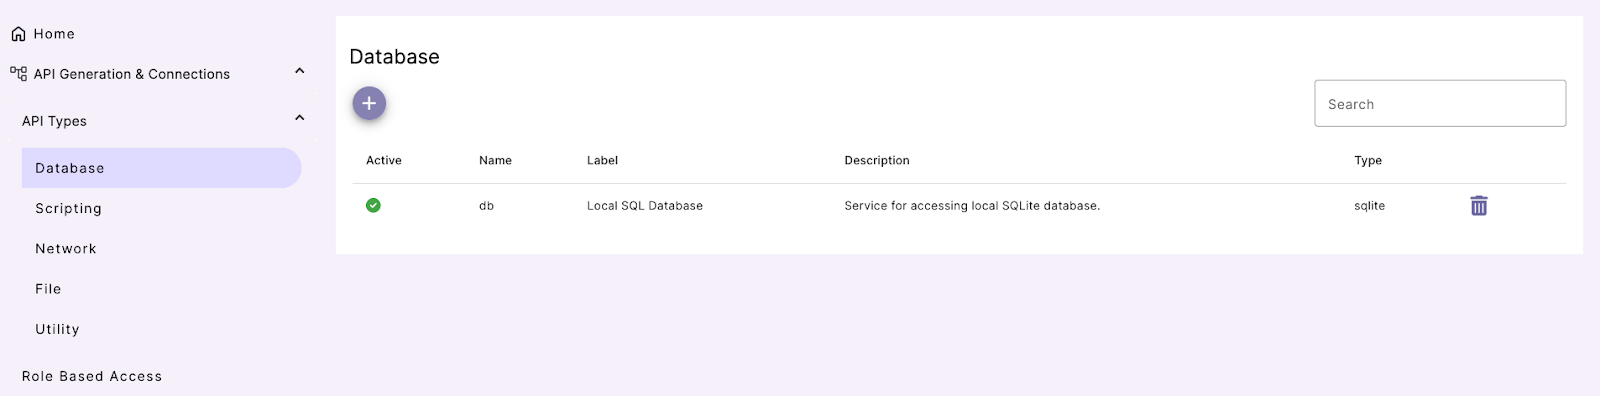
Next we can generate and secure the SQL Server REST API. This is probably the easiest step in the entire project! Login to your DreamFactory instance and click API Generation & Connections on the left-side menu, then API Types, then Database:
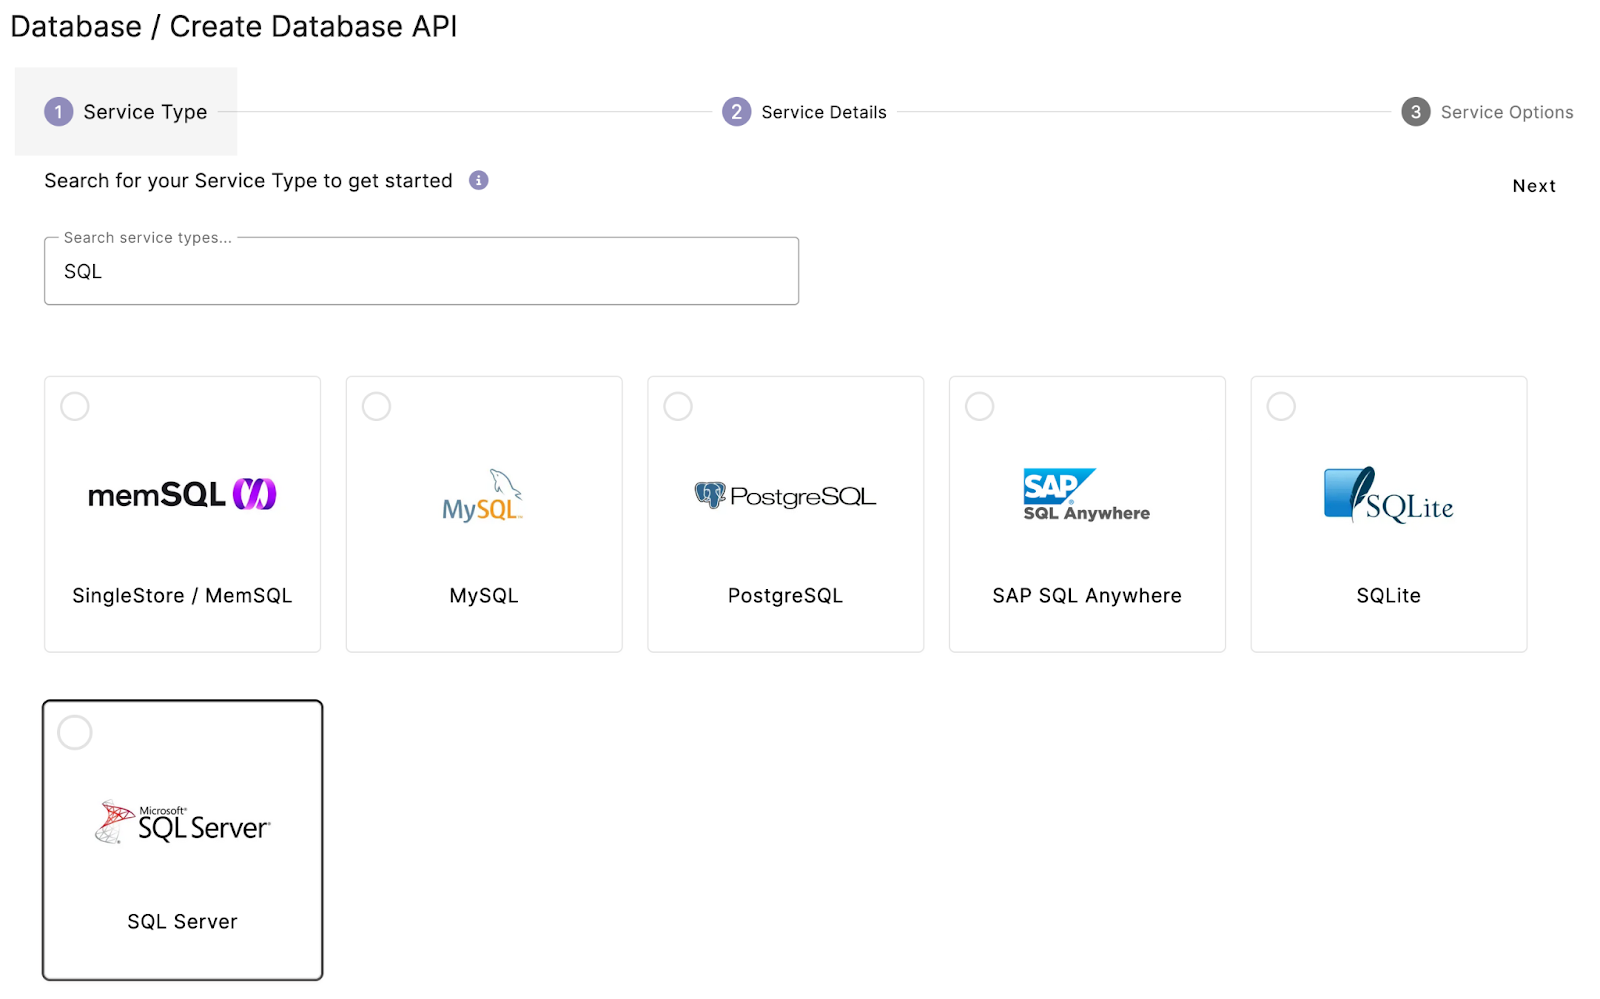
Click the plus icon under the Database header and search for SQL Server using the Search Server Types form field:
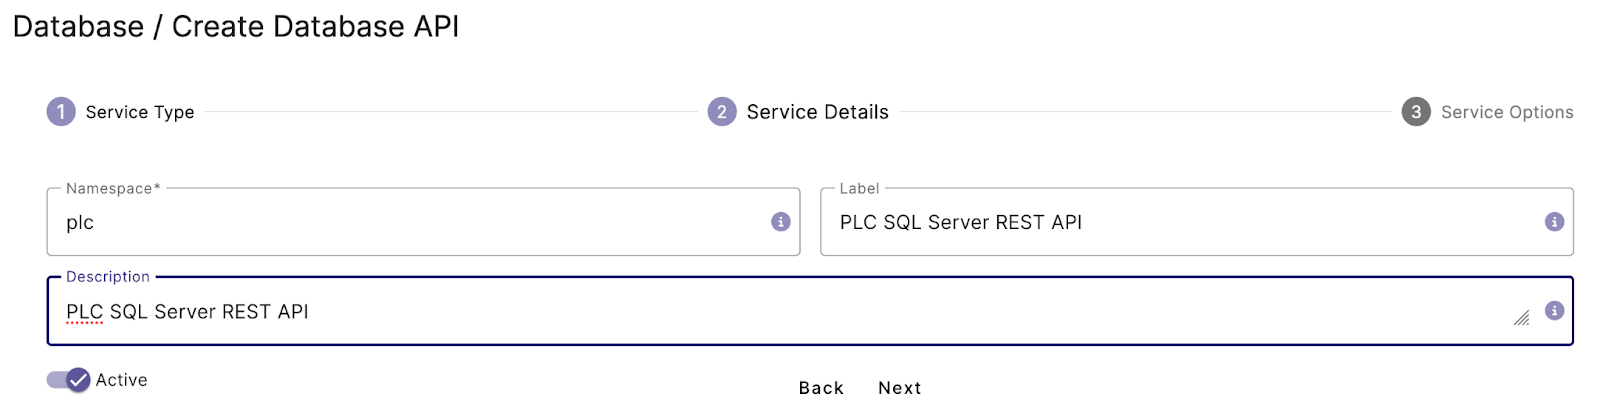
Next you’ll be prompted to enter some basic information about the REST API:
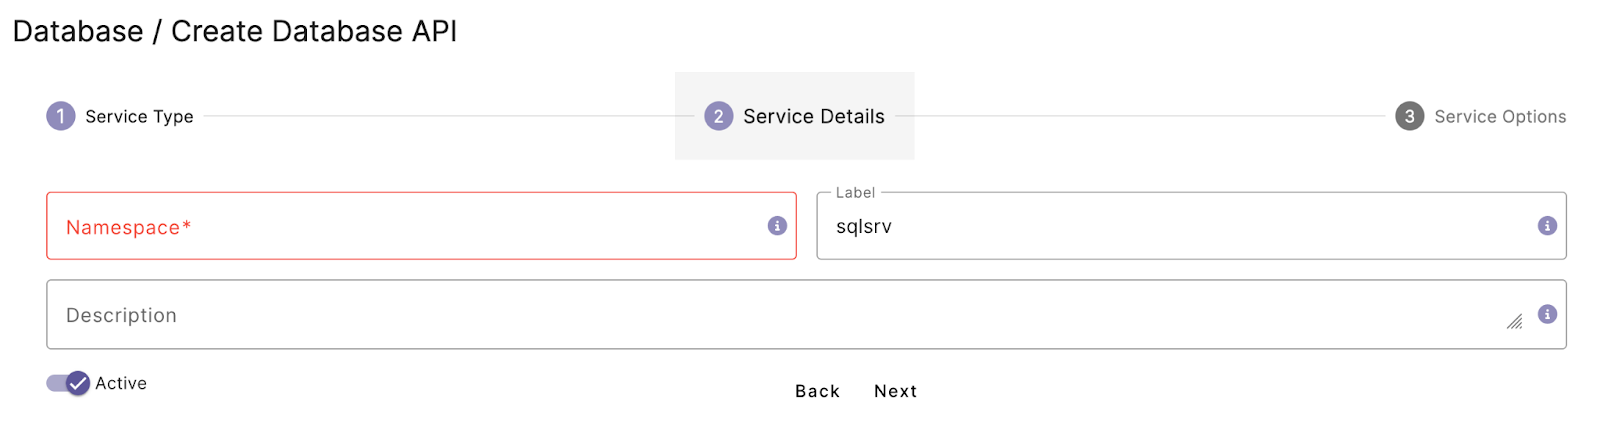
This includes the API namespace, label, and description. The latter two are just visual cues used inside the DreamFactory web console, whereas the namespace will form part of the URI structure so you’ll probably want to call it something reasonably memorable. For the purposes of this tutorial I’ll call our namespace plc.
Click Next, and you’ll be prompted to enter database connection details. As you’ll see there are quite a few options to consider, however for most use cases you’ll only need to supply the following:
- Host: The hostname or IP address associated with the MS SQL Server instance.
- Port Number: The port number used to communicate with the MS SQL Server instance. This is typically 1433 but some organizations change it for security reasons.
- Database: The name of the database where your SIMATIC PLC data is stored.
- Username: The username associated with the account you would like the API to use when connecting to the database.
- Password: The password associated with the account you would like the API to use when connecting to the database.
- Schema: The schema is a collection of tables, stored procedures, and other information. You’ll want to specify the schema you used when creating the database.
Check out the DreamFactory documentation for a complete list of options. Enter the connection details and press Save. Once done (presuming there are no form errors), your REST API has been generated and it’s time to create a role-based access control and API key!
Creating a Read-only Role-based Access Control
A role-based access control (RBAC) determines what a client connecting to the API with a specific API key will be able to do with the API. Because you’re likely not going to insert, delete, or modify data that originates from the PLC, it makes sense to create a read-only RBAC. Click the Role Based Access link located in the left-hand menu, and then press the plus icon below the Role Based Access header. You’ll be taken to this screen:
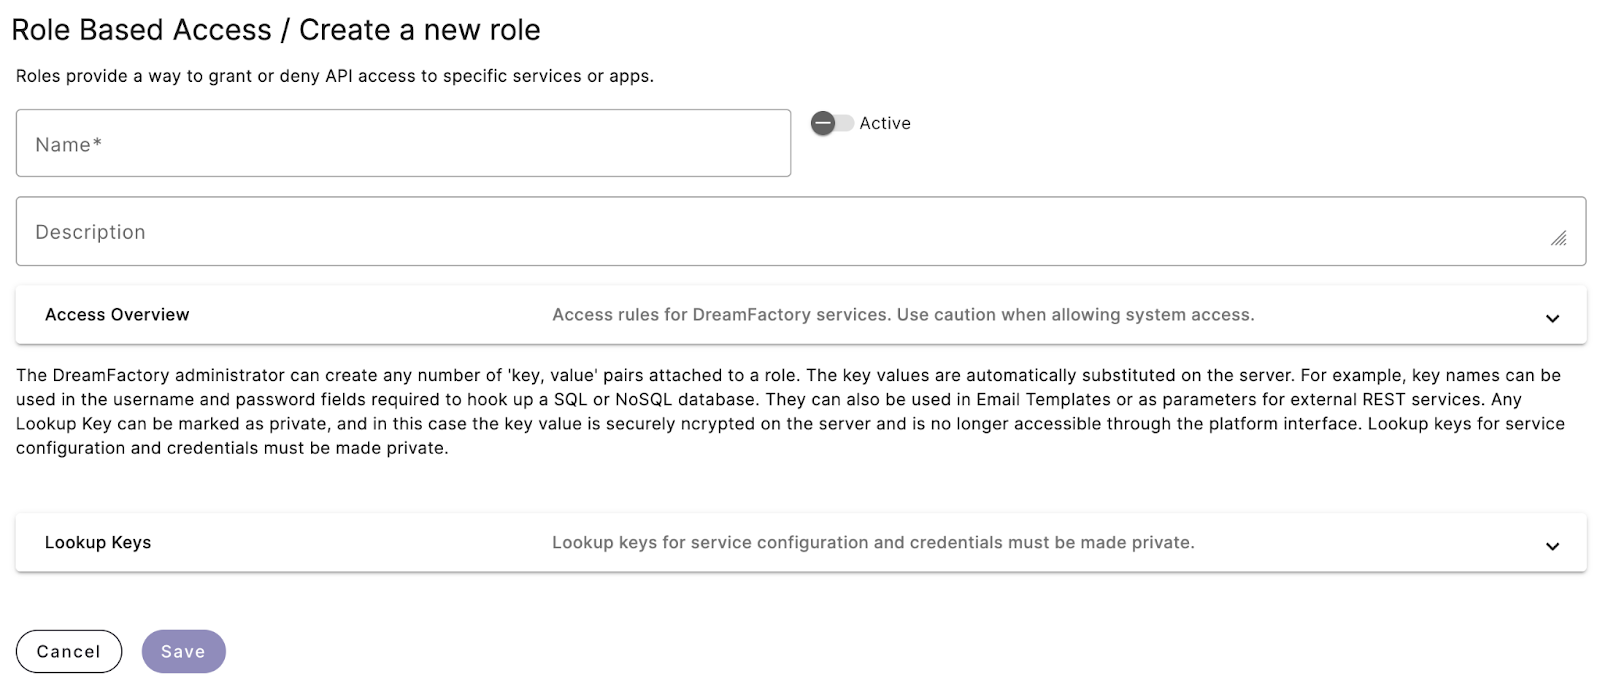
Assign a name such as PLC read-only, make sure the Active switch is enabled, and create a simple description such as “SIMATIC PLC Read-only”. Then click the Access Overview arrow and you’ll see this interface:

Click the Service select box and choose your newly created API. Next, the Component select box will determine which API endpoints will be accessible. For the sake of this example I’ll choose *, which means all endpoints however you can limit access to specific tables, views, or stored procedures. Next, the Access select box determines which actions a user can take in conjunction with the endpoint(s). This can be any combination of read, create, replace, update, or delete. I’ll select GET (read) since this will be a read-only RBAC. Finally, I’ll leave the Requester select box set to API. An additional option called Script is also available which can be used in conjunction with DreamFactory’s scripting capabilities. Once you’ve completed these fields press the Save button. Next we’ll create an API key and then start accessing the PLC data via our new API!
Creating an API Key
To create an API key click the API Keys link located on the left hand side of the screen and then press the plus sign icon under the API Keys header. You’ll see this screen:

Assign an easily recognizable name such as PLC read-only and then in the Assign a Default Role select box choose your newly created RBAC. Add a description and then make sure the Active switch is enabled before pressing the Create button. You can leave the App Location radio buttons untouched. On the screen that appears you’ll find a newly generated API key!
Accessing the SIMATIC PLC REST API
You might want to create a dashboard to display the latest PLC metrics, or maybe use this data as part of a business analytics report. Both (and much more) are possible using the generated API! For testing purposes we can use an API testing client such as Postman or Bruno. Let’s presume your PLC metrics are being sent to a SQL Server table named Metrics. The table creation statement looks like this:
CREATE TABLE Metrics (Timestamp DATETIME NOT NULL,TagName VARCHAR(100) NOT NULL,Value FLOAT NOT NULL);
DreamFactory will generate API endpoints based on the database table, stored procedure, and view names, meaning this Metrics table is accessible via the following URI:
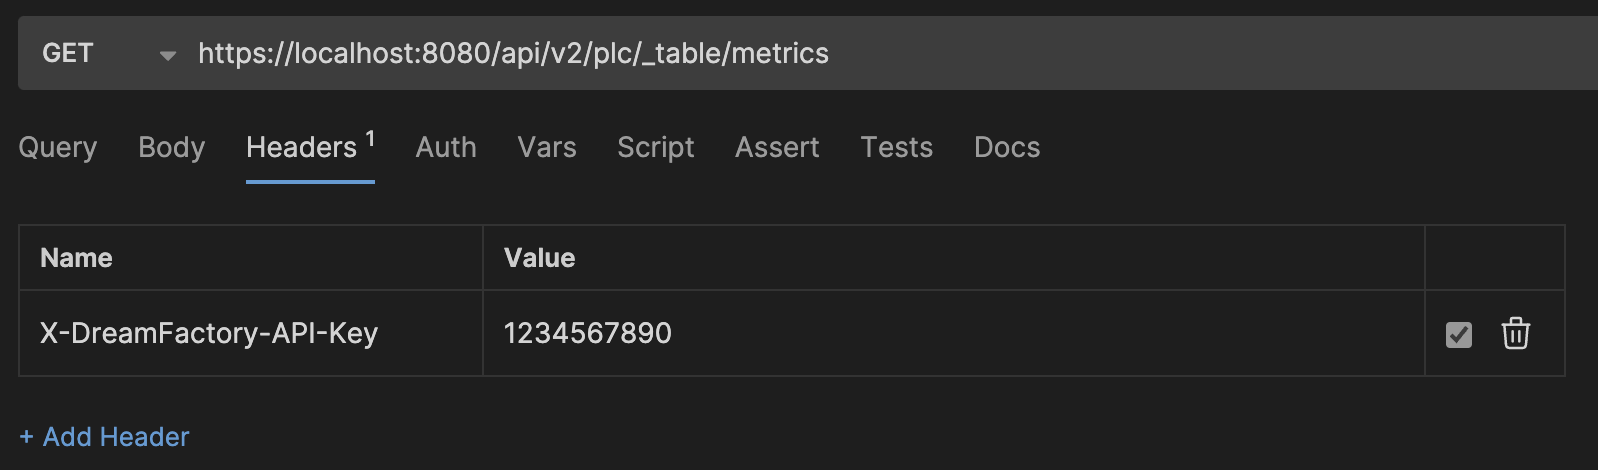
/api/v2/plc/_table/metrics
DreamFactory supports all kinds of options to modify query behavior, such as limiting record count, filtering, counting, and so forth. Further, because DreamFactory does not support public APIs, you’ll need to supply the API key we created in the previous step. This is done by assigning it to a header named X-DreamFactory-API-Key. Using Bruno the URL and API key would be defined like so:
Let’s suppose our Metrics table contains a few entries that look like this:

Querying the aforementioned URI /api/v2/plc/_table/metrics, your API testing client should return:
{
    "resource": [
        {
            "Timestamp": "2024-07-12 12:34:45",
            "TagName": "Motor1",
            "Value": "45"
        },
        {
            "Timestamp": "2024-07-12 12:34:56",
            "TagName": "Motor1",
            "Value": "47"
        },
        {
            "Timestamp": "2024-07-12 12:34:56",
            "TagName": "Motor2",
            "Value": "24"
        }
    ]
}
Where to From Here?
DreamFactory is used by organizations all around the world to connect to databases, PLCs, mainframes, and all kinds of other software and devices that lack native network support. Contact us if you'd like a tour of what's possible!