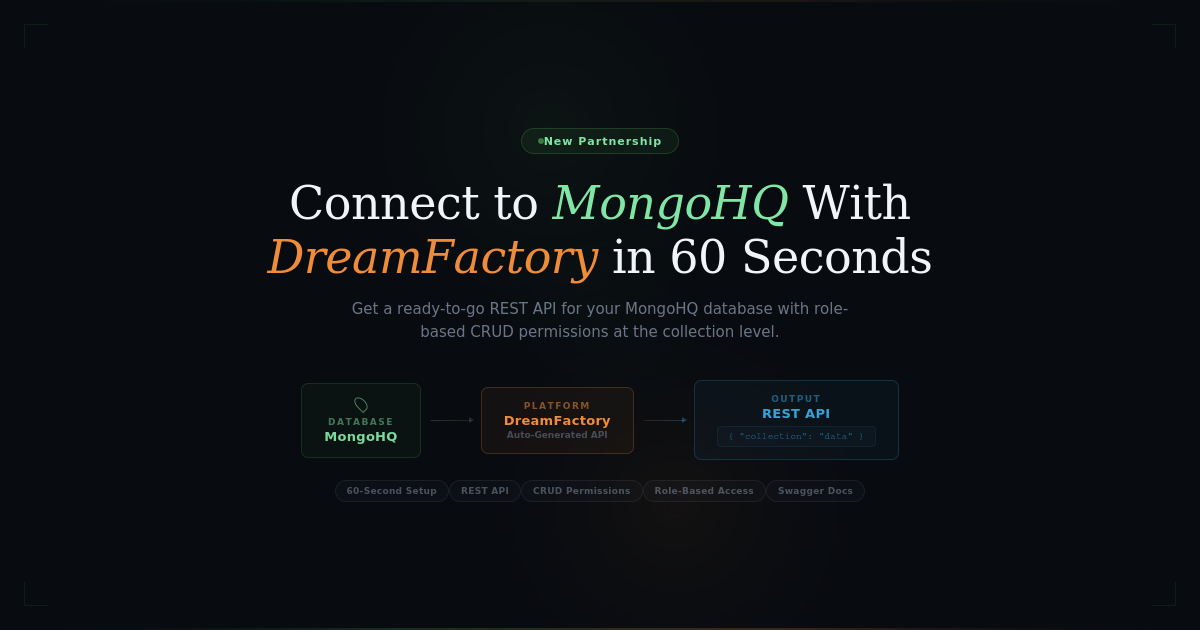
We’re excited to announce that we’ve partnered with MongoHQ. Now you can connect directly to any MongoHQ database instance from the DreamFactory Services Platform (DSP). In a nutshell, this new feature makes accessing your MongoHQ data really easy.
- Securely store your MongoHQ credentials on a server. You never want to do this on the client for security reasons!
- Make database calls to your MongoHQ database with a ready-to-go REST API. Now you don’t have to write your own API to access MongoHQ. DreamFactory creates the API for you. Just make an API call and get a JSON document back from the server.
- Apply CRUD permissions at the collection level based on user role. This is a great feature if you need to apply different data permissions for different users in your application.
In this blog post, we’ll show you how to connect to MongoHQ in 60 seconds, quickly browse the REST API to access your data stored in MongoHQ, and apply CRUD permissions for different user roles.
Before getting started, you’ll need to sign up for a MongoHQ account if you don’t already have one. The link above provides developers a $50 credit for opening a new account with MongoHQ.
Once you’ve logged into your DreamFactory Services Platform (DSP), you’ll need to configure your connection to MongoHQ. Make sure to sign up for a DreamFactory account if you don’t already have one.
Set Up a MongoHQ Service
Once you’re logged into your DSP as an administrator, start by clicking on the ‘Services’ tab on the left-hand side of the screen.
Then click to Create New Service and fill out the required information about your MongoHQ database. See the screenshot below for an example.
Make sure to select ‘NoSQL DB’ in the Type list box and ‘MongoHQ’ in the NoSQL Type list box. You’ll then need to enter your MongoHQ connection string, database name, database username, and database password. Don’t forget to click the Save button at the bottom of the screen.
Browse the REST API for MongoHQ
Once you’ve saved your MongoHQ connection settings, DreamFactory automatically creates a REST API for your MongoHQ database. To browse the API, just click on the ‘API Documentation’ tab on the left-hand side of the screen.
Then find the API name that you used for MongoHQ (in our example we called the API ‘mongohq’ in the setup screen). You’ll see a total of 14 API calls that allow you to manipulate your MongoHQ data with standard GET, POST, PATCH, PUT, and DELETE verbs.
We use a great tool called Swagger for our API docs, which makes it really easy to interact with the API and inspect your MongoHQ data right from your web browser. We suggest taking a look at the live Swagger API before writing client-side code to access MongoHQ data from your app.
For example, we have a collection called 'zips' that contains demographic data by zipcode. Let’s say we want to run a simple filter on this data to look at cities in California with a population greater than 50,000. In this example, we’ll also limit the number of records returned to 5.
Doing so is easy. In the API docs, just navigate to the GET request for /mongohq/{table_name}. Then simply enter the name of the ‘zips’ collection, a simple filter string, and set the limit to 5.
Now click the ‘Try it out!’ button and you’ll see the API request and response.
You can also make API calls from the command line. For example, you can use cURL to make a GET request on a particular MongoHQ table and append a BSON filter string in the request. You’ll see the corresponding JSON returned in the response.
And you can see the available MongoHQ API operations right in your browser using the DreamFactory Javascript SDK (for example with FireBug).
Set Up CRUD Permissions to MongoHQ by User Role
Lastly, if your application requires different data permissions for different user roles, you can easily configure CRUD access for your various MongoHQ collections.
For example, let’s say we have a ‘sales rep’ role and we only want to grant READ and WRITE access to a collection called ‘opportunities.’ We don’t want to allow a ‘sales rep’ user to be able to access other collections and we don’t want a ‘sales rep’ user to create or delete data in the ‘opportunities’ collection.
Setting up data access permissions only takes a few seconds. In this example, you’d simply create a Role called ‘sales rep.’ Then you’d click on the Roles tab on the left-hand side of the screen and assign ‘Read and Write’ service access to opportunities for the MongoHQ service that we just set up. That’s it!
FAQs
How do I connect DreamFactory to my MongoHQ database?
Log into your DreamFactory admin console, go to the Services tab, and create a new service. Select NoSQL DB as the type and MongoHQ as the NoSQL type. Enter your MongoHQ connection string, database name, username, and password, then save. DreamFactory automatically generates a full REST API for your MongoHQ database with 14 API calls covering GET, POST, PATCH, PUT, and DELETE operations.
Do I need to write my own API to access MongoHQ data?
No. DreamFactory automatically creates a ready-to-go REST API as soon as you save your MongoHQ connection settings. You can make standard API calls and get JSON documents back from the server. You can also browse and test the API directly in DreamFactory using the built-in Swagger documentation before writing any client-side code.
Can I set different data permissions for different users?
Yes. DreamFactory lets you apply CRUD permissions at the collection level based on user role. For example, you can create a "sales rep" role and grant only read and write access to a specific collection while blocking access to all other collections. You configure this in the Roles tab by assigning service access rules per role and per collection.
Terence Bennett, CEO of DreamFactory, has a wealth of experience in government IT systems and Google Cloud. His impressive background includes being a former U.S. Navy Intelligence Officer and a former member of Google's Red Team. Prior to becoming CEO, he served as COO at DreamFactory Software.