

The DreamFactory Services Platform (DSP) provides a flexible and powerful backend for your mobile apps. If you don’t have a DreamFactory account, sign up here. One of the key features is the ability to integrate any number of remote web services, and access them directly through the DreamFactory REST API. In this blog post we'll walk through the process of setting up and invoking a remote web service.
By letting your DSP manage the service, you can hide many of the complex details of the remote web service from the client. Service credentials, URL params, and headers can all be configured once and stored on the DSP. This provides the client a simple, secure, and consistent way to access any remote web service via the DreamFactory REST API.
Testing the Remote Service
For this example we'll be using a web service at edmunds.com for retrieving make and model information on cars. You can substitute some other web service if you like. First we need to verify access to the edmunds.com API. To use the API you can go to https://developer.edmunds.com to create an account and request an API key. We are displaying a fake API key to protect our real one, your key would be different.
From the edmunds API docs, we know already that the URL for our service is
https://api.edmunds.com/v1/api/vehicle/makerespository/findall
and it requires two URL parameters named fmt and api_key.
fmt is just the return data type, and should be set to json. api_key is assigned to you by edmunds.com when you signed up for API access.
The full URL with params is then
https://api.edmunds.com/v1/api/vehicle/makerespository/findall?fmt=json&api_key=7rjqgtvjryjks5zjn482fpg2
At this point you should be able to use curl or a similar tool to retrieve data from this URL. Remember this URL as we'll refer to it later. Now that we know the service is working we need to integrate it with our DSP by adding it as a remote web service.
Creating the Service on your DSP
To create a new web service, go to the Services tab in the admin console. Click the Create New button in the upper right and complete the form as shown below.
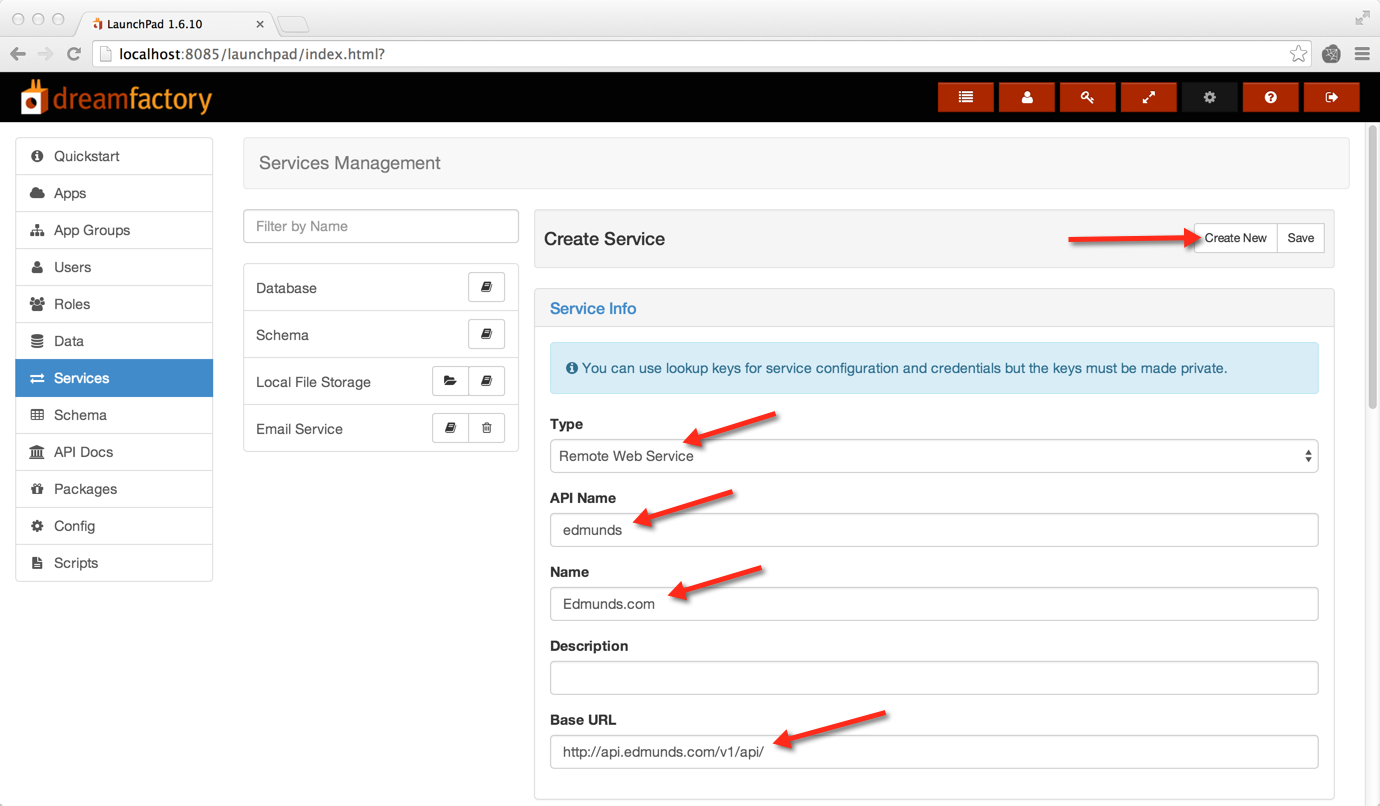

Type: Remote Web Service
Service Name: Edmunds.com
Service Name can be whatever you like and will be the name displayed in the list of services in the admin console.
API Name: edmunds
Api Name can be whatever you like and will be the name used by the REST API. If we set it to 'edmunds' then the service URL will be https://dsp-foo.cloud.dreamfactory.com/rest/edmunds. You would replace dsp-foo with the name of your own DSP.
Base URL: https://api.edmunds.com/v1/api/
When a client makes a request to the service, the DSP will append everything after /edmunds in the service URL to the base URL before invoking the web service. The DSP is acting as a proxy for the remote web service. An important benefit of this setup is that web service credentials (in this case api_key) are never exposed to the client.
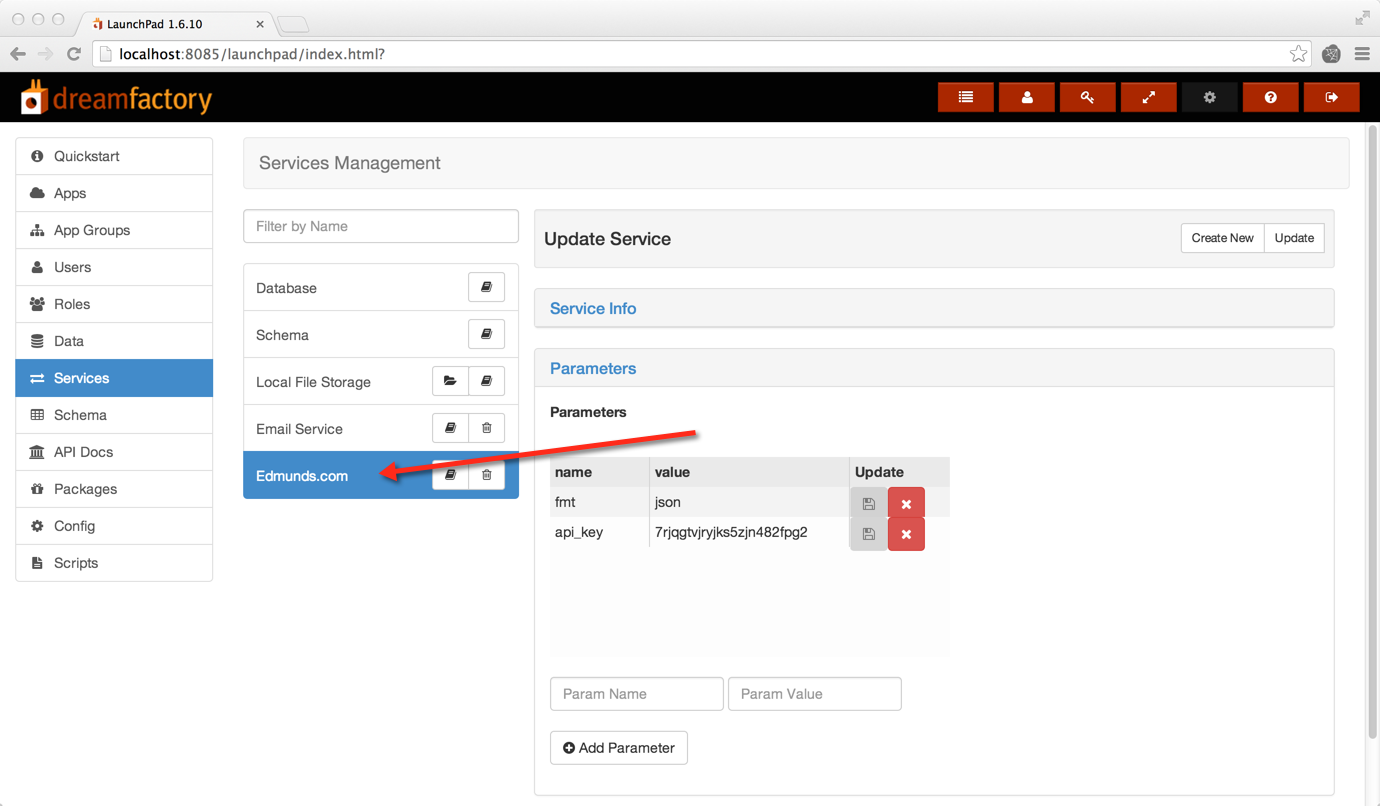
Parameter #1: name=fmt, value=json
Parameter #2: name=api_key, value=7rjqgtvjryjks5zjn482fpg2
After completing the form click the Save button and the new service should show up in the list.
Creating an App to Call the New Service
Now we can create an app that uses our new web service. Go to the Applications tab in the admin console and click the New button in the upper right. Complete the form as shown, making sure the API name for the app is 'edmundsapp' because the API call in the sample code below includes the app name.
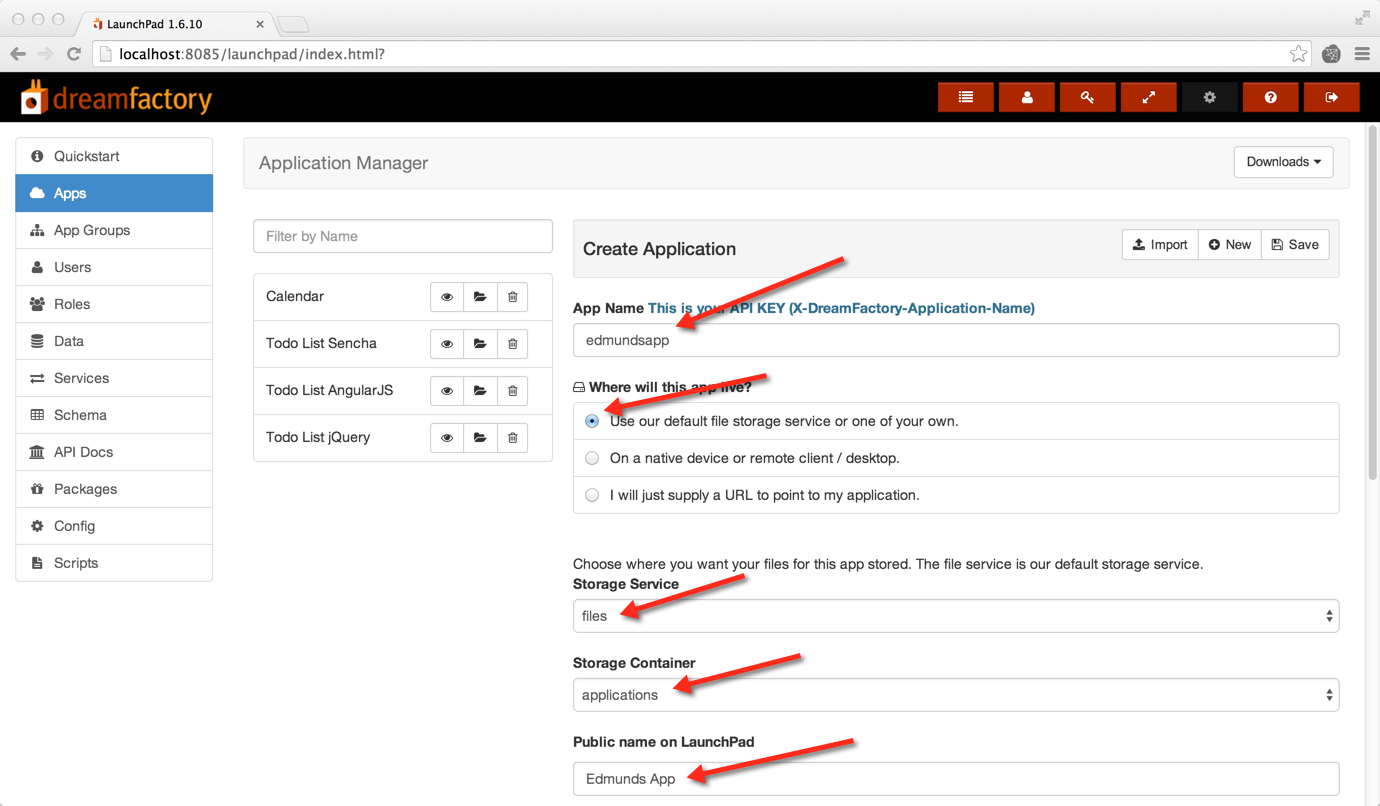
Click the Save button then select the new app in the list. Click the file manager icon to the right of the app name in the list. You will see that an index.html file has been created for you. Click the edit icon next to index.html and replace the contents of that file with the code below and click the Save button.
<html>
<head>
<meta charset="utf-8">
<script type="text/javascript" src="//code.jquery.com/jquery-1.9.1.min.js"></script>
<script type="text/javascript">
$(document).ready(function() {$.ajax({
dataType:'json',
url:location.protocol + '//' + location.host + '/rest/edmunds/vehicle/makerepository/findall',
data:'app_name=edmundsapp',
cache:false,
success:function (response) {
$('#RESULTS_CONTAINER').html(JSON.stringify(response));
},
error:function (response) {
alert("There was an error loading the make and model data.");
}
});
});
</script>
</head>
<body>
<p>Edmunds.com via DreamFactory</p>
<br/>
<div id="RESULTS_CONTAINER"> </div>
</body>
</html>
The DSP Service Proxy
After the page loads there is a single ajax call to the edmunds.com service at
location.protocol + '//' + location.host + '/rest/edmunds/vehicle/makerepository/findall'
location.host points to the DSP that is hosting the app. You could point to some other hard-coded host if you wanted. The service URL is /rest/edmunds. When the DSP receives this GET request, it appends everything after the /edmunds to the service's base URL as in
https://api.edmunds.com/v1/api/ + vehicle/makerepository/findall
The DSP then appends the service's configured URL params fmt and api_key which gives the complete URL
https://api.edmunds.com/v1/api/vehicle/makerespository/findall?fmt=json&api_key=7rjqgtvjryjks5zjn482fpg
Hopefully this URL looks familiar. It's the one I told you to remember a while ago. The DSP sends the request to edmunds.com and forwards the response back to the client.
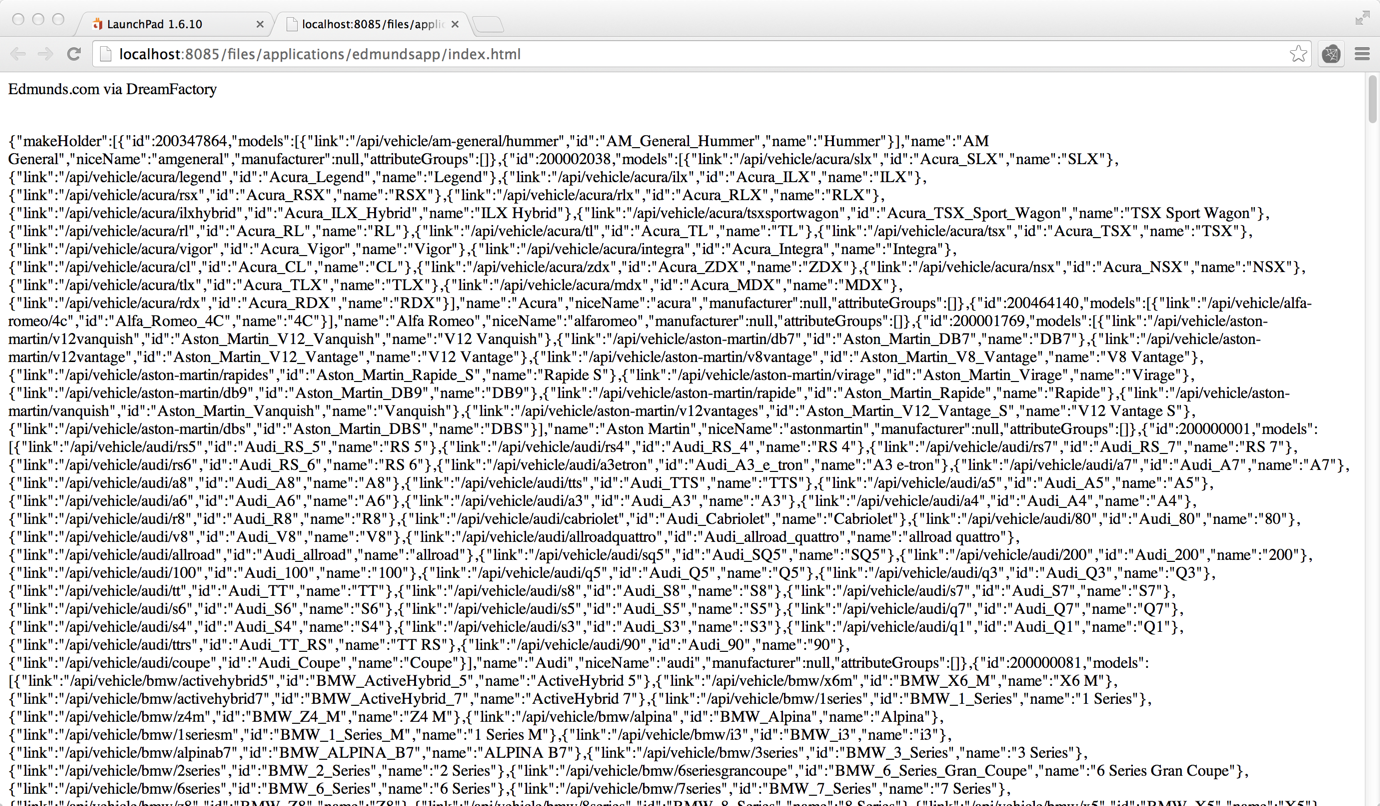
Running the App
Click the Edmunds App in the list and click the preview (eye) icon to the right of the app name. If all goes well you will see the returned data in the preview area. You can use your browser's developer tools to look at the details of the request and response.
Using the admin console you can add as many services as you want and access them through the DreamFactory REST API. You can also control which apps and users have access to each service. Please leave any questions or comments and we'll get back to you ASAP!