


This is part one of a three part tutorial. In this tutorial we will setup an AngularJS application on our local machine, install the DreamFactory AngularJS User Management Module, and connect to a DSP that lives on the DreamFactory Hosted System. Then we'll show you how to implement Authentication using the DreamFactory User Management Module. All the files for this tutorial can be downloaded from here. Let's get started!
Things we'll need.
- A Hosted DreamFactory Services Platform (DSP).
- Node & Node Package Manager(NPM)
- Bower
- Grunt *optional*
Step One: Obtaining a DreamFactory Services Platform.
Before you configure the backend of the application, you need to get a DSP (short for DreamFactory Services Platform). If you don't already have one, sign up for a free hosted DSP at DreamFactory and log into your account.
You can also install a DSP on your cloud or server of choice from Bitnami here.
Step Two: Login and Register your app.
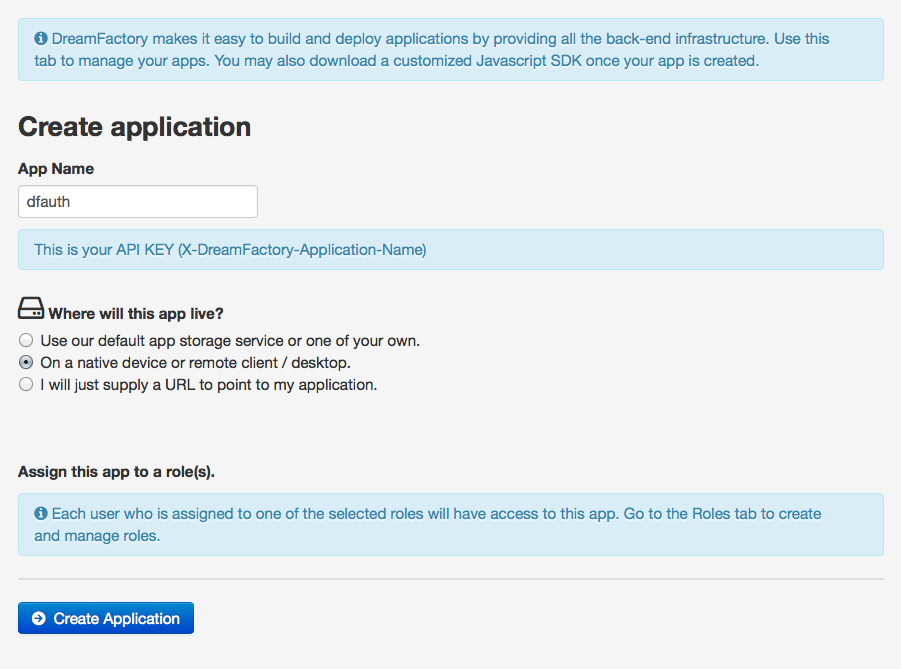
Log into your DSP if you haven't already and the register your app by clicking on the 'Apps' tab. Then click the 'Create New App' button in the upper right hand corner of your screen.
Enter 'dfauth' for your app name and select the radio button 'On a device or remote client / desktop'. Click the 'Create Application' button and you're done.

Step Three: Enable CORS
Click the 'Config' tab. Locate the CORS setup section. Click 'Add New Host' and enter * to allow connections from all sources.
**NOTE** This is inherently unsafe as you will allow any domain to make calls to your DSP. We will lock this down at the end of the tutorials.

Step Four: Application Setup
You can download the source for the project from here if you haven't already done so. Unzip the project on your local dev (MAMP/WAMP/LAMP) server and open the directory in your favorite IDE. We use PHPStorm. Alternatively, if you have Grunt installed, you can navigate to the root of your project and type 'grunt serve'. That will fire up a server to host the application instead of using MAMP, WAMP, or LAMP.
Open your terminal/console and navigate to the root of your project. You will need to run the following commands:
npm install
and then:
bower install
These commands will install the dependencies for this project including the DreamFactory User Management module. We have taken the liberty of including the script for the DreamFactory User Management module in the index.html
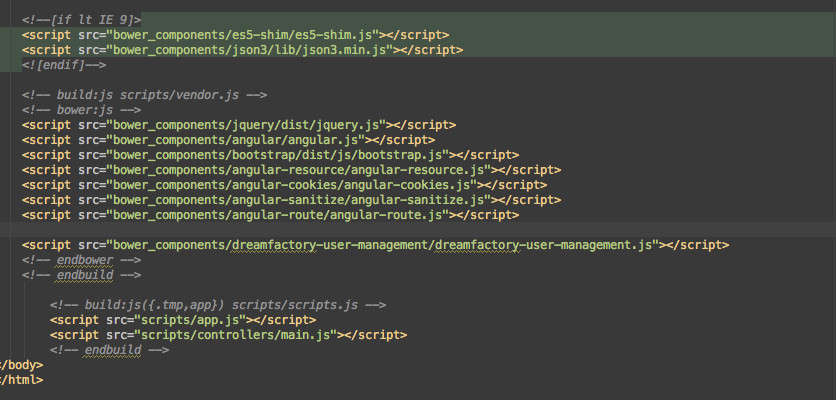 index.html
as well as injecting it into the app:
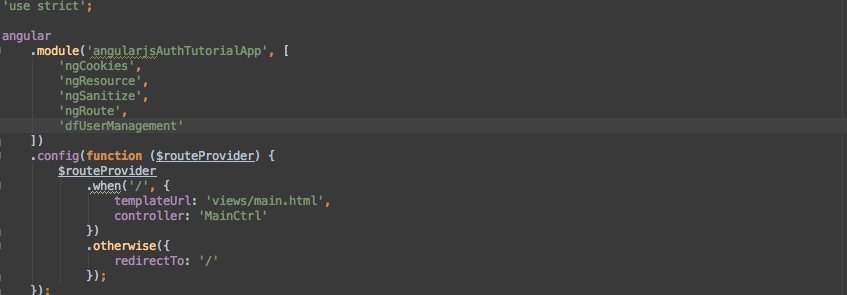 app.js
We are going to have to tell the app where our DSP is located. We do that through two constants that we set in our app.js file. Those constants are as follows:
    .constant('DSP_URL', ENTER_YOUR_DSP_URL_HERE)

    .constant('DSP_API_KEY', ENTER_YOUR_API_KEY_HERE)
and they go here:
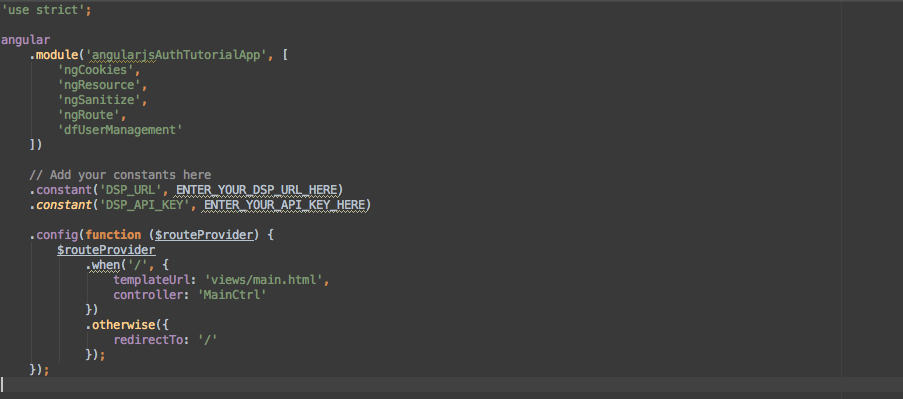 app.js
The DSP_URL is simply the location of your DSP. If you're using our hosted system for this tutorial then the url should resemble something like:
https://dsp-DSP_NAME.cloud.dreamfactory.com
The api key is the name we registered our application with. In the case of this tutorial it will be 'dfauth'. So your constants should look like this now:
    .constant('DSP_URL', 'https://dsp-DSP_NAME.cloud.dreamfactory.com')

    .constant('DSP_API_KEY', 'dfauth')
**Note** We use AngularJS's array notation when defining our controllers, services, directives, config blocks, etc because it allows us to minify our code with Grunt for faster loading. For more information check out Grunt.
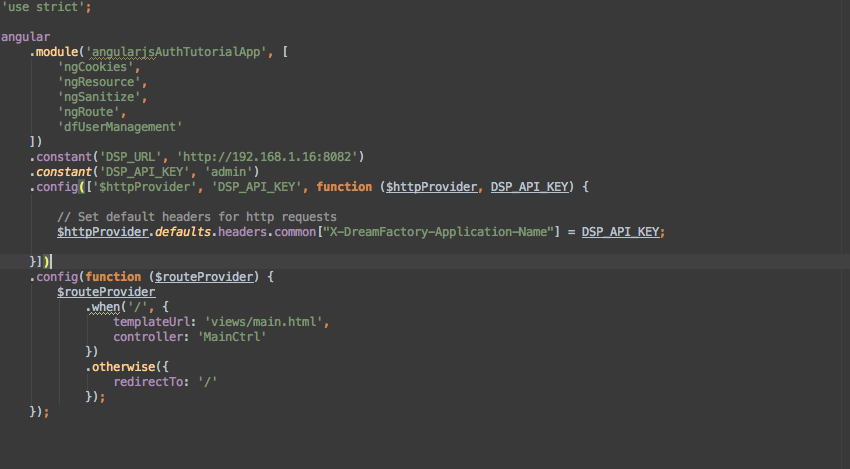
The DSP requires a specific header called 'X-DreamFactory-Application-Name' in order to respond to requests from your application. To configure AngularJS to use this header we have to configure the AngularJS $httpProvider. This is very easy to do. Simply add the following code after the constants:
.config(['$httpProvider', 'DSP_API_KEY', function($httpProvider, DSP_API_KEY) {$httpProvider.defaults.headers.common['X-DreamFactory-Application-Name'] = DSP_API_KEY;
}])
That was easy. Now AngularJS will add this header to all $http requests that we make. Notice that we have injected our constant for the 'DSP_API_KEY'.
**Note** The modules provided by DreamFactory for AngularJS need to have specific information pertaining to your DSP and application. The DSP's url and the api key(which is just the name we registered our app with) are generally the only two pieces of information the modules need to communicate with your DSP.
Now our Application and DreamFactory Modules can make requests to the correct DSP and the DSP will know what application is making the requests.
Our app.js file should now resemble the image below:
 app.js
The Application setup in now complete. Let's make it authenticate someone.
Step Five: Implementing Authentication Routes
In order to authenticate someone in your application we'll need two things. A way for them to login and a way for them to logout once they are finished. The DreamFactory User Management module provides directives complete with forms to do this for you. All we have to do is setup some authentication routes and corresponding controllers. Don't worry. It's pretty straight forward.
**Note** The DreamFactory User Management module also provides a mechanism for you to login/logout with your own forms. We'll cover this in the last tutorial.
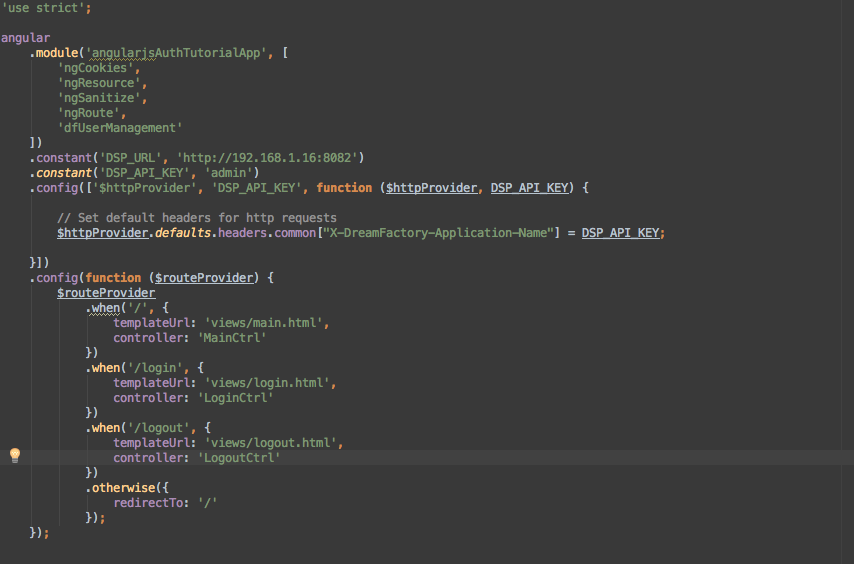
First lets set up the routes. We need a login route and a logout route. So add the following code to the router in app.js:
    .when('/login', {

        templateUrl: 'views/login.html',

        controller: 'LoginCtrl'

    })

    .when('/logout', {

        templateUrl: 'views/logout.html',

        controller: 'LogoutCtrl'

    })
Your app.js file should now resemble this:
 app.js
Step Six: Adding Authentication Controllers
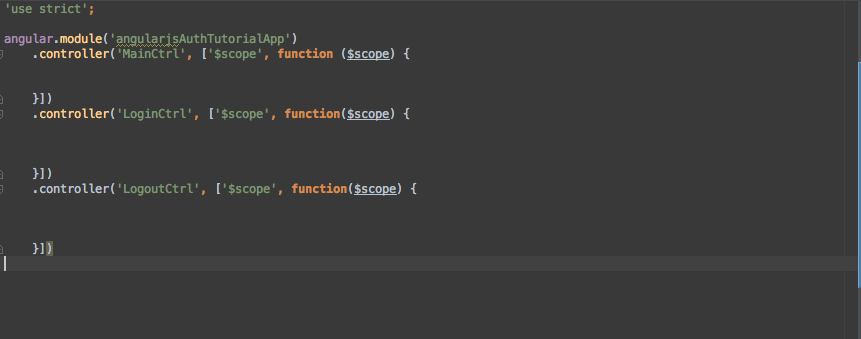
Now lets add the corresponding controllers. Open the file /scripts/controllers/main.js and add the following code:
.controller('LoginCtrl', ['$scope', function($scope) {}])
.controller('LogoutCtrl', ['$scope', function($scope) {}]);
Your main.js file should resemble the image below:
 main.js
Step Seven: Add Authentication Templates
We need to add the template files for these two routes. Create a login.html file and a logout.html file in the views folder. Then we'll add our directives to these templates to handle our authentication for us. Let's start with login.html.
Open login.html and add the following code:
<dreamfactory-user-login></dreamfactory-user-login>
That's it. Now open the logout.html file and add the following code:
<dreamfactory-user-logout></dreamfactory-user-logout>
Step Eight: Add some navigation
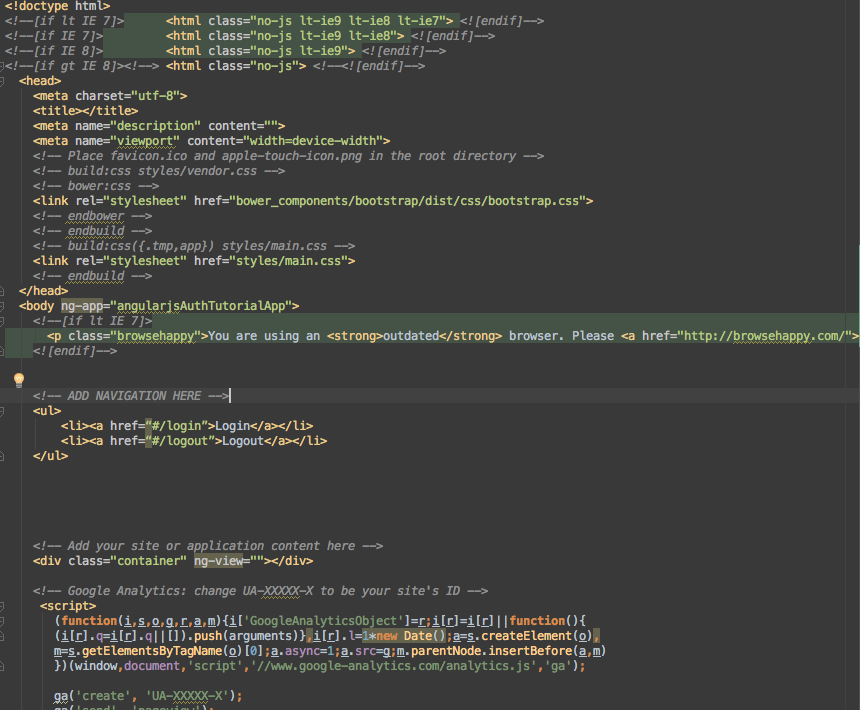
Now that we have our routes, controllers, and templates in place we need to allow the user to get to these pages. Let's add some navigation to the index.html file. Open index.html and add the following code in the body:
    <ul>

        <li><a href="#/login">Login</a></li>

        <li><a href="#/logout">Logout</a></li>

    </ul>
Your index html file should resemble the image below:
 index.html
If we step back and look at our app in the browser we should see this:
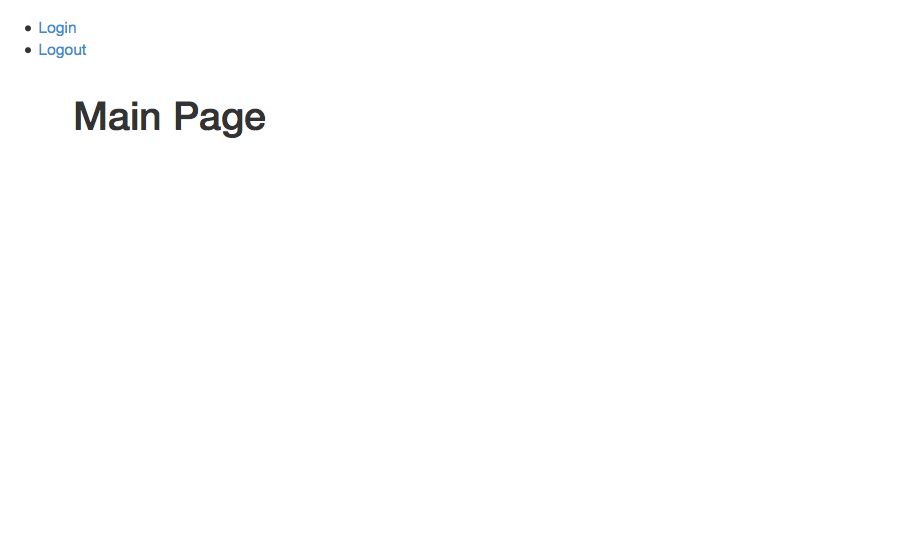
Not very pretty. And not effective. Let's navigate to the login page. Click on the login link. The form we see is rendered by the DreamFactory User Management module. If you open your web browser's console and then enter your DSP user credentials in the form you should see a POST to the DSP url we set as our constant way back in Step Four. And if you entered your credentials correctly you will see a response code of 200. Eureka! It works. But it doesn't do much. Let's explore the DreamFactory User Management module's services to make our app more useful.
**Note** If you followed the steps above correctly and your login was successfully tested in the step above you should be able to find the 'CurrentUserObj' stored in a cookie.
Step Nine: Exploring the DreamFactory User Management module
Our app can authenticate via the DreamFactory User Management module but it doesn't do us any good at this point. We need to use that information to make our app do something. And do something it shall. The DreamFactory User Management module provides us with two services. A data service that tracks the current user and an events service that allows us to listen to events that it emits. First let's route the user back to the home page on a successful login. Open the main.js file that contains our LoginCtrl controller. First we'll inject the DreamFactory User Management module's event service named 'UserEventsService'. Modify your LoginCtrl controller to the following:
.controller('LoginCtrl', ['$scope', '$location', 'UserEventsService', function($scope, $location, UserEventsService) {$scope.$on(UserEventsService.login.loginSuccess, function(e, userDataObj) {
$location.url('/');
}
}])
Your LoginCtrl controller should now resemble this:
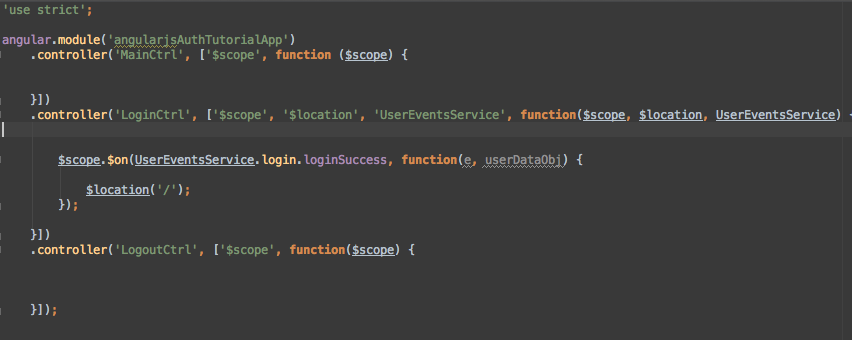 main.js
If you're wondering why there is a second parameter for the event callback function above; AngularJS can pass data with an event and the DreamFactory User Management module takes advantage of this. In the example above the second parameter 'userDataObj' will contain our user's data when we receive a 'UserEventsService.login.loginSuccess' message. We don't use the passed data here. So don't worry about it right now. Reload the app and let's try logging in again. If everything worked we should have been rerouted to the home page of our application. If we click the logout button at this point you should see a DELETE request in the console but we get stuck at the logout template. Let's make our LogoutCtrl controller respond to the logout event and route us back to the home page. Open the main.js file and find the LogoutCtrl controller. Modify it to be:
.controller('LogoutCtrl', ['$scope', '$location', 'UserEventsService', function($scope, $location, UserEventsService) {$scope.$on(UserEventsService.logout.logoutSuccess, function(e, userDataObj) {
$location.url('/');
});
}]);
Your LogoutCtrl controller should now resemble this:
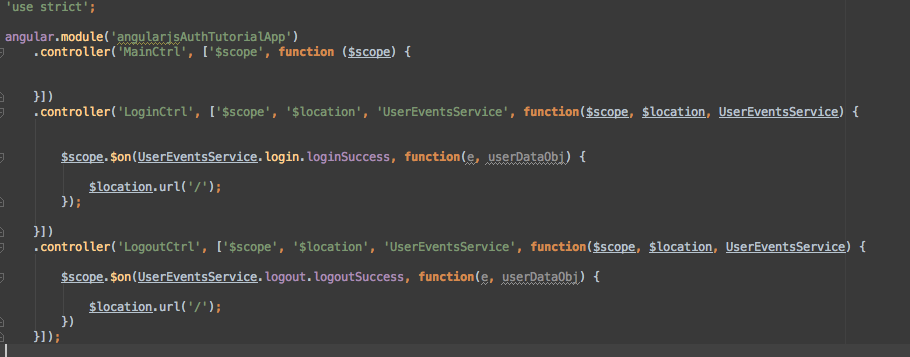 main.js
This should be starting to look familiar.
Let's reload the app from the root and try logging in and logging out. Everything should work as expected.
**Note** You may be thinking 'How do I know what the events the UserEventsService offers are or how they are namespaced?'. Visit the github page for more information about the UserEventsService and the UserDataService provided by this module.
Ok. So, we can login and logout through the module and our app can respond to the module events. How about an example of dealing with a user's data? Or protecting routes? Or a least presenting the proper navigation based on login status? Check out all that and more in Part Two of The Authenticated App With AngularJS + DreamFactory User Management Module.
Related reading: Building an AngularJS application using DreamFactory