

The 1.5 release of the DreamFactory Services Platform (DSP) introduces the ability to easily create server-side filters that control database access at the record level. Click here for an introduction to this feature, including how to restrict access by OwnerId. As a follow up to that post I want to give you a detailed example of how you can use this feature to "assign" records to certain users based on the value of a particular field. I'm not going to present an app that uses this feature, but I will show you all the details of how to set it up for your own DSP. Once everything is configured properly, the server will apply the filters you defined to all API calls.
For this example consider a simple table named Opportunity that has the following schema. If you like you can import this JSON into your DSP from the Schema tab in the DSP admin console.
{

    "table": [

        {

            "name": "opportunity",

            "label": "Opportunity",

            "plural": "Opportunities",

            "field": [

                {

                    "name": "id",

                    "label": "Id",

                    "type": "id"

                },

                {

                    "name": "name",

                    "label": "Name",

                    "type": "string",

                    "size": 80,

                    "allow_null": false

                },

                {

                    "name": "amount",

                    "label": "Amount",

                    "type": "money",

                    "decimals": 0

                }

            ]

        }

    ]

}
There is a currency field named amount that contains the amount of the opportunity. Let's say that we want opportunities where 0 <= amount < 10000 to be handled by user group A, and opportunities where 10000 <= amount < 50000 to be handled by user group B. Group A should have no access to group B's records and vice versa. This is accomplished by configuring two roles in the system, one for group A and another for group B. When you create a role you select which users are assigned to that role and also the filter that role should enforce. In this case the filter is "amount >= 0 and amount < 10000" for group A or "amount >= 10000 and amount < 50000" for group B. Note that admin users will have access to all records regardless of amount, because roles and filters do not apply to admin users.
Step 1 - Add some users
To make this example worthwhile we need at least two non-admin users. One of them will be assigned the role for group A and the other will be assigned the role for group B. You can have as many users as you like in either group. We are just showing one in each for this example. Go to the users tab in the admin console and click Create New User. Complete the form as shown then click Save. Don't worry about assigning the role yet, we'll do that in a minute. Click "Set password manually" and enter a password for the new user to avoid requiring confirmation.
Now repeat this for the second user. Names are not important just make sure they are not an admin user.
Step 2 - Create the Roles
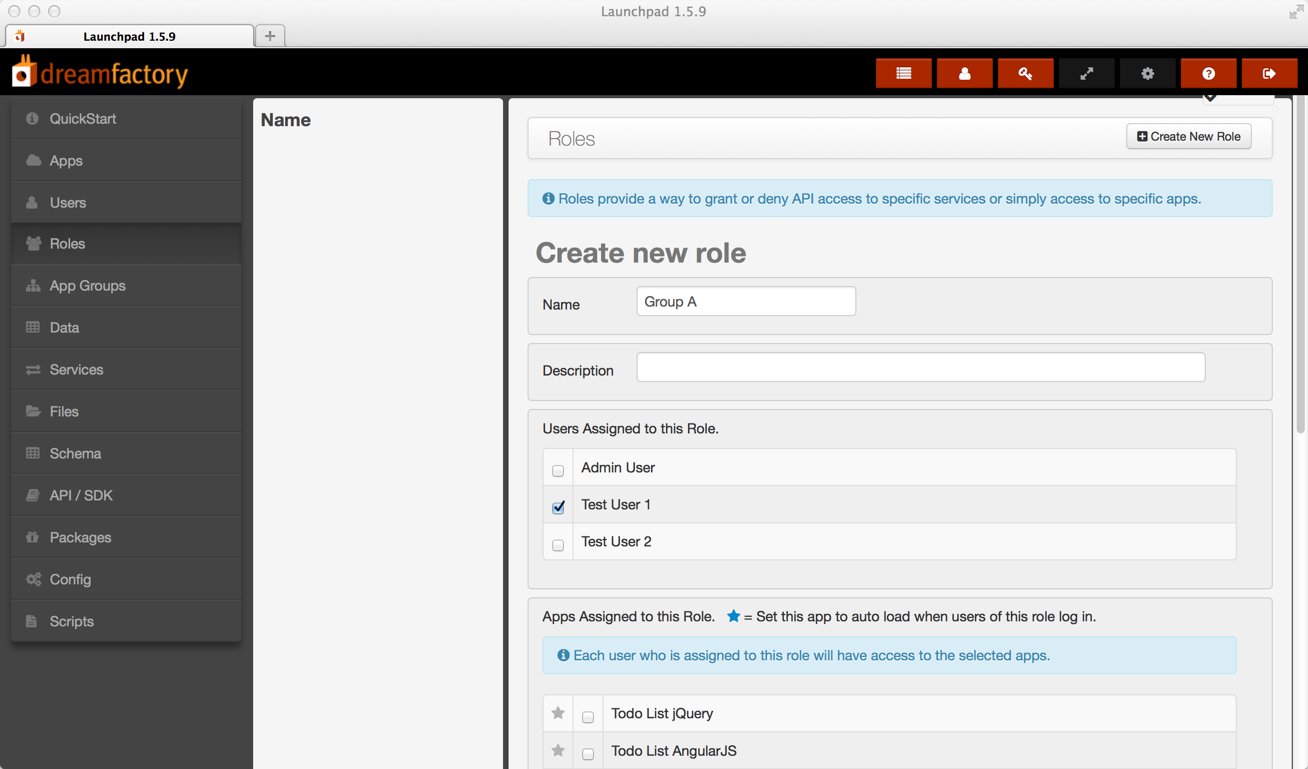
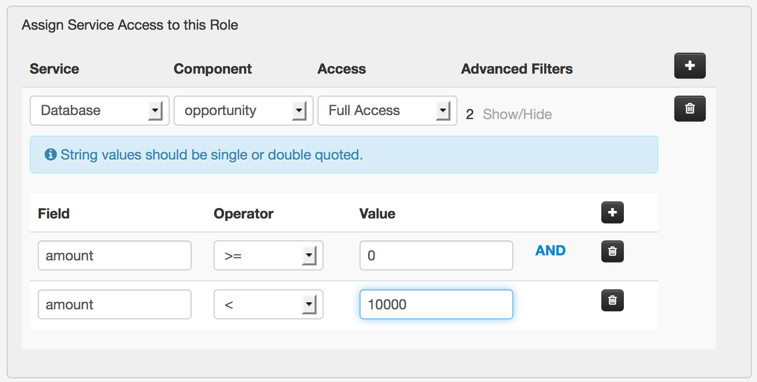
Now comes the fun part. As part of creating the roles you create the filters that determine who has access to what records. In your admin console go to the Roles tab and click Create New Role. The first role is for group A and we will assign the first user to this role. Complete the form as shown. Check the Active checkbox to make the role active. You want to grant full access to the database table named opportunity. Select Database from the Service menu and opportunity from that Component menu. To add a filter click the Show/Hide under Advanced Filters and create a filter for "amount >= 0 and amount < 10000". The AND is accomplished by clicking the plus icon to add a new line to the filter. You can click to select AND or OR but not both in the same filter.
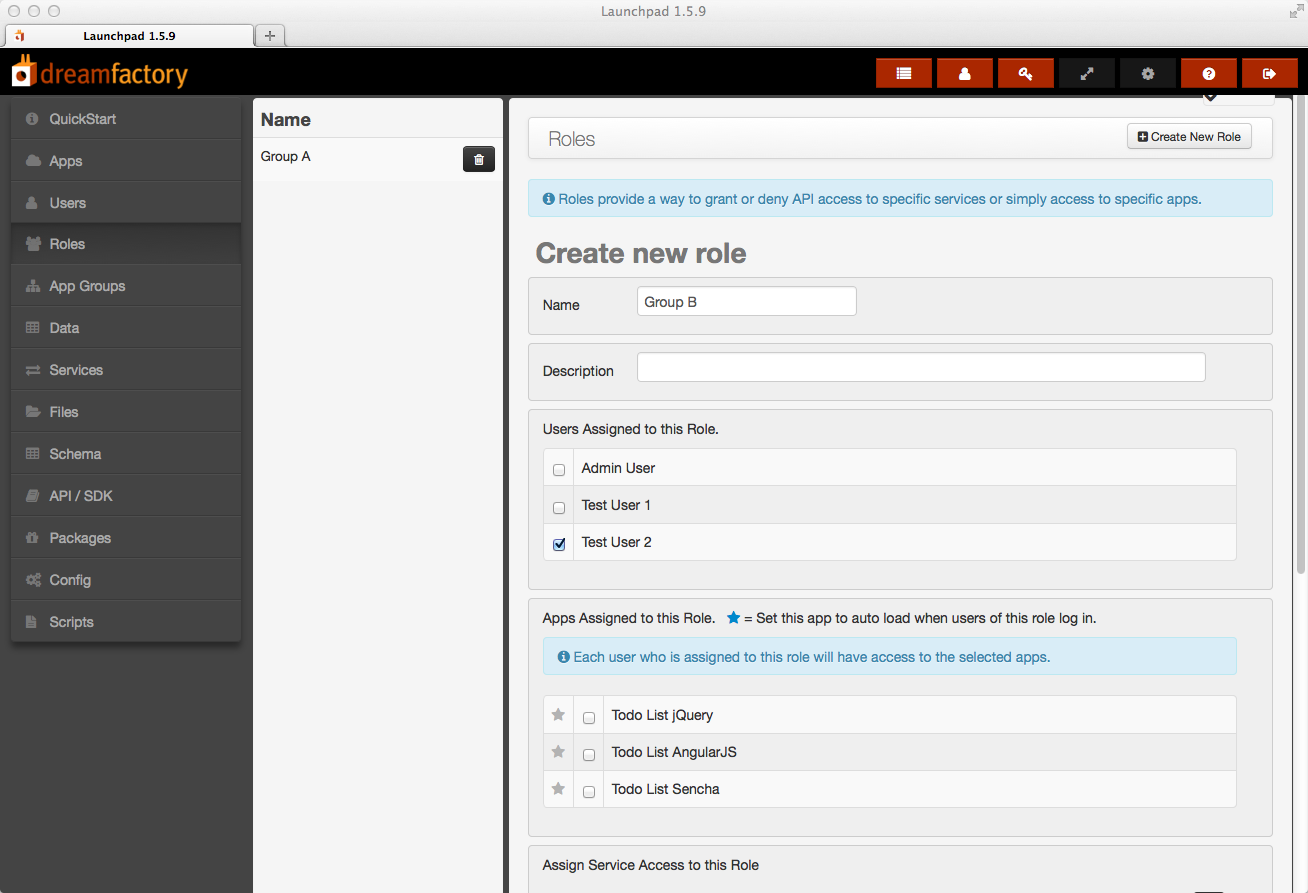
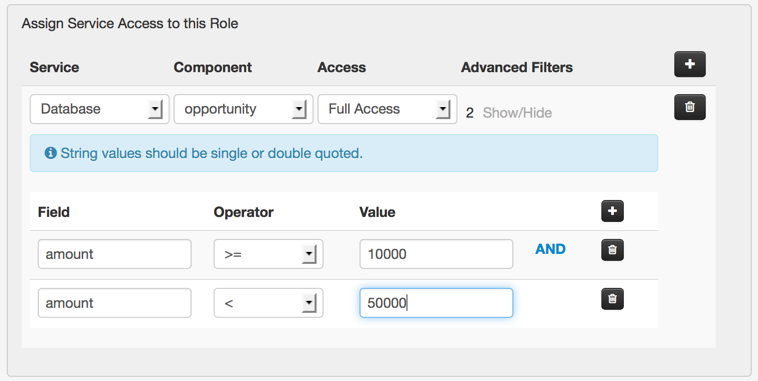
Click Save then repeat to create the role for group B which is assigned to the second user with filter set to "amount >= 10000 and amount < 50000".
Click Save and you should see both roles in the list in the second column of the admin console. That's it! Now when you log in as a group A user and make an API call to access the Opportunity table you will only be allowed access to records where 0 <= amount < 10000. When you log in as a group B user you will only be allowed access to records where 10000 <= amount < 50000. If you log in as an admin user you can see all records.
Step 3 - Add Lookup Keys
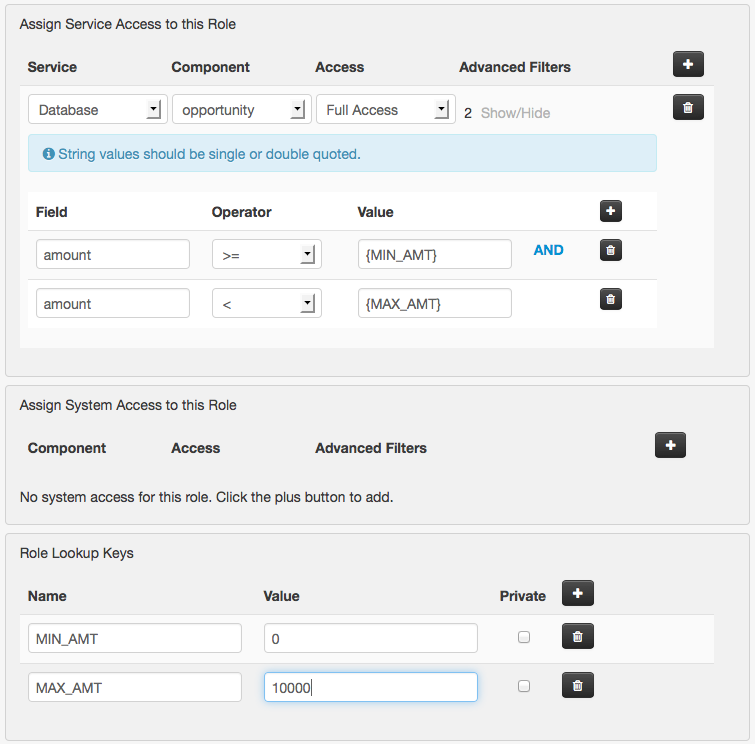
Having the values 0, 10000, and 50000 hardcoded in the role filters is somewhat limiting and could become hard to maintain. A better way to handle this is to add lookup keys to each role that define these values. A lookup key is simply a key-value pair that can be used as a value in the role filters. We want to define lookups on each role named MIN_AMT and MAX_AMT. Select the group A role and add a lookup key named MIN_AMT with value set to 0. Add a second lookup key named MAX_AMT with value set to 10000. Under the service access section change the filter to "amount >= {MIN_AMT} and amount < {MAX_AMT}". The lookup key names must always be in curly brackets.
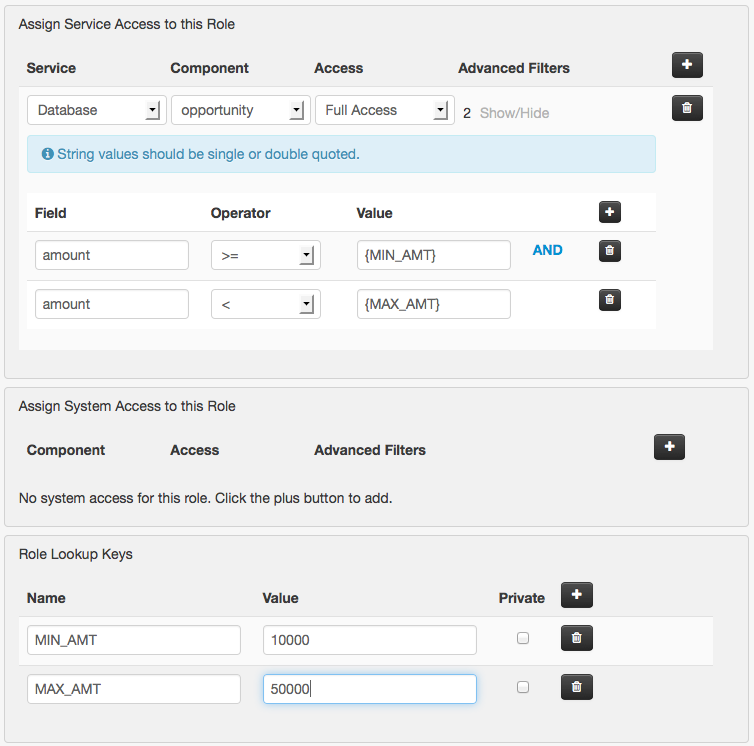
Now select the group B role and add the same lookup keys and filter. This time set MIN_AMT to 10000 and MAX_AMT to 50000.
An awesome feature of lookup keys is that they obey a hierarchy starting with user lookups, then role lookups, and finally global lookups (global lookup keys are defined in the DSP config settings in the admin console). This makes it easy to implement a system of overrides and default values. For example, if I wanted a special MIN_AMT and MAX_AMT for a certain user in group A I could add user lookup keys to that user that would apply only to that one user. For that user only, the role filter would be evaluated using the user lookup keys, NOT the role lookup keys. Other users in group A would be bound to the values defined in the role lookup keys. If you wanted to make 0 and 10000 the default values for all users then you could define them in the global lookup keys. These values would be used for any users with no matching user or role lookup keys defined.
The system is designed to be incredibly flexible. You just have to decide the best setup for users, roles, filters, and lookup keys for your organization. You can change these settings at any time, for one, some, or all users. Of course we are here to help should you have any questions about how to do this.