Terence Bennett - April 29, 2014Welcome back to those of you who have been following this tutorial series. To those of you just joining us I highly recommend starting at the beginning of the series with The Authenticated App with AngularJS + DreamFactory User Management. When we finished part two our application was starting to do some cool stuff. We could authenticate through the DreamFactory User Management Module without writing any code to communicate with the server and then we used that authenticated user to conditionally show navigation. We also were able to protect a route from url hacking using the ‘resolve’ property in Angular’s $routeProvider.
**Note** In the previous tutorial we used the resolve property of the AngularJS router to check if we had a logged in user to access a specific page. If we didn’t have a logged in user we redirected the user to the login page. While this can be effective in keeping the average application user out of restricted areas you should never rely on this method to provide actual data protection. This technique is used to maintain the user experience. We don’t want people to show up at a page without data because they don’t have access to that page or aren’t logged in to the app. The rule I follow is…’don’t load it if they are not supposed to see it’. DSP Roles will help with this functionality but to truly build custom access to data you’ll need to employ the much more powerful Server Side Scripting feature that’s available in DSP version 1.5.x. There is a tutorial for this on the way. Shameless feature plug ended 🙂
These are all great features but we have to implement one more thing in order to make the app effective. You guessed it, Error Handling. We’re going to explore AngularJS’s $exceptionHandler to communicate errors for us. We’ll also take a look at building a custom error object and how to handle the errors thrown by the DreamFactory User Management Module. And because it’s no fun for you to use your app alone; we’ll implement the DreamFactory User Management Module’s ‘Register Users’ facility.
We have updated the project app to include Twitter’s Bootstrap to make for a more pleasant user experience and this will also help us with the functionality of the errors we display to the user. You can download the updated project from here to follow along. If you’re downloading the updated project don’t forget to change the DSP_URL constant in app.js to point at your DSP and run npm install and bower install at the root of your project. If you’re going to continue using your project from the previous tutorials you need to run bower update at the root of your project to get the latest DreamFactory User Mangement module as we have updated a few things. Let’s get started!
Step One: Understanding the AngularJS $exceptionHandler
AngularJS comes built in with a service called $exceptionHandler. It’s ready to go out of the box and can be seen in action by simply throwing an error from your code. Let’s try that out.
Open /scripts/controllers/main.js and add the following code to your MainCtrl controller:
         if (true != false) {
            throw 'True is not equal to false';
         }
Make sure you’re on the app’s home page and refresh the browser. If you open your console you should see an error with the string that we specified. When the error is thrown the application stops executing its current task and logs the error to the console. This is the default implementation of $exceptionHandler and it leaves our app in a pretty ugly state. Let’s do something more useful with this service.
Step Two: Implementing a Decorator with $exceptionHandler
A decorator is simply a way to add/augment some functionality of a service. Let’s change how the $exceptionHandler deals with an error by configuring it with a decorator. Open your scripts/app.js file and add the following code:
         .config(['$provide', function($provide) {
             $provide.decorator('$exceptionHandler', ['$delegate', function($delegate) {
                 return function(exception) {


                 }
             }])
         }]);
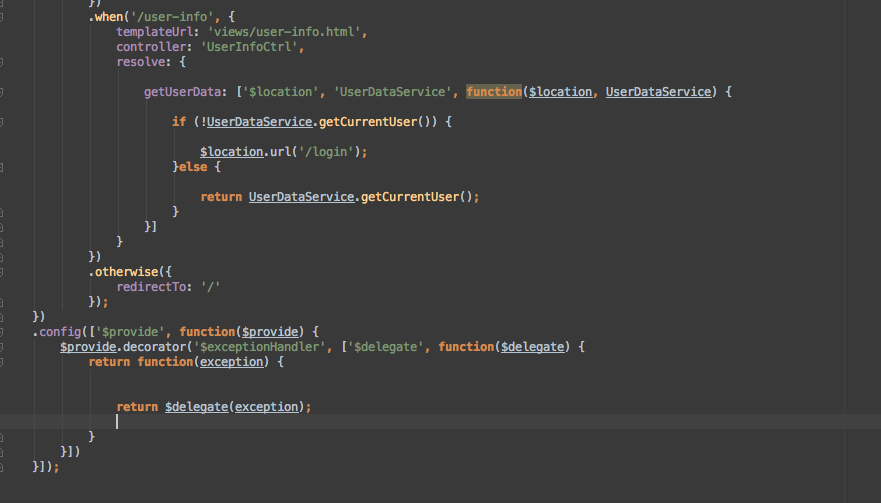
Your app.js should resemble:


If you refresh your app at this point you’ll notice that it has stopped execution because of the error…but no error appeared in the console. Why? If we look back at the code we added to app.js you’ll notice that we inject ‘$delegate’. This is the original service implementation of $exceptionHandler. We also have access to the actual exception that would be passed to the $exceptionHandler. That exception param is the message from the ‘throw’ statement. To allow the $exceptionHandler to continue on its way we have to return the $delegate with its exception. Let’s do that.
Add the following code to your decorator:
return $delegate(exception);
Your app.js file should resemble:
If you refresh your app on the home page you should now see that our error message in the console has returned. Let’s try augmenting that message.
Modify your decorator in app.js to:
        .config(['$provide', function($provide) {
            $provide.decorator('$exceptionHandler', ['$delegate', function($delegate) {
                return function(exception) {

                exception += " modified";


                    return $delegate(exception);

                }
            }])
        }]);
Reload your app and have a look at the console. You should see the word modified appended to your error. That was pretty cool. But we can do more with it. A lot more.
Step Three: Creating and Using Custom Error Objects
So we can throw an error. We can, for lack of a better term, ‘intercept’ that error; augment the message included with that error and send it back to its default implementation. But what if we have different types of errors or want to know what part of the application threw the error. Maybe we don’t want to return to the original $exceptionHandler implementation. We can implement a custom object and pass that as the exception. We can then interrogate that object and act accordingly based on the information in that error object.
First and foremost. Remove the if statement and error code from our MainCtrl controller in main.js. Also, remove the exception += ' modified'; from our $exceptionHandler decorator. Let’s create a more useful scenario. We’re going to create a button that throws an error every nth time that it is clicked. This will give us the ability to simulate a situation where something works until we get ‘unexpected’ behavior. Then we’ll show an error that is contextual to the process that throws it. It’s easier than it sounds.
Add the following code to your MainCtrl in main.js
        $scope.timeForError = 2;
        $scope.counter = 0;

        $scope.btnClicker = function() {

        $scope.counter++;

        if ($scope.counter % $scope.timeForError == 0) {
            throw {
                message: 'There was an error'
                }
            }
        }
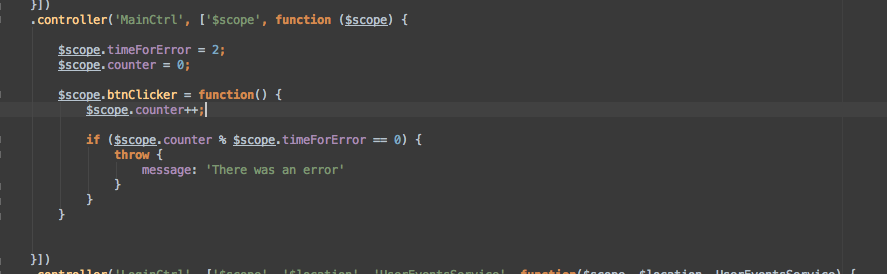
Your MainCtrl should resemble:
Modify your /views/main.html to:
        <div class="col-xs-10 col-xs-offset-1">
            <h1>Main App Page</h1>
            <p>{{currentUser.display_name}}</p>
            <p>{{counter}}</p>
            <button type="button" data-ng-click="btnClicker()">Click Me</button>
        </div>
Due to some Blog formatting issues we can’t use double curly brackets in our code. We have to escape the brackets with a slash. Don’t put the slashes in your code. Just enter the code as a normal angular expression.
Main.html should now look like this:

Reload the app and click the button we just made a few times. You should see an Error fire every 2 clicks and that error should be an object. Rather than letting the browser log the error object to the console, let’s present it to the user.
Step Four: Displaying Errors to the User
We need a place to display the error to the users. Because these errors are application errors and not form/contextual errors we’ll want a consistent look and feel in how we display them. The app will need a more or less global place to do this. Let’s create an Error controller to handle displaying of these kinds of errors.
Add the following code to the end of your main.js:
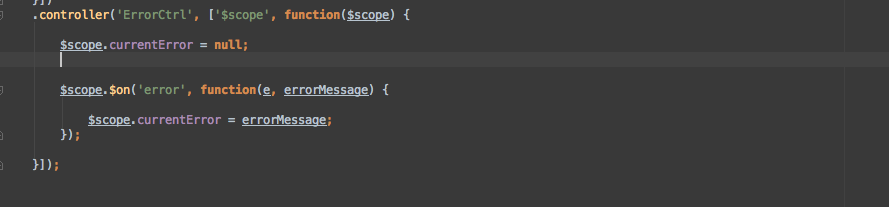
        .controller('ErrorCtrl', ['$scope', function($scope) {

            $scope.currentError = null;


        }]);
Your main.js should resemble:

Now we need to create a place to display the error. Open your index.html file and add the following code:
        <div class="container-fluid">
            <div data-ng-controller="ErrorCtrl">
                <div data-ng-if="currentError" class="alert alert-danger alert-dismissable">
                    {{currentError}}
                </div>
            </div>
        </div>
Due to some Blog formatting issues we can’t use double curly brackets in our code. We have to escape the brackets with a slash. Don’t put the slashes in your code. Just enter the code as a normal angular expression.
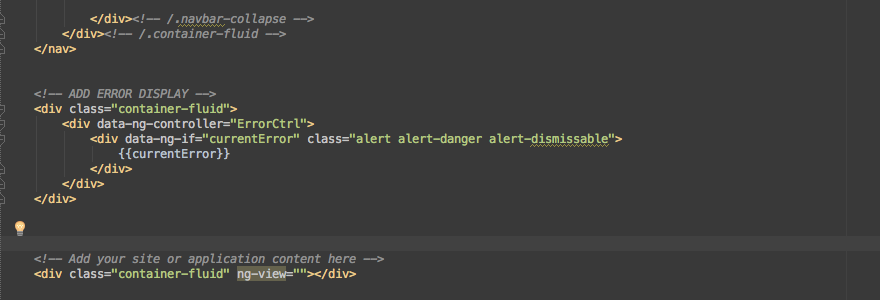
Your index.html should resemble:
All that’s left to do is communicate the error to the ErrorCtrl. We’ll do that via messaging.
Modify the $exceptionHandler decorator in app.js to:
        .config(['$provide', function($provide) {
            $provide.decorator('$exceptionHandler', ['$delegate', '$injector', function($delegate, $injector) {
                return function(exception) {


                    $injector.invoke(['$rootScope', function($rootScope) {

                        $rootScope.$broadcast('error', exception.message);
                    }]);


                    return $delegate(exception);

                }
            }])
        }]);
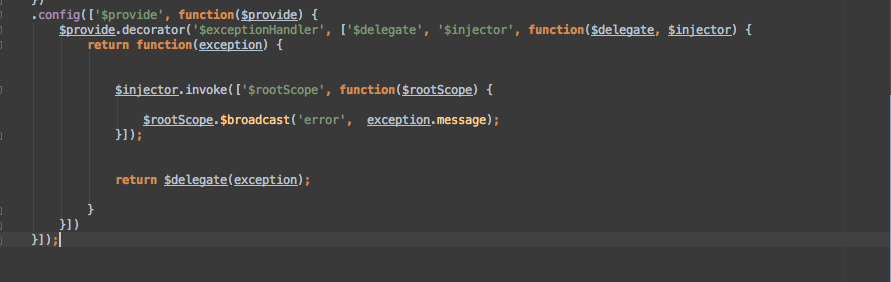
Your app.js should resemble:
We’ve injected the AngularJS ‘$injector’ because we’ll need it to instantiate ‘$rootScope’ inside of our config in order to successfully $broadcast the message to the ErrorCtrl.
Now modify your ErrorCtrl in main.js to listen for the message:
        .controller('ErrorCtrl', ['$scope', function($scope) {

            $scope.currentError = null;


            $scope.$on('error', function(e, errorMessage) {

                $scope.currentError = errorMessage;
            });

        }]);
Your ErrorCtrl should resemble:
Reload the app and give the button a few clicks. We should see an error pop up at the top of the screen. Let’s give the user the ability to close this error.
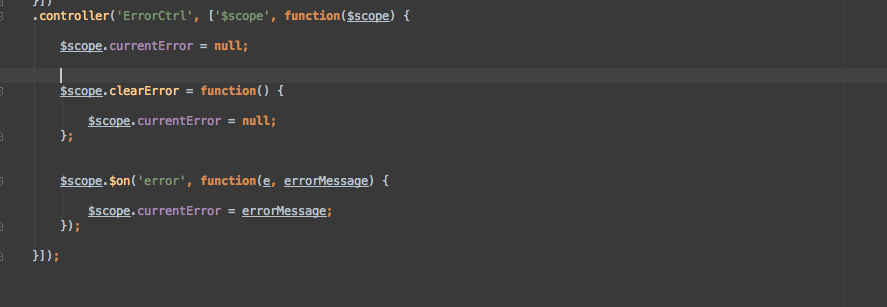
Modify your ErrorCtrl to:
        .controller('ErrorCtrl', ['$scope', function($scope) {

            $scope.currentError = null;

            $scope.clearError = function () {
                $scope.currentError = null;
            }

            $scope.$on('error', function(e, errorMessage) {

                $scope.currentError = errorMessage;
            });

        }]);
Your ErrorCtrl should resemble:
And we’ll need a button for them to click on to close the error. So modify the error display section of your index.html to:
        <div class="container-fluid">
            <div data-ng-controller="ErrorCtrl">
                <div data-ng-if="currentError" class="alert alert-danger alert-dismissable">
                    <button type="button" class="close" data-ng-click="clearError()" aria-hidden="true">×</button>
                    {{currentError}}
                </div>
            </div>
        </div>
Due to some Blog formatting issues we can’t use double curly brackets in our code. We have to escape the brackets with a slash. Don’t put the slashes in your code. Just enter the code as a normal angular expression.
Reload the app and give the button a few clicks. An error should pop up. If you click the ‘X’ on the right hand side it should disappear. Upon giving the button a few more clicks the error should reappear and can be dismissed the same as the last. As it stands right now we don’t make great use of the fact that we can throw errors represented as objects. Let’s do that now.
Step Five: The Complex Error Object and Dealing with DreamFactory User Management Errors
Up until now we have dealt with errors as strings and as a simple object containing a message. The simple object was just to prove that we can use objects when we throw errors. The DreamFactory User Management Module throws a slightly more complex error object that needs to be dealt with differently then the first two errors. Let’s clean up the project and get ready to handle the DreamFactory errors. First, we’ll get rid of our wayward error causing button in the MainCtrl. Go ahead and remove the code for this button. We’ll also need to visit /views/main.html and remove any code related to the button. When you are done your MainCtrl and main.html should resemble the images below:
MainCtrl in main.js
main.html

The DreamFactory User Management error objects look like this:
        {
            module: 'DreamFactory User Management',
            type: 'error',
            provider: 'dreamfactory',
            exception: EXCEPTION_HERE
        }
- module: This is the name of the module that threw the error.
- type: This is the kind of object. 99% of the time this is ‘error’ but sometimes there are other use cases.
- provider: Who is the vendor or provider of the module. Yes, 3rd parties can develop modules that work with DreamFactory
- exception: This is usually a data object returned from the server, although occasionally, it can be a string if a module throws the error explicitly instead propagating one from the server.
I know I said it would be complex…but this should be all the info a user needs. You can check your DSP logs for in depth error/debugging messages.
So how do we handle this. Let’s open up our app.js and modify our $exceptionHandler decorator to deal with objects of this type.
Modify your decorator to:
        .config(['$provide', function($provide) {
            $provide.decorator('$exceptionHandler', ['$delegate', '$injector', function($delegate, $injector) {
                return function(exception) {


                    if (exception.provider === 'dreamfactory') {

                        $injector.invoke(['$rootScope', function($rootScope) {

                            $rootScope.$broadcast('error:dreamfactory', exception);
                        }]);
                    }
                    else {

                        return $delegate(exception);
                    }
                }
            }])
        }]);
We’ve basically just created a router for exceptions. If it’s a ‘dreamfactory’ error we’ll pass it up to the ErrorCtrl to deal specifically with DreamFactory error messages. If there is no provider or it’s some other error that you have thrown then if falls through to the standard error handler. Let’s set up the ErrorCtrl to listen for and deal with DreamFactory error objects. I’ve commented the parseDreamFactoryError function for those who wish to know how it works. It doesn’t check for everything but should suffice for the tutorial.
Modify your ErrorCtrl to:
        .controller('ErrorCtrl', ['$scope', function($scope) {

            $scope.currentError = null;


            $scope.parseDreamFactoryError = function (errorDataObj) {

                // create a place to store the error
                var error = null;

                // If the exception type is a string we don't need to go any further
                // This was thrown explicitly by the module due to a module error
                // unrelated to the server
                if (typeof errorDataObj.exception === 'string') {

                    // store the error
                    // and we're done
                    error = errorDataObj.exception;

                // the exception is not a string
                // let's assume it came from the server
                }else {

                    // is there more than one error contained in the object
                    // I don't think I've ever encountered more than one message
                    // in the error object but we should check
                    if(errorDataObj.exception.data.error.length > 1) {

                        // yes. Let's loop through and concat these to display to the user
                        angular.forEach(errorDataObj.exception.data.error, function(obj) {

                        // add the message from each error obj to the error store
                        error += obj.message + 'n';
                    })

                // We have only one error message
                // 99.9% of the time this is the case
                }else {

                    // store that error message
                    error = errorDataObj.exception.data.error[0].message;
                    }
                }

                // return the built message to display to the user
                return errorDataObj.module + ': ' + error

            };

            $scope.clearError = function() {

                $scope.currentError = null;
            };


            $scope.$on('error:dreamfactory', function(e, errorMessageObj) {

                $scope.currentError = $scope.parseDreamFactoryError(errorMessageObj);
            });

        }]);
Now if we reload the app (and make sure you are logged out). If you enter a bogus email and password an error should be displayed with the correct error message. Yahtzee!
Step Six: Implementing the Registration Component
Now let’s let others blissfully enjoy the wonderful web experience we’ve created for them. First thing we’ll need to do is enable ‘Open Registration’ on our DSP. Then we’ll need to create a Role for the newly registered users. And finally, give them a place to register.
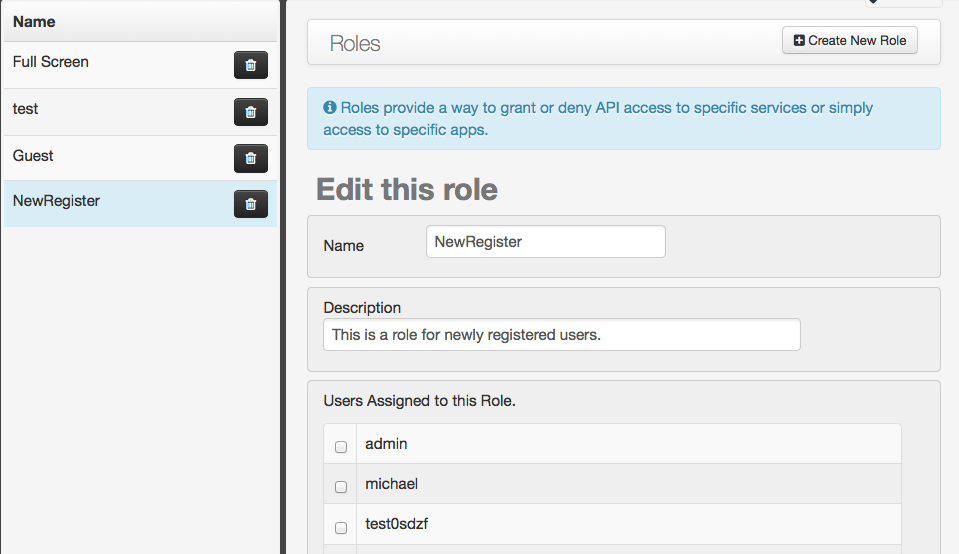
Log in to your DSP and navigate to the ‘Roles’ tab. Enter ‘NewRegister’ as the name for the role. Enter ‘Role for newly registered DF Auth users’ in the description. Scroll down to the ‘Apps assigned to this role’ section and click the checkbox next to ‘dfauth’. Finally scroll to the bottom and click the checkbox next to ‘Active’. Save the Role.
Your should see your newly created role in the Roles list.
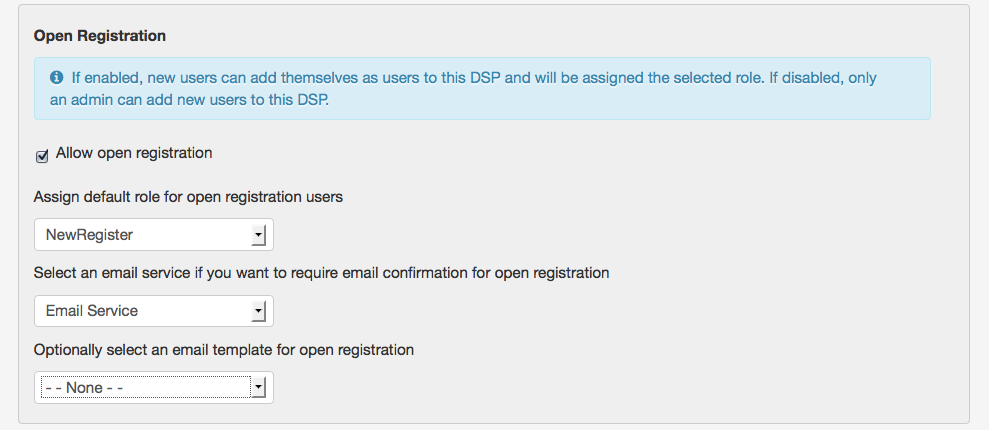
Click on the ‘Config’ tab located in the left-hand DSP menu and scroll down to the ‘Open Registration’ section. Click the checkbox for ‘Allow open registration’. Then select the ‘NewRegister’ role from the select box under ‘Assign default role for open registration users’. Save your configuration.
Your Open Registration configuration should resemble:
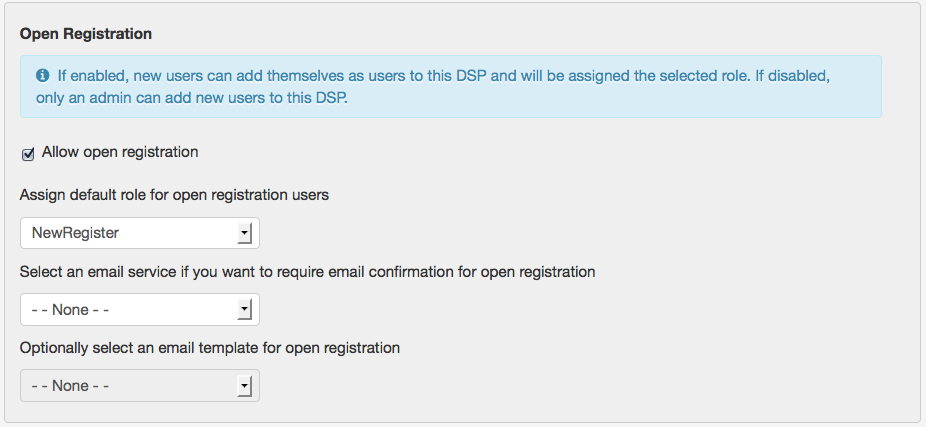
Open registration is now configured. When we implement open registration in our application a user will be able to fill out a form and register with our DSP. You may have noticed the other two fields in the DSP’s Open Registration configuration titled ‘Select an email service if you want to require email confirmation for open registration’ and ‘Optionally select an email template for open registration’. If you select an email service the DSP will send an email to the newly registered user requiring confirmation before activating their account. Right now we won’t require confirmation so we can set up the app easily. We’ll then go back and implement required confirmation.
Let’s go back to the app an implement Open Registration.
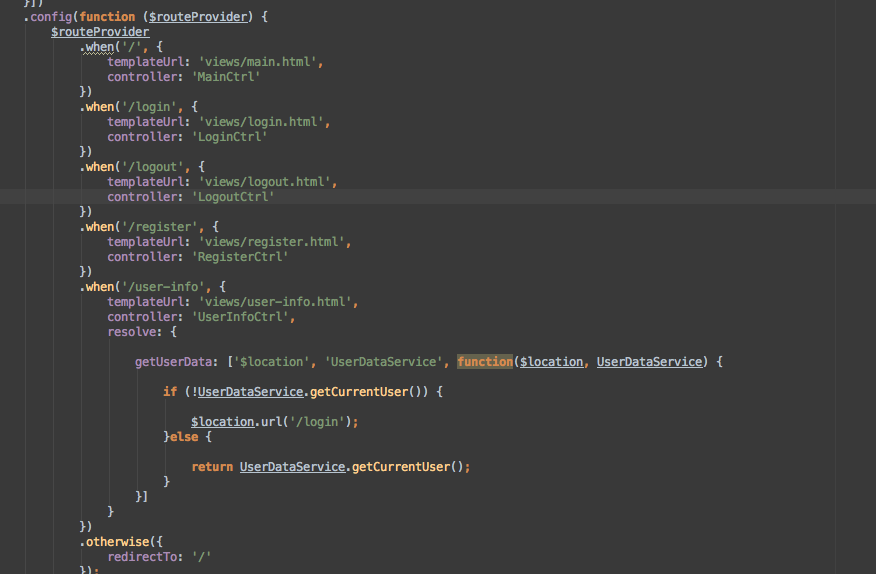
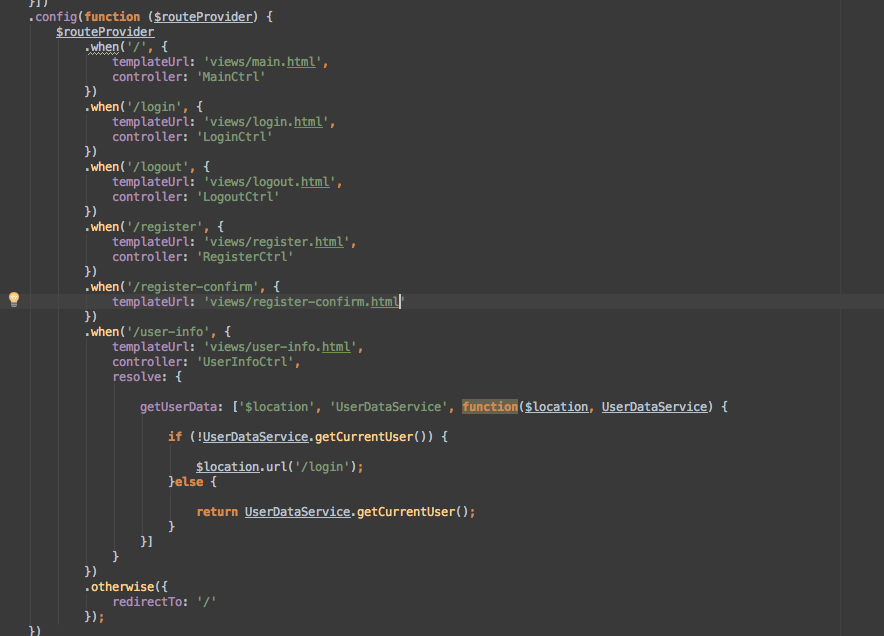
First we’ll need a route to handle registration. Add the following code to the router in your app.js file just under the logout route.
        .when('/register', {
            templateUrl: 'views/register.html',
            controller: 'RegisterCtrl'
        })
The router in your app.js file should resemble:
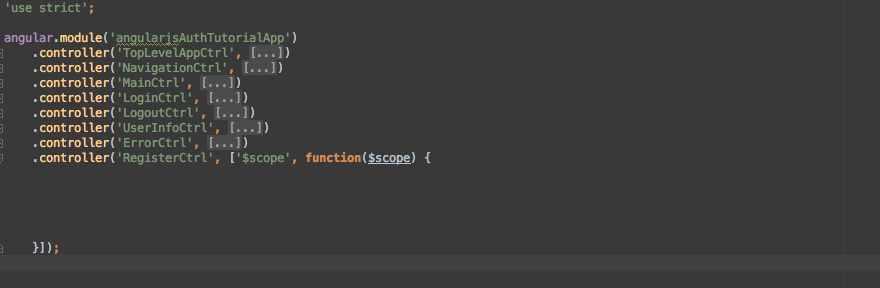
Now we’ll need to add a controller and template for our register route. Modify your main.js to include the RegisterCtrl controller:
        .controller('RegisterCtrl', ['$scope', function($scope) {


        }]);
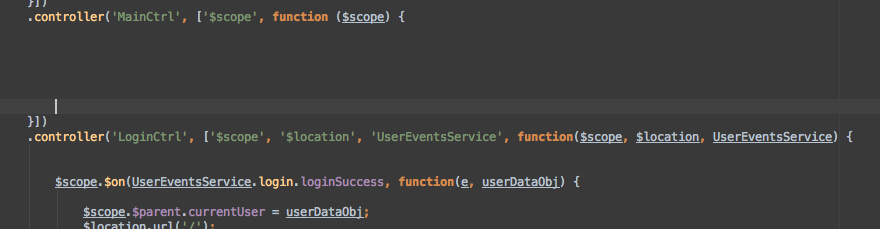
I’ve folded up my other controllers so you can see our RegisterCtrl. Your main.js should resemble:
Create the file register.html in your views folder and add the following code to that file:
<dreamfactory-register-user></dreamfactory-register-user>
Let’s also add the navigation so a user can actually get to the register page. Add the following link to your index.html navigation section:
<li data-ng-if="!hasUser" ><a href="#/register">Register</a></li>
The navigation section in your index.html should resemble:

If we reload the app at this point we should see the register button in our navigation. Clicking on the link should take us to a register page with our dreamfactory provided template. We could register a user at this point but our app won’t respond to any of the register events. Let’s get our app to do something when a user register successfully registers.
Step Seven: Responding to Register Events and Auto Login
We’ll want to auto login the user on successful registration. In order to do so we need to listen for the success event from registration and then call our login directive to do some work for us. Finally after our login directive works its magic we’ll need to set the user and redirect.
Modify your RegisterCtrl to:
        .controller('RegisterCtrl', ['$scope', '$location', 'UserEventsService', function($scope, $location, UserEventsService) {


            $scope.$on(UserEventsService.register.registerSuccess, function(e, userCredsObj) {

                $scope.$broadcast(UserEventsService.login.loginRequest, userCredsObj);
            });


            $scope.$on(UserEventsService.login.loginRequest, function(e, userDataObj) {

                $scope.$parent.currentUser = userDataObj;
                $location.url('/');
            })


        }]);
And modify your register.html to:
        <dreamfactory-register-user></dreamfactory-register-user>
        <dreamfactory-user-login options="{showTemplate: false}"></dreamfactory-user-login>
On successful registration we broadcast a message to our login directive with the user credentials object we received back from our register directive. Notice the options attribute on the login directive in the register template. We can pass an object with the property ‘showTemplate’ set to true or false and the directive will respectively render or not render its template. We do not need the template in this instance due to the fact that we already have the user credentials (no more user input is needed). We listen for a successful login message and then set the user and redirect to the home page.
You should be able to register a new user and upon successful registration be logged in and redirected to the app home page.
Step Eight: Handling Required Confirmation of Registration
We’re almost done with our registration component. One more scenario we need to account for is required confirmation. We’re going to want to redirect the user to a ‘Thank you’ page after registering and inform them that they should be receiving an email to confirm their registration. This is easy enough. First let’s modify our RegisterCtrl controller to handle the confirm registration message.
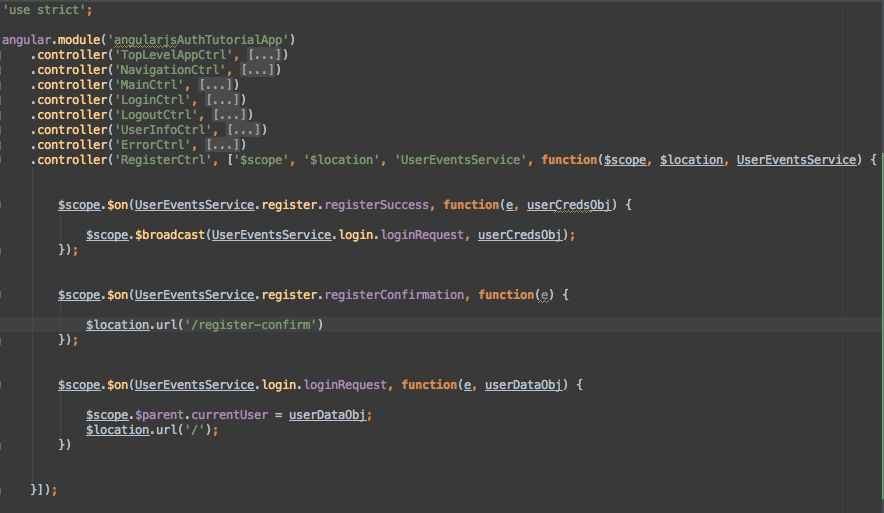
Modify your RegisterCtrl controller to:
        .controller('RegisterCtrl', ['$scope', '$location', 'UserEventsService', function($scope, $location,
        UserEventsService) {


            $scope.$on(UserEventsService.register.registerSuccess, function(e, userCredsObj) {

                $scope.$broadcast(UserEventsService.login.loginRequest, userCredsObj);
            });


            $scope.$on(UserEventsService.register.registerConfirmation, function(e) {

                $location.url('/register-confirm')
            });


            $scope.$on(UserEventsService.login.loginRequest, function(e, userDataObj) {

                $scope.$parent.currentUser = userDataObj;
                $location.url('/');
            })

        }]);
Your RegisterCtrl should resemble:
We’ll also need to add a route for registration confirmation as well as a template. Add the following code to your router in app.js:
        .when('/register-confirm', {
            templateUrl: 'views/register-confirm.html'
        })
Your router should resemble:
Now create register-confirm.html in our views folder and add the following code:
        <h3>Thanks For Registering with DF Auth</h3>

        <p>A confirmation email has been sent to the email address that you registered with. Upon confirmation you
        will
        be able to login to the application. Thanks!</p>

        <p><a href="#/login">Click here</a> to go to the login page</p>
You’ll notice that we did not add a controller as this route will only display our ‘Thank you’ template.
We’ll have to enable Open Registration to send a confirmation email. Log into your DSP and click the ‘Config’ tab in the left hand DSP menu. Scroll down to the Open Registration section. Selecting an email service will automatically enable registration confirmation. Select the default email service labeled ‘Email Service’. You do not have to choose an email template. The Email Service will send the default email template for user registration. Remember to save the configuration.
Your Open Registration config should resemble:
Make sure to logout if you are logged in and reload the app. When you register a new user you should be redirected to the thank you page. Shortly thereafter you should also receive an email at the address you registered with. If you click the link in the email you received you should be able to return to the app and login now.
This completes our three part tutorial on Authentication with AngularJS and the DreamFactory User Management module. We covered quite a bit in these tutorials. We have an application that can authenticate as well as register users against a DSP. We learned how to keep our AngularJS application modular and ready to accept other components. Thanks to our DreamFactory User Management module we communicated with a server without writing any code and can track a user through our application. We can use stored user data to augment the application such as with our navigation component, we learned some strategies for dealing with application data in general and we can handle errors in a useful way. Hopefully these tutorials will spark your creativity. The finished application with comments and all can be found here.
Be sure to check back for more tutorials and modules (there will be many) and as always comments and suggestions are welcome.
Bonus Content: Using the DreamFactory User Management Module with your own templates.
When we were demonstrating using the register directive with the login directive we passed an options object that turned off the template for the login directive. Then we broadcasted an event called UserEventsService.login.loginRequest along with a user credentials object. The login module received this message, ran its login routine and upon success emitted a ‘success message’ and a user data object. It also stored a cookie with our session data and user information. We invoked the login function and behavior without actually having to fill out the form and push a button. All three of the DreamFactory User Management modules’ directives can be used in a similar way. Simply include the directive in your html partial. Include the UserEventsService in your controller. Then broadcast a message to the directive using the UserEventsService. Check out the code below for an example.
        // Here is the definition for a login controller that uses its own form and
        // logs in via the DreamFactory User Management Modules login directive.
        // Notice we inject the 'UserEventsService'
        .controller('MyNewLoginCtrl, ['$scope', '$location', 'UserEventsService', function($scope, $location, UserEventsService) {

            // We set a scope variable to hold our credentials from our custom form
            // To authenticate against the DSP you'll need to pass the login directive
            // this information.
            // The DSP requires email and password to be listed as such. We can't rename
            // these properties to mail or pword. That won't work.

            $scope.userCreds = {
                email: null,
                password: null
            }

            // This is our submit function
            // it will broadcast our message to the login directive
            $scope.login = function() {

                // Here we broadcast our message
                // The UserEventsService is just an object of namespaced events.
                // UserEventsService.login.loginRequest really is just the string 'user:login:request'
                // These are namespaced like so in case we want to change them. Now we only have to change them
                // in one place..and when we want to use them we can just inject them as a service.
                $scope.$broadcast(UserEventsService.login.loginRequest, $scope.userCreds);

            }

            // Here we capture the successful message
            // same as before
            $scope.$on(UserEventsService.login.loginSuccess, function(e, userDataObj) {

                // assign the user
                $scope.$parent.currentUser = userDataObj;

                // redirect to home
                $location.url('/')
            });
        }])
Here is what your custom form may look like
        <!-- Add our DreamFactory User Management login directive with its template set false -->
        <dreamfactory-user-login options="{showTemplate: false}"></dreamfactory-user-login>

        <!-- Create your custom form -->
        <form name="login-form" data-ng-submit="login()">
            <div class="form-group">
                <input type="email" id="email" name="email" placeholder="Enter Email"
                data-ng-model="userCreds.email" class="form-control" required>
            </div>
            <div class="form-group">
                <input type="password" id="password" name="password" placeholder="Enter Password"
                data-ng-model="userCreds.password" class="form-control" required>
                </div>
            <!-- <input type="submit" value="submit"> -->
            <input class="button" id="submit-login" type="submit" value="Login">
        </form>
That’s all there is to it!
Make sure to pass an object to the options parameter of the DreamFactory User Management modules’ directives with a property ‘showTemplate’ set to false (the logout directive has no template so no need to tell it not to render).
Related reading:Build an AngularJS Application Using DreamFactory
Terence Bennett, CEO of DreamFactory, has a wealth of experience in government IT systems and Google Cloud. His impressive background includes being a former U.S. Navy Intelligence Officer and a former member of Google’s Red Team. Prior to becoming CEO, he served as COO at DreamFactory Software.