Terence Bennett - March 16, 2017DreamFactory and Verizon recently hosted a hackathon where developers built location-aware apps with DreamFactory, MapQuest, and Verizon Cloud. Adding MapQuest as an API in DreamFactory takes less than five minutes. In this short tutorial, we’ll show you how to securely store your MapQuest API in DreamFactory, call the MapQuest Geocoding API from a DreamFactory session, and easily add role-based access control to any MapQuest Geocoding API endpoint. Let’s get started!
Step 1: Get a free MapQuest API key
If you don’t already have a MapQuest API key, sign for a free MapQuest account here. You can learn about the various MapQuest APIs here. This tutorial covers the Geocoding API. You can set up other MapQuest APIs the same way.
Step 2: Get a free DreamFactory account
If you don’t have a DreamFactory instance, sign up for a free developer account here https://www.dreamfactory.com/signup or install DreamFactory from Bitnami or GitHub.
Step 3: Add MapQuest to DreamFactory as a Remote HTTP Service
Navigate to the ‘Services’ tab of the DreamFactory Admin Console and follow the steps below to set up a secure connection to MapQuest.
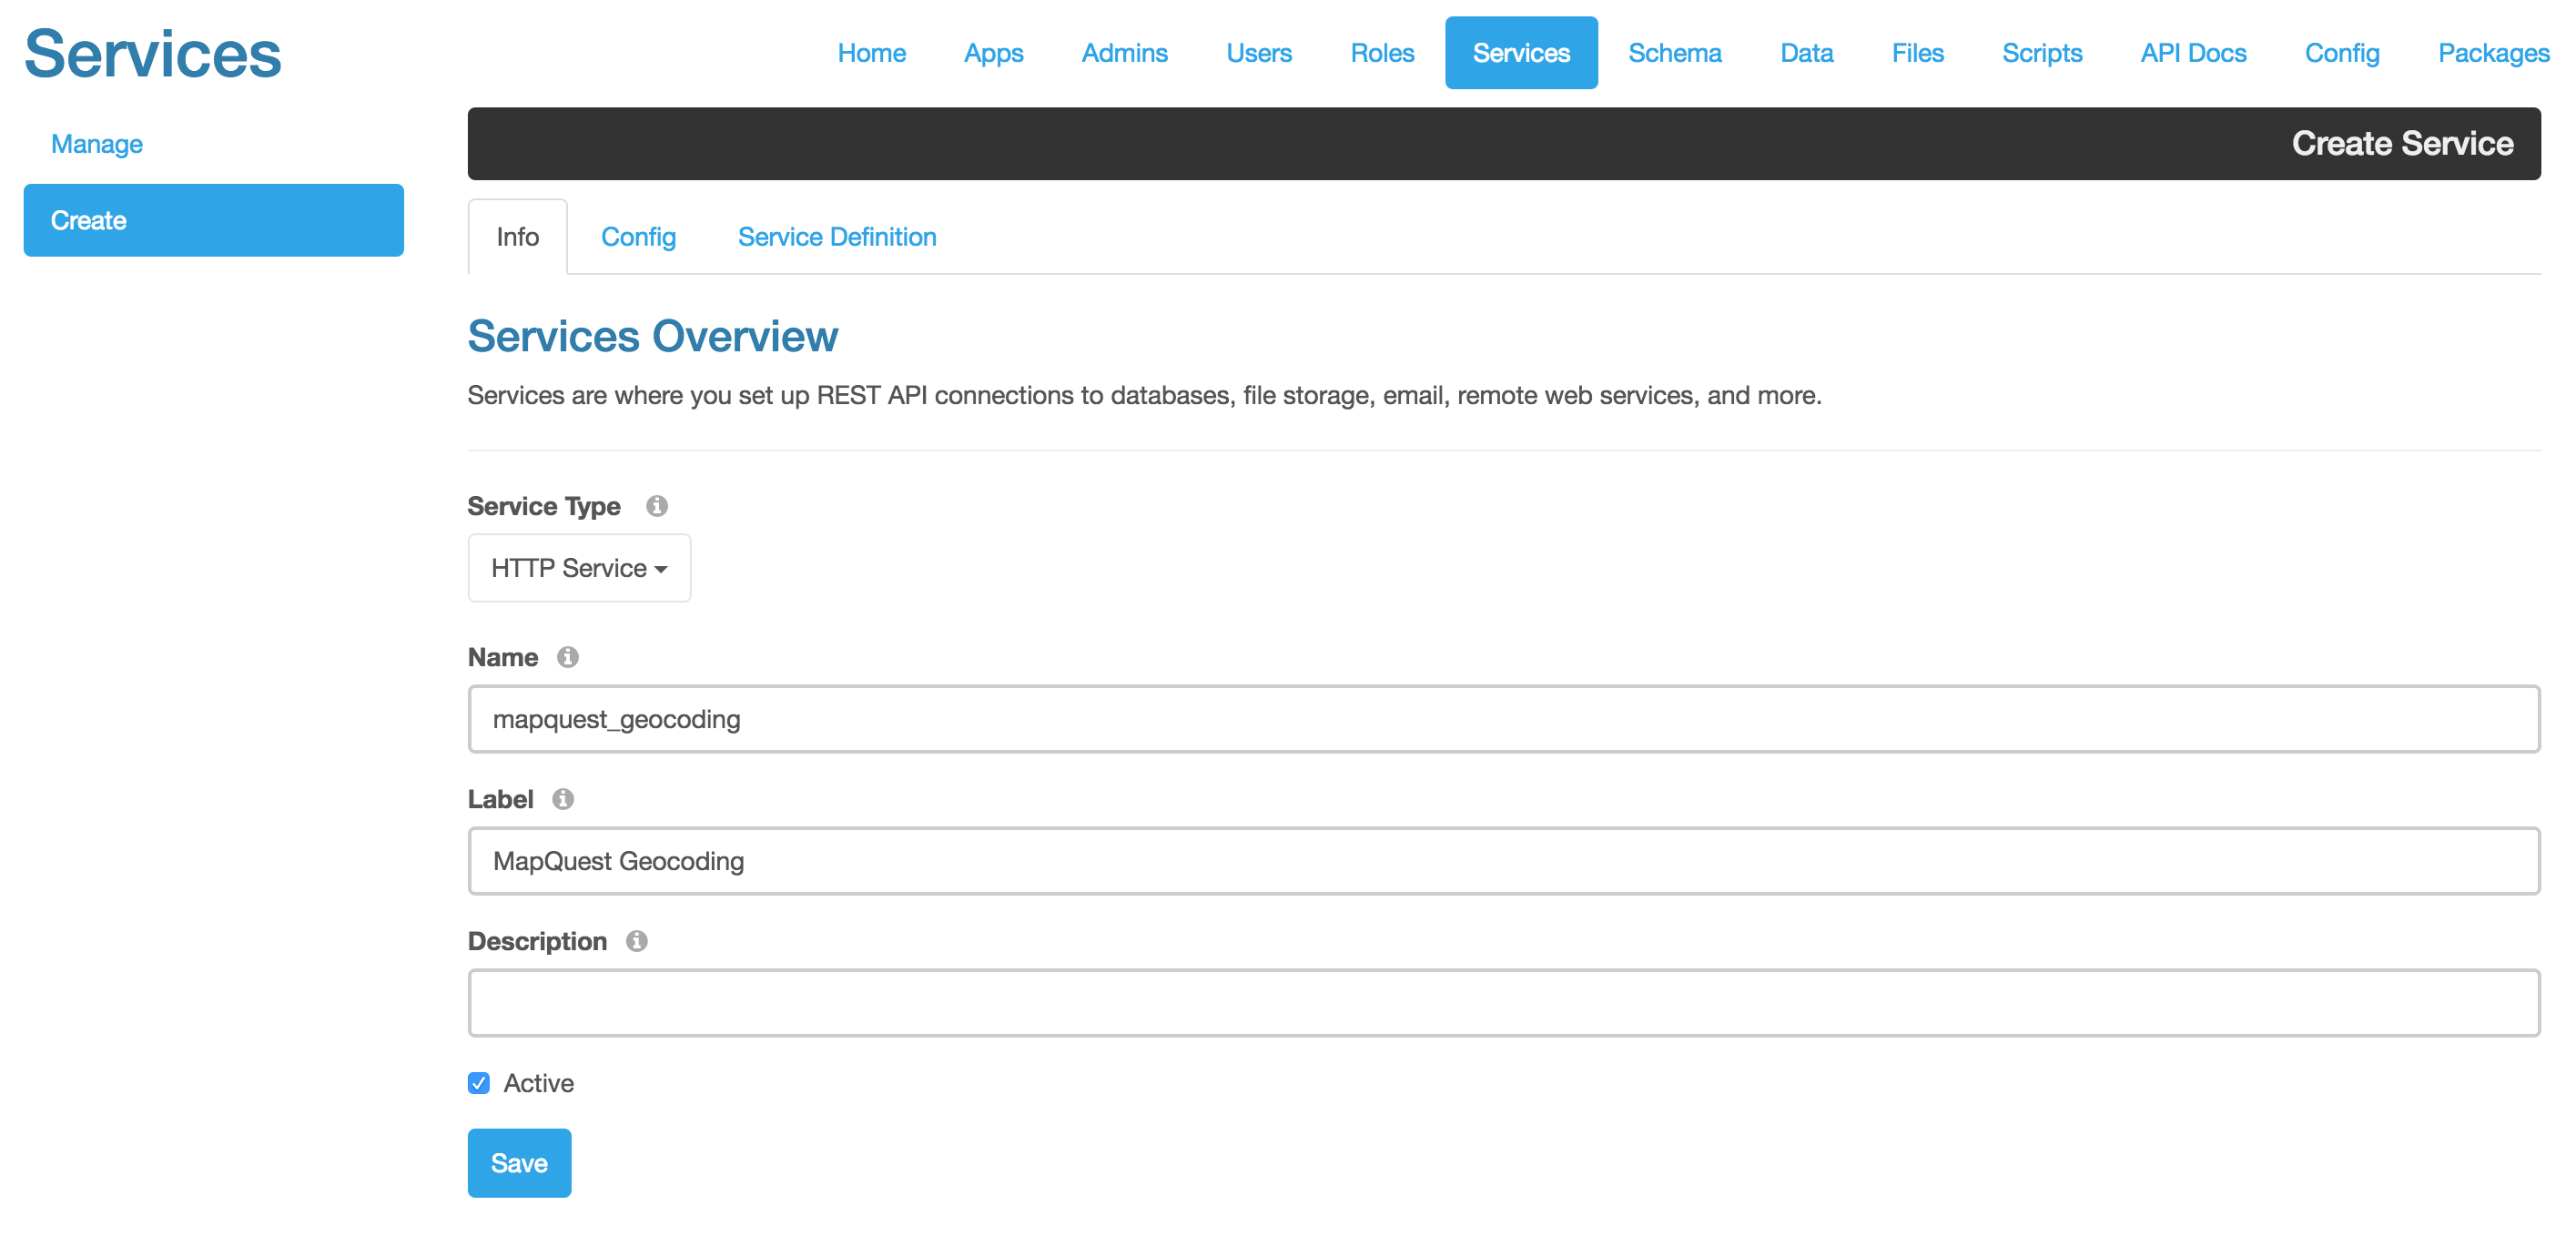
- Click Create and set the Service Type to ‘Remote Service’ > ‘HTTP Service’.
- In the ‘Info’ tab, set the service name to ‘mapquest_geocoding’ and label to ‘MapQuest Geocoding’. Check the Active checkbox.

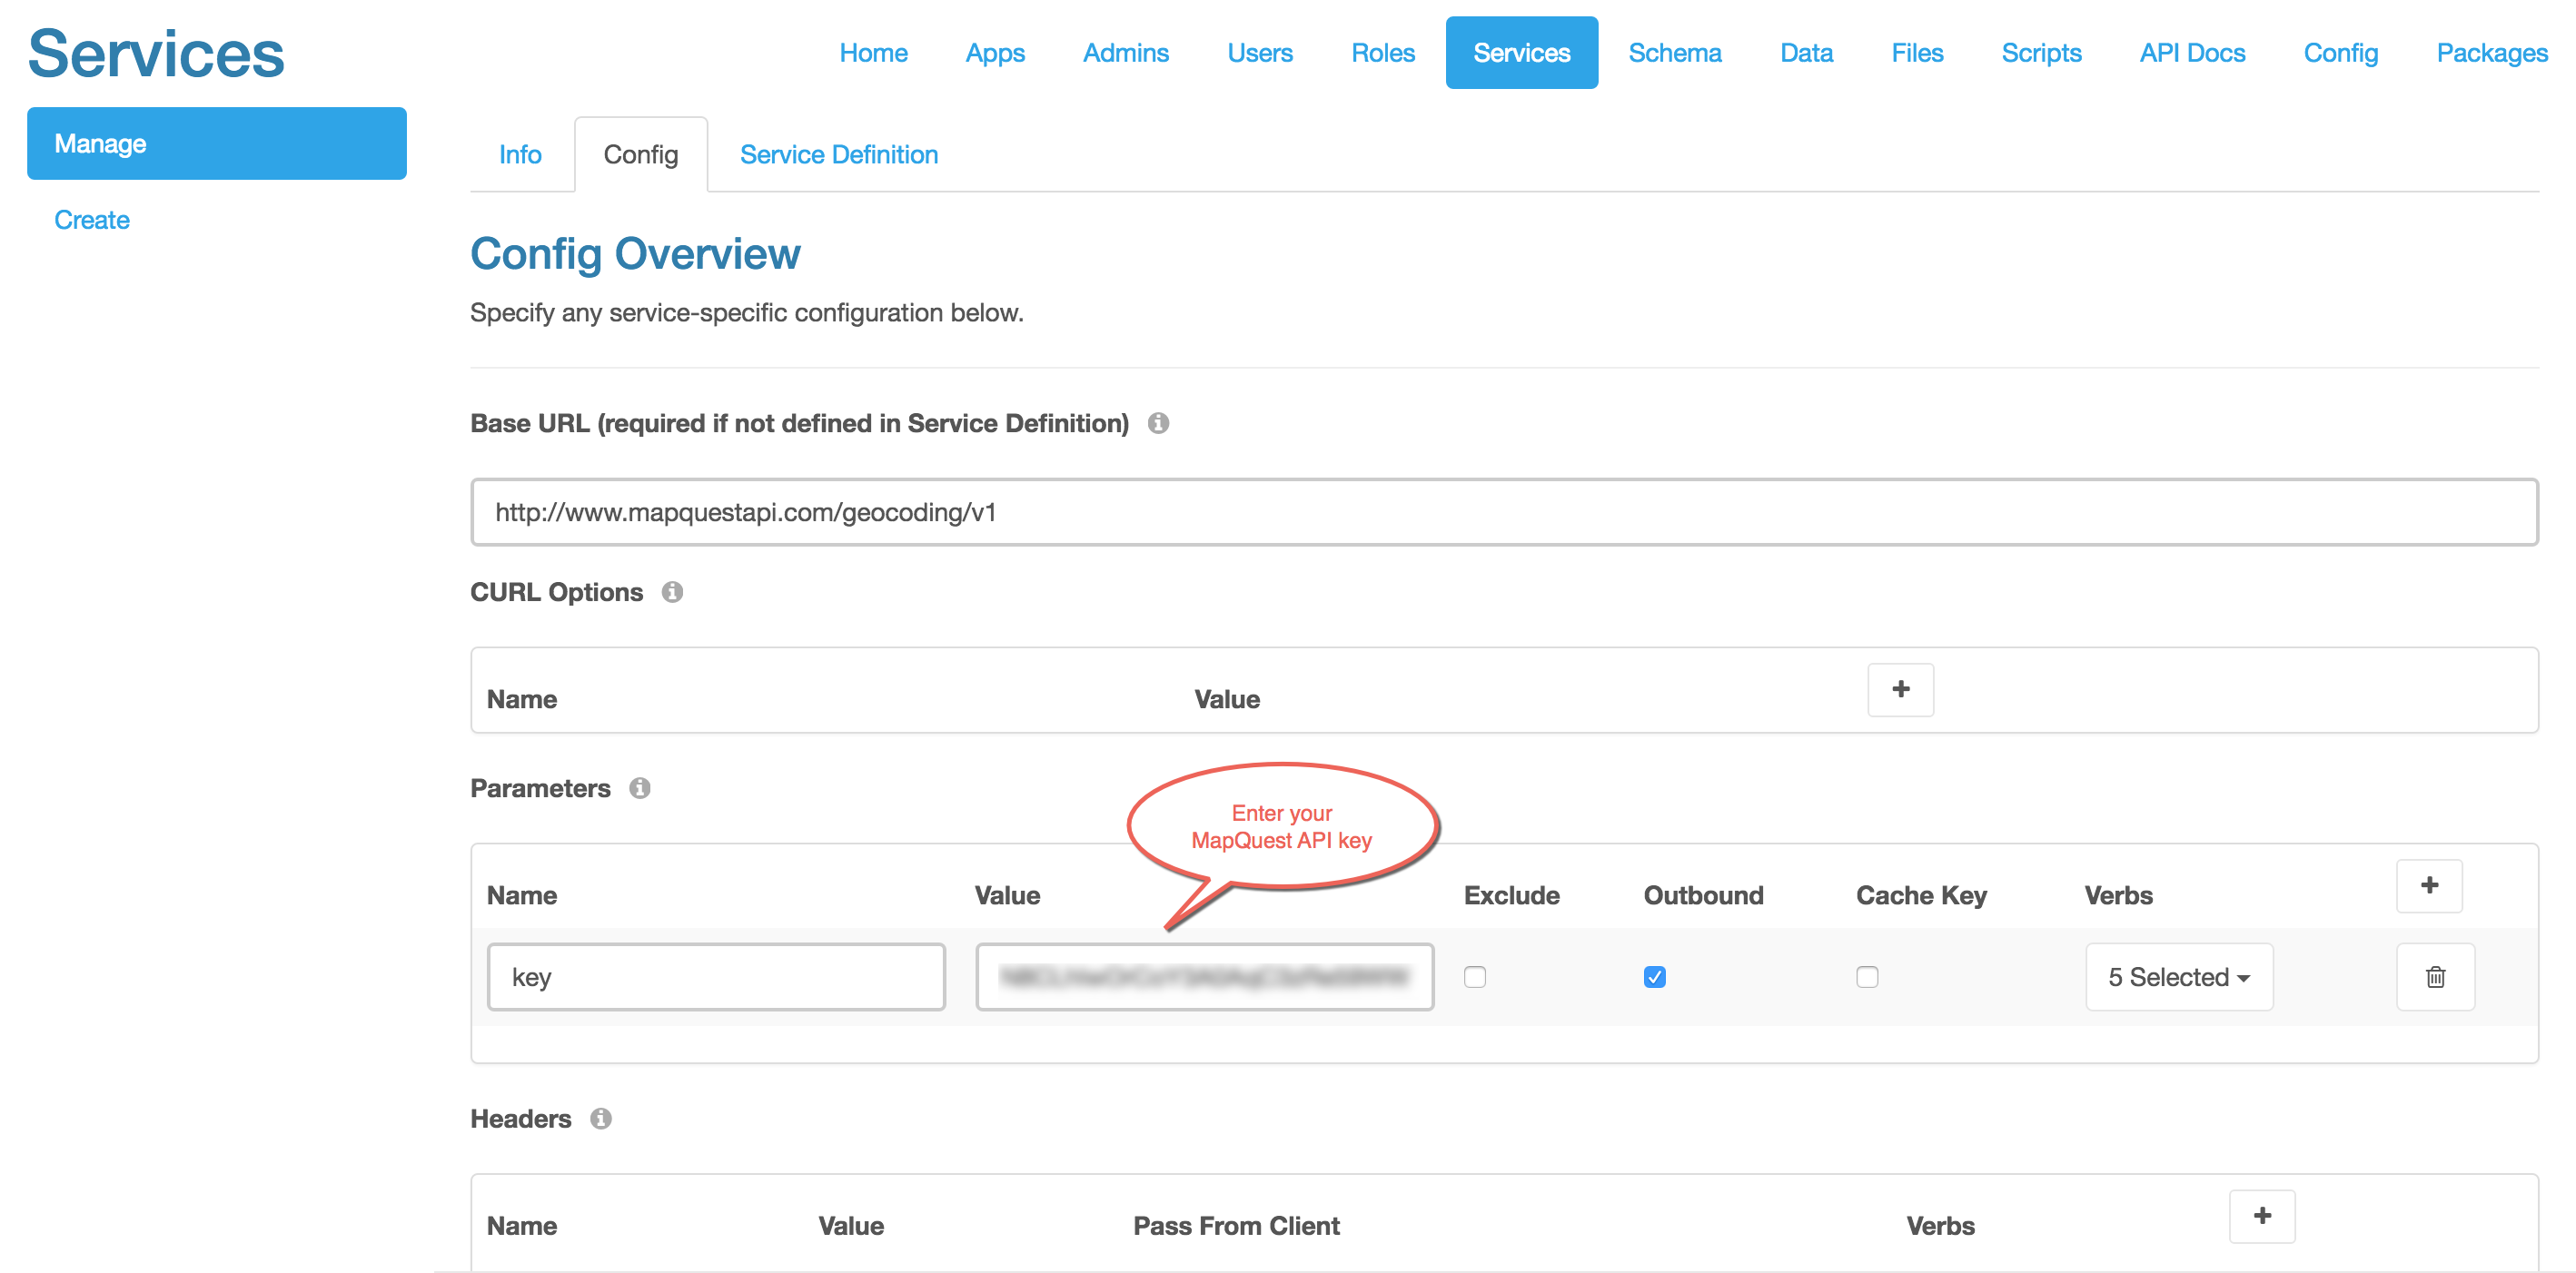
- Go to the Config tab for the new service and set the Base URL to https://www.mapquestapi.com/geocoding/v1.
- Under Parameters, click the ‘+’ button and enter ‘key’ for Name and ‘<your mapquest api key>’ for Value.
- Make sure to check the Outbound checkbox and select all five HTTP verbs so that your MapQuest API key is sent to the MapQuest Geocoding API for all requests.

Step 4: Call the MapQuest API from DreamFactory
Now that the MapQuest Geocoding API is configured in DreamFactory, you can use any REST client to access the MapQuest Geocoding API endpoints using the DreamFactory REST API. For example, here’s how it works with cURL.
Log into DreamFactory as an Admin to get a DreamFactory session token:
curl -i -k -3 -X POST "https://localhost:8080/api/v2/system/admin/session" -d '{ "email" : "[email protected]", "password" : "your_password" }' -H "Content-Type: application/json"Then, make an API call to the MapQuest Geocoding API with a street address, like below with cURL. DreamFactory combines the request URL from the client with the configured base URL for the service to generate the actual URL for the request. You can now call any MapQuest Geocoding API endpoint with a DreamFactory session!
curl -i -k -3 -X GET "https://localhost:8080/api/v2/mapquest_geocoding/address?location=100%20Park%20Ave%2C%20New%20York%2C%20NY" -H "X-DreamFactory-Api-Key: <api key for the admin app in the apps tab>" -H "X-DreamFactory-Session-Token: <session token returned by the login api call above>"
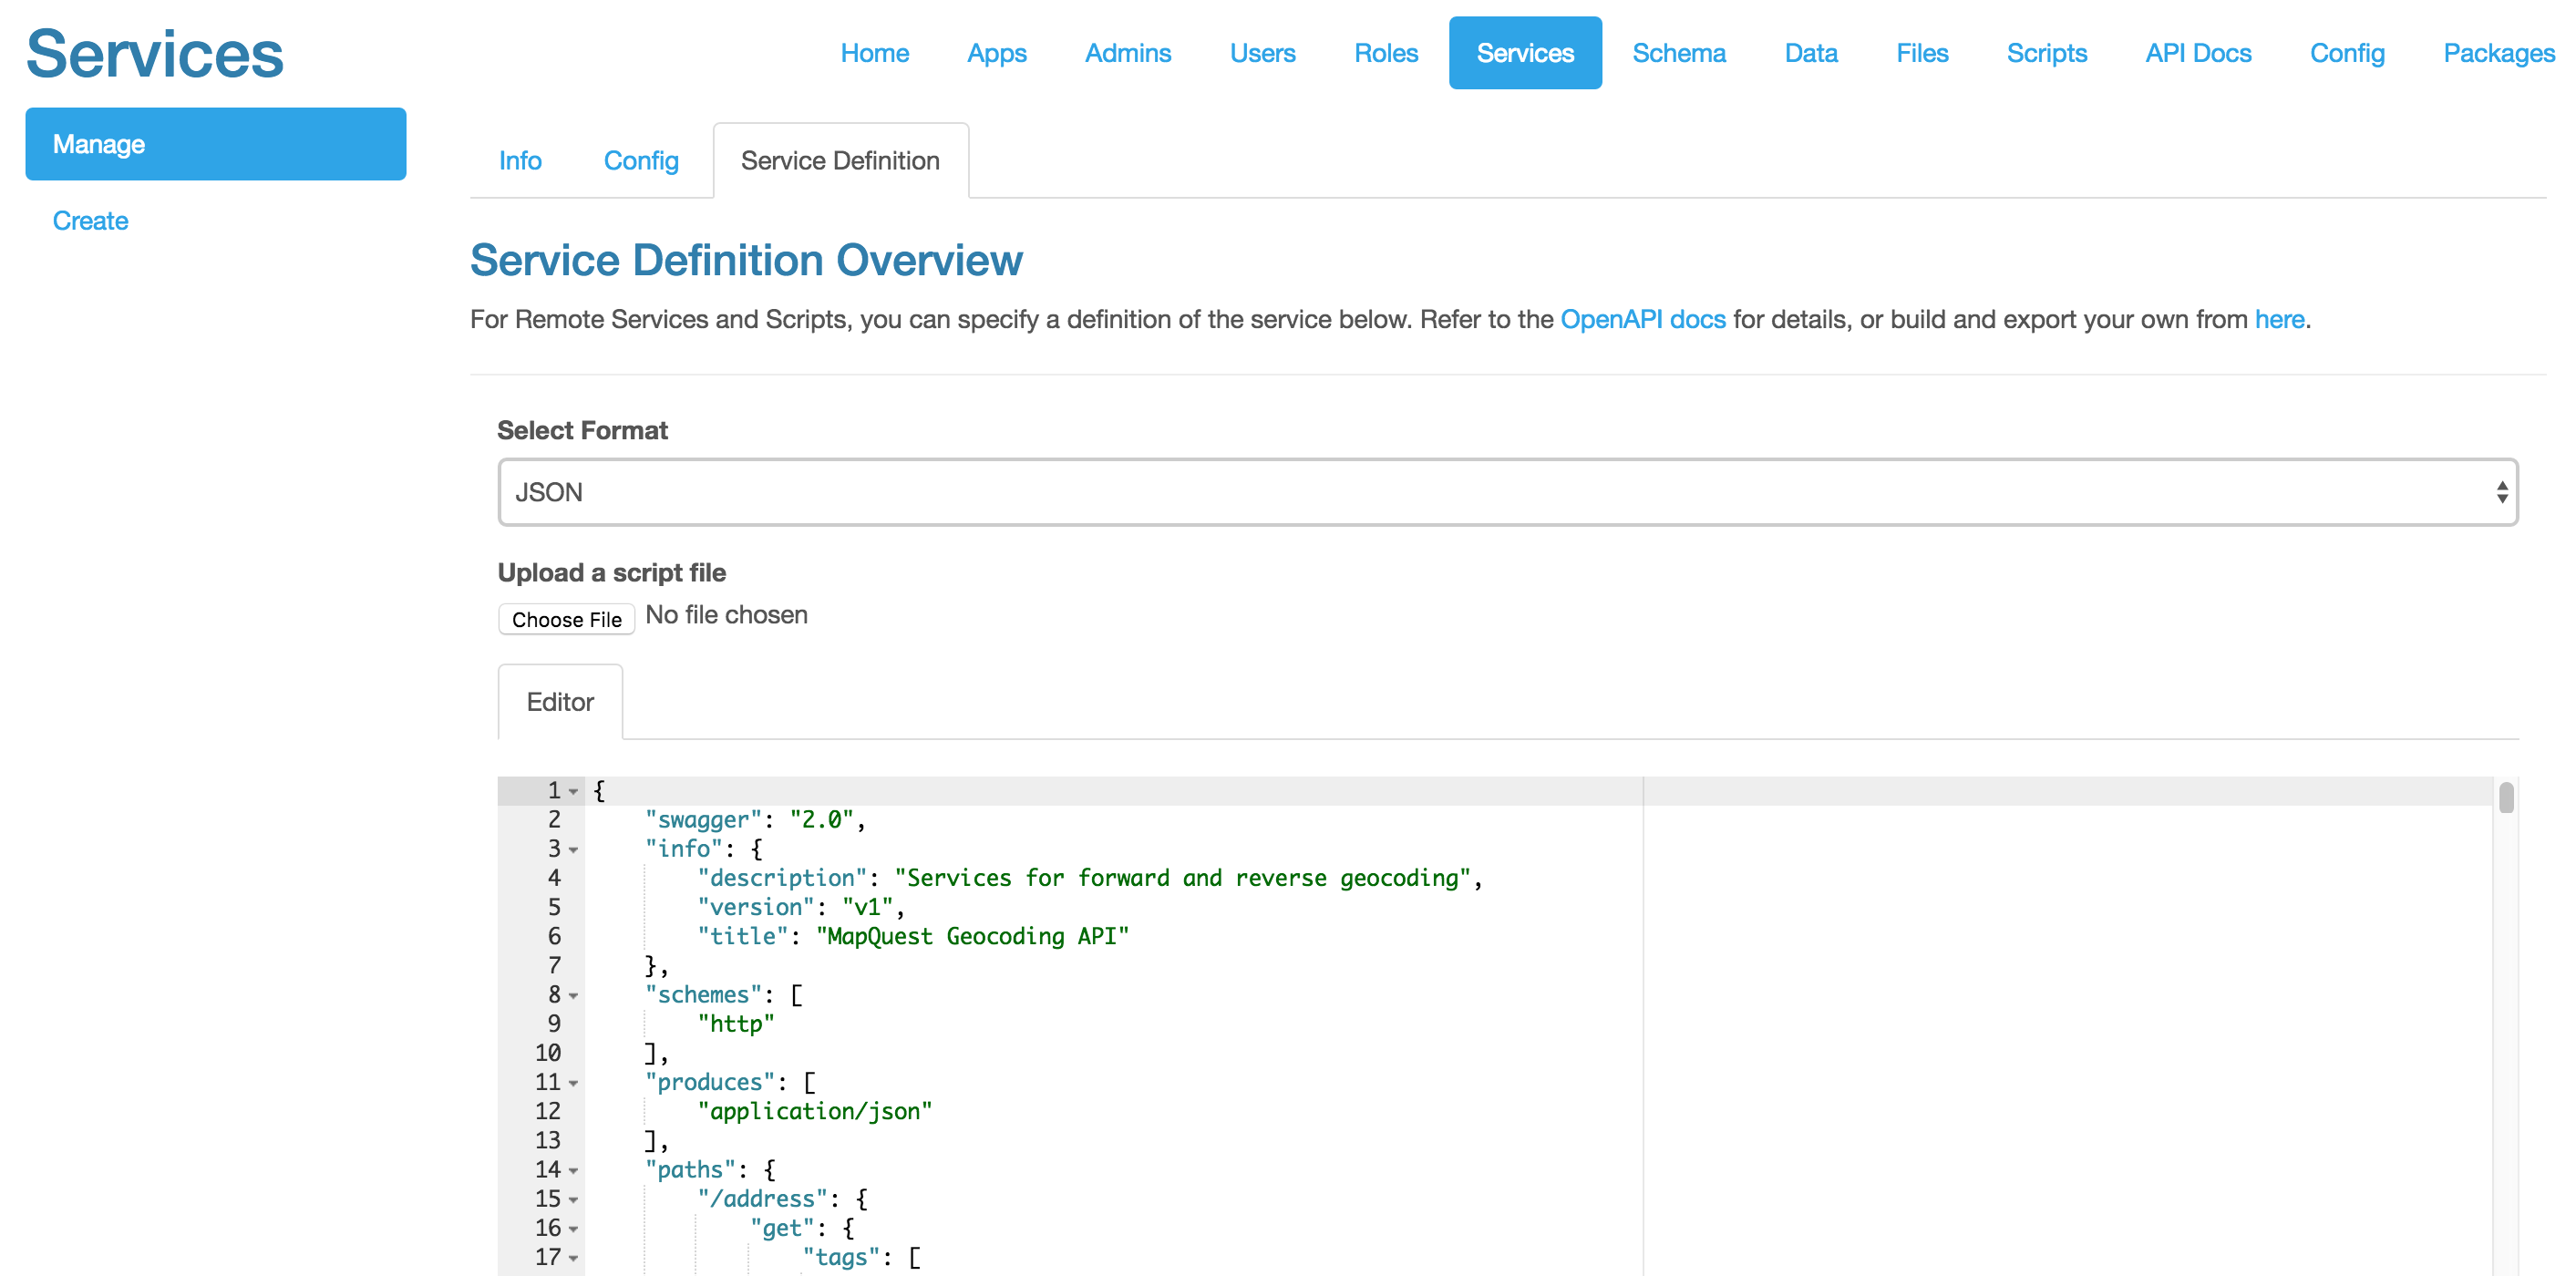
Step 5 (Optional): Add Swagger 2.0 Definition for the MapQuest API
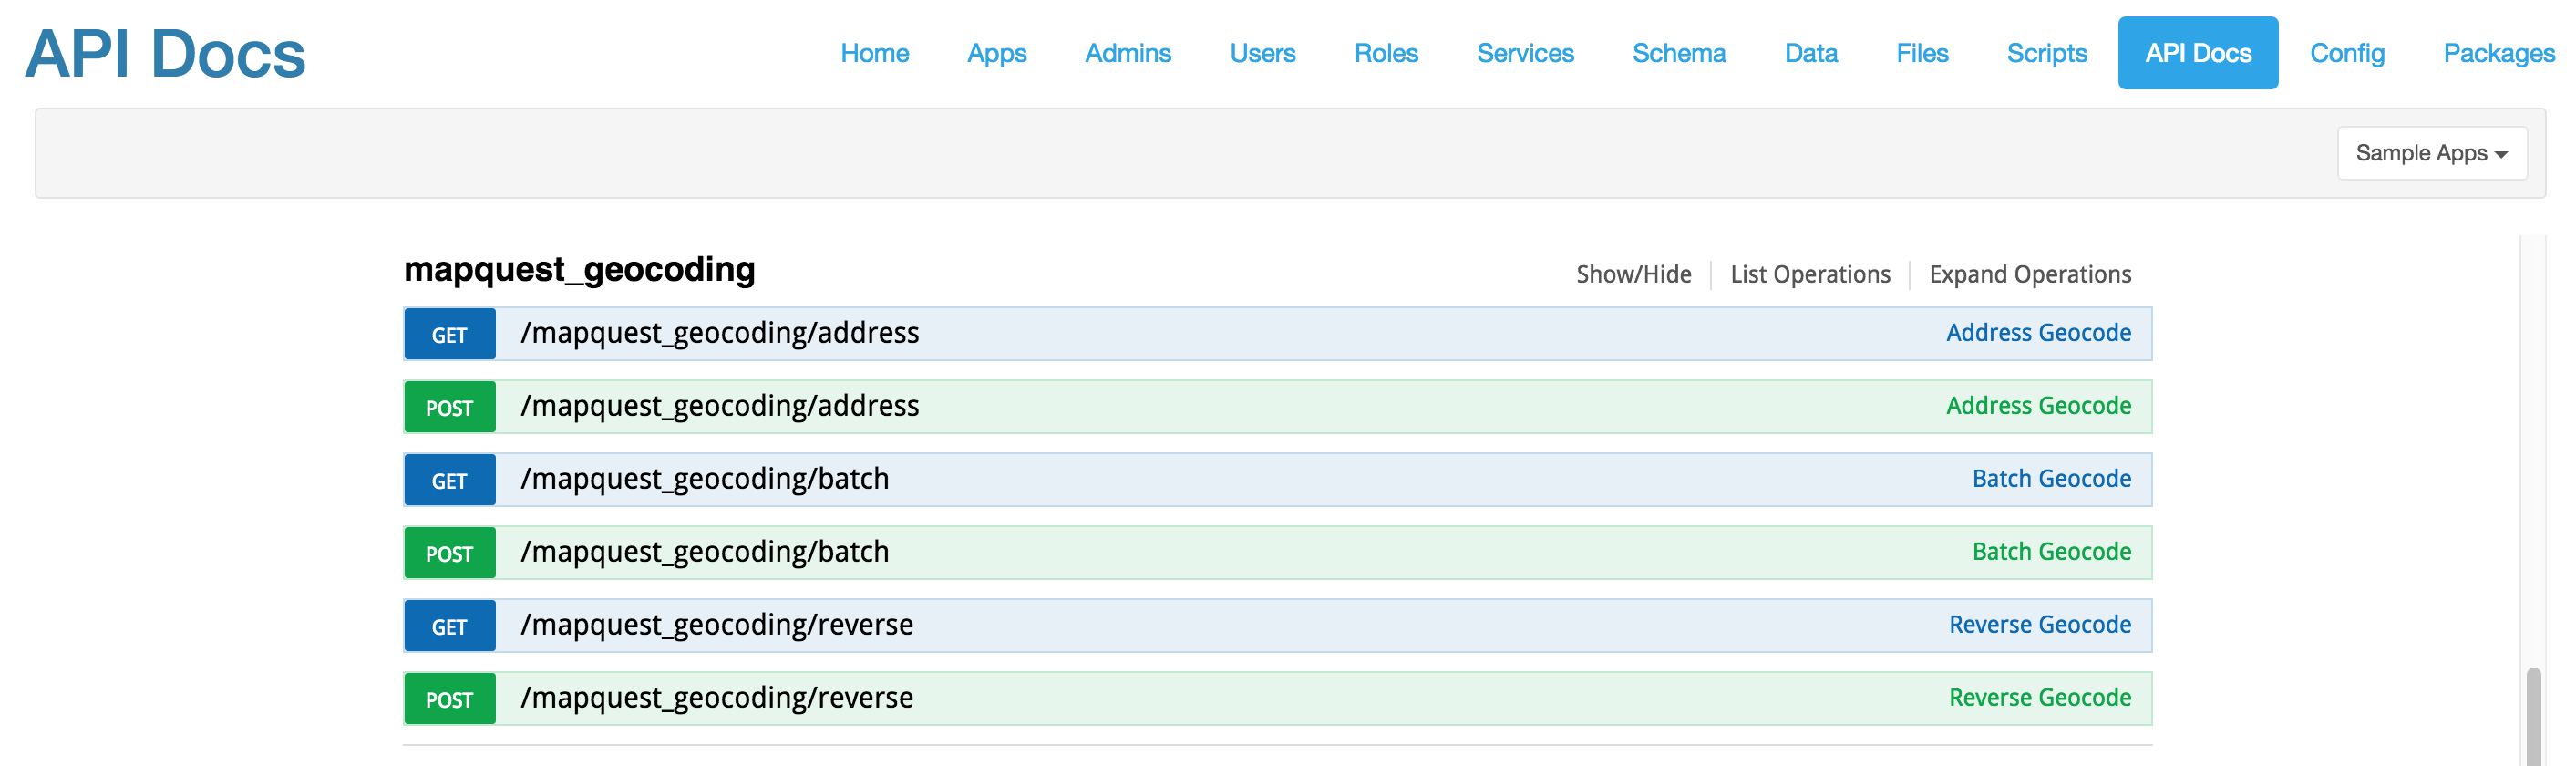
It’s also easy to add a Swagger definition for the MapQuest Geocoding API. The Swagger definition documents the MapQuest Geocoding API and makes it easy to make live API calls right in the DreamFactory API docs. There’s a Swagger 2.0 JSON definition for the API on GitHub here. Just copy and paste the JSON into the ‘Service Definition’ tab.
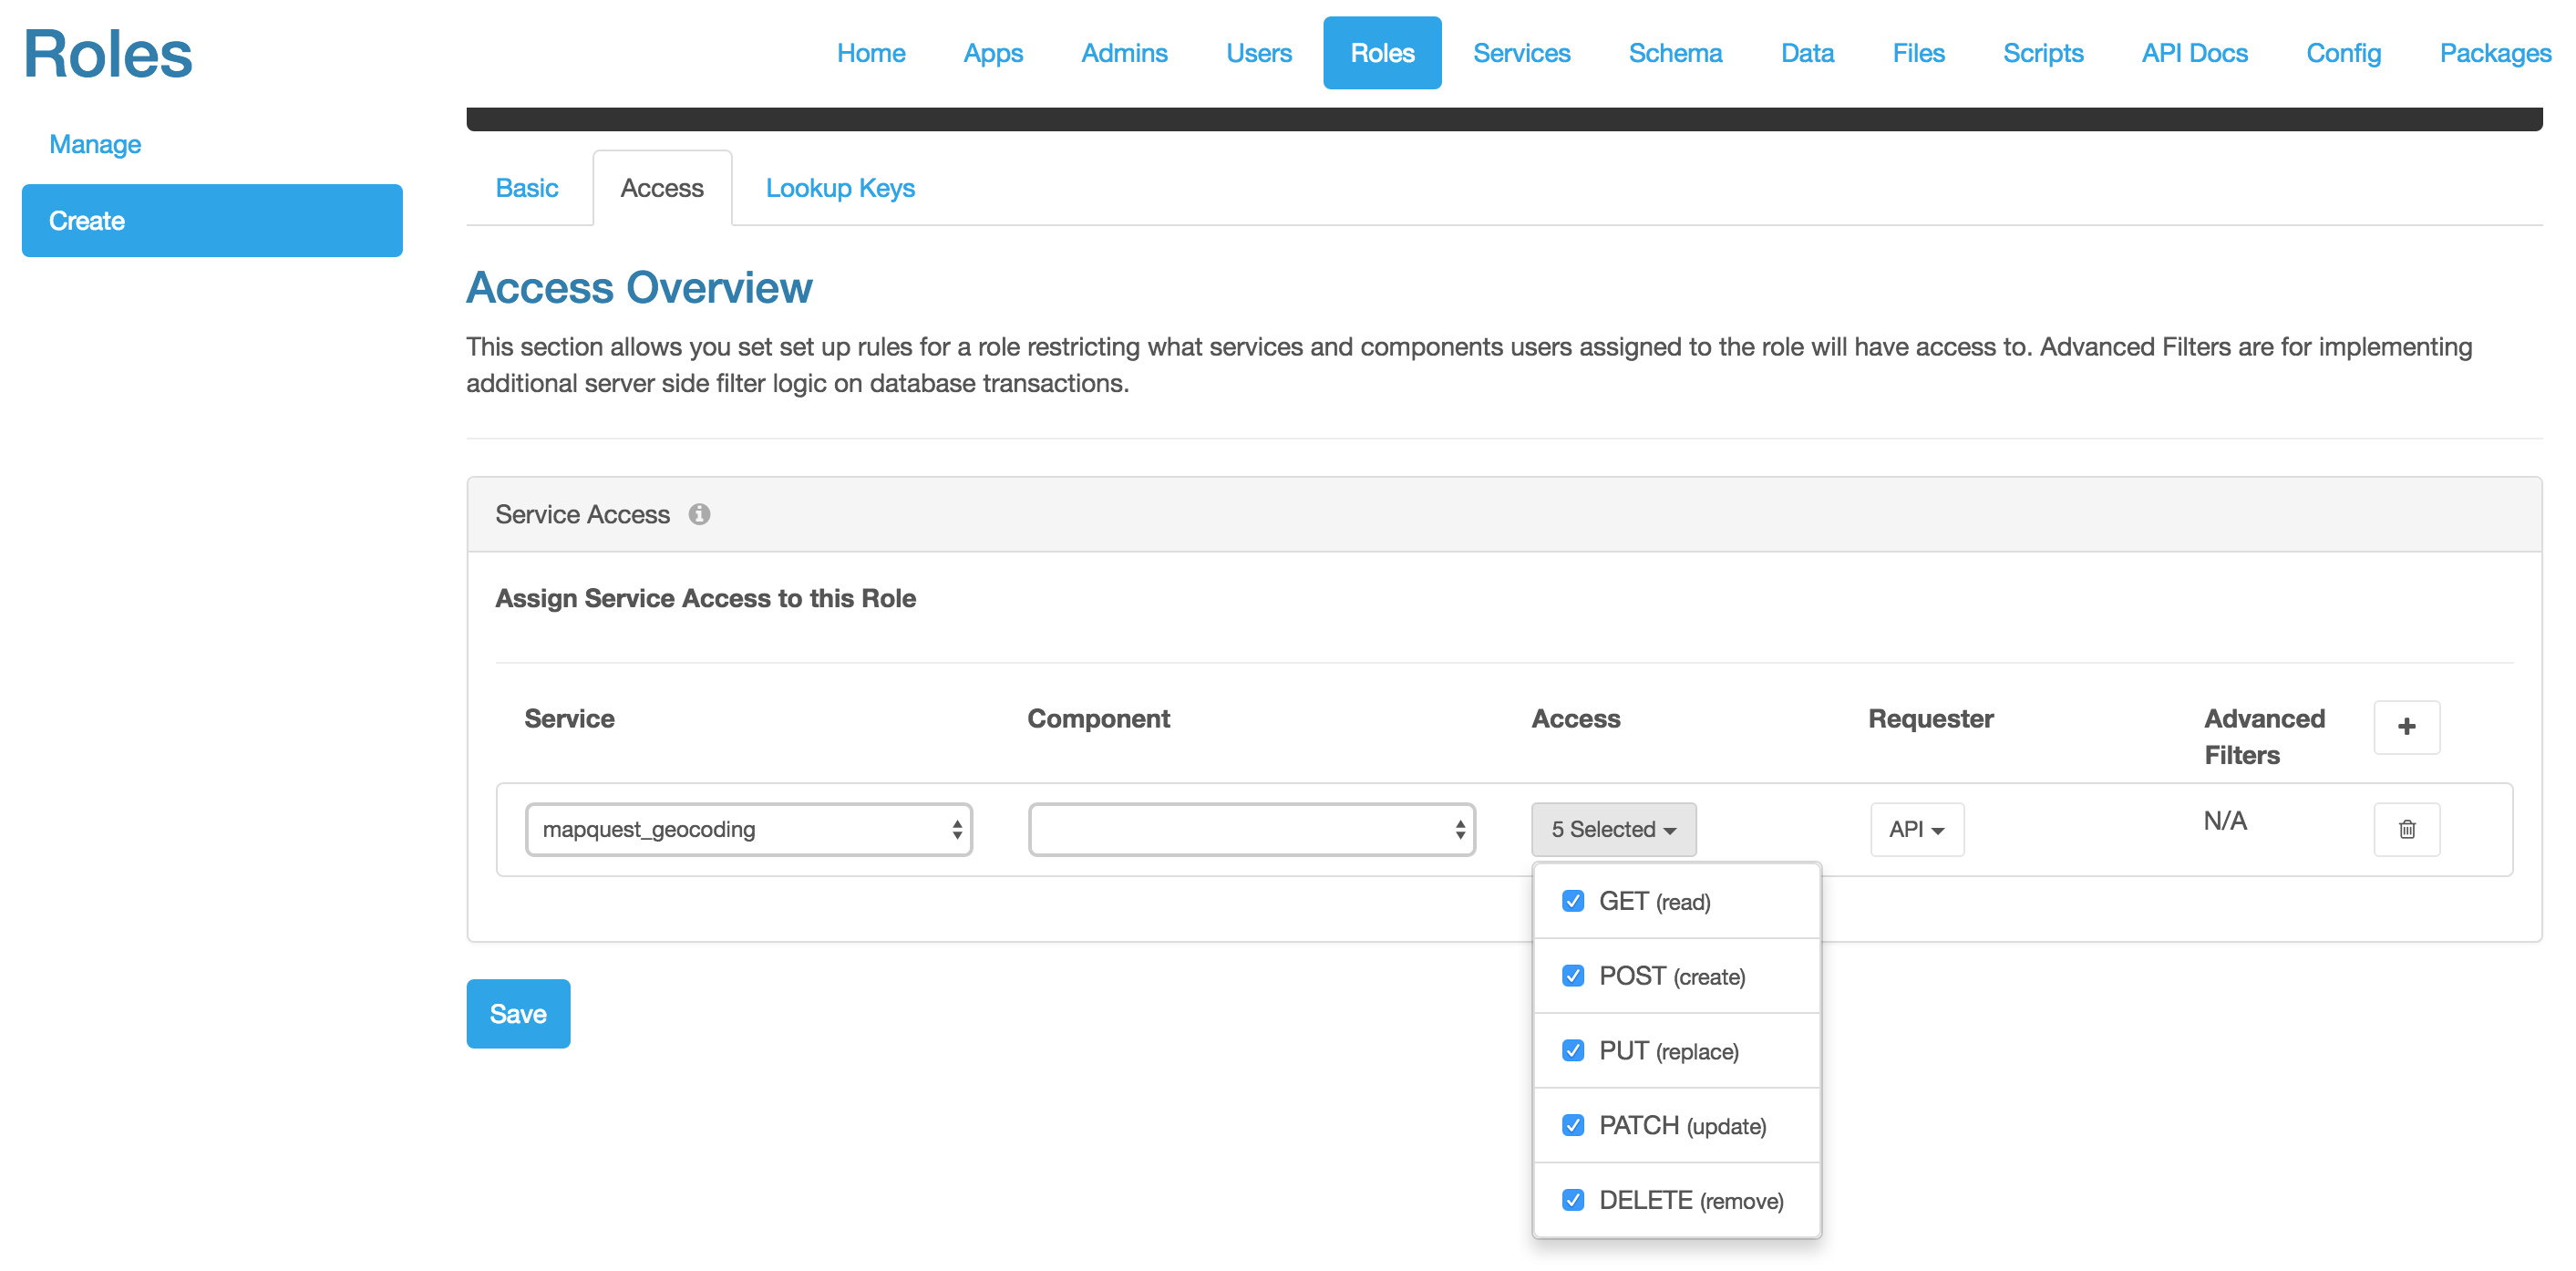
The other benefit of adding the Swagger definition is to add role-based access control to the MapQuest Geocoding API. In the ‘Roles’ tab of DreamFactory, simply grant or deny access to your MapQuest GeoCoding API for one or more roles. You can even partition the Geocoding API into multiple Swagger files with different endpoints and assign the Swagger endpoints to different roles, all under the same MapQuest API key.
You can also implement server-side event scripts on any MapQuest Geocoding endpoint defined in the Swagger definition. This is a powerful way to add logic to any API request or response.
Keep in mind that you can quickly set up other MapQuest APIs in DreamFactory exactly the same way as we did here with the Geocoding API. For example, to set up the MapQuest Search Ahead API, create a new service in DreamFactory, enter https://www.mapquestapi.com/search/v3 as the Base URL and use your same MapQuest API key. You can then copy the Swagger 2.0 definition for the Search Ahead API here and interact with the API in DreamFactory’s API Docs before building your application.
This brief tutorial should help you get started building great apps with DreamFactory and MapQuest. Let us know what you create!
Read more about DreamFactory’s integrations.
Terence Bennett, CEO of DreamFactory, has a wealth of experience in government IT systems and Google Cloud. His impressive background includes being a former U.S. Navy Intelligence Officer and a former member of Google’s Red Team. Prior to becoming CEO, he served as COO at DreamFactory Software.