Kevin McGahey - January 15, 2018DreamFactory 2.11 now supports AMQP. As you may know, AMQP stands for Advanced Message Queuing Protocol. DreamFactory’s AMQP client service is an implementation of the AMQP-0-9-1 Protocol. With this service you can now use DreamFactory as an AMQP client for your projects. Once you’ve configured the AMQP client service in DreamFactory, you can easily publish messages to exchange and consume messages from queues using REST APIs. We’ve tested this service with RabbitMQ.
AMQP is a native DreamFactory service, and includes user management with role-service-access, live API documentation, etc. Once you’ve configured your AMQP client service in DreamFactory, all the configuration details are hidden from your client. They’re securely stored in your DreamFactory instance database. This provides a simple way to publish and consume messages to and from your AMQP broker.
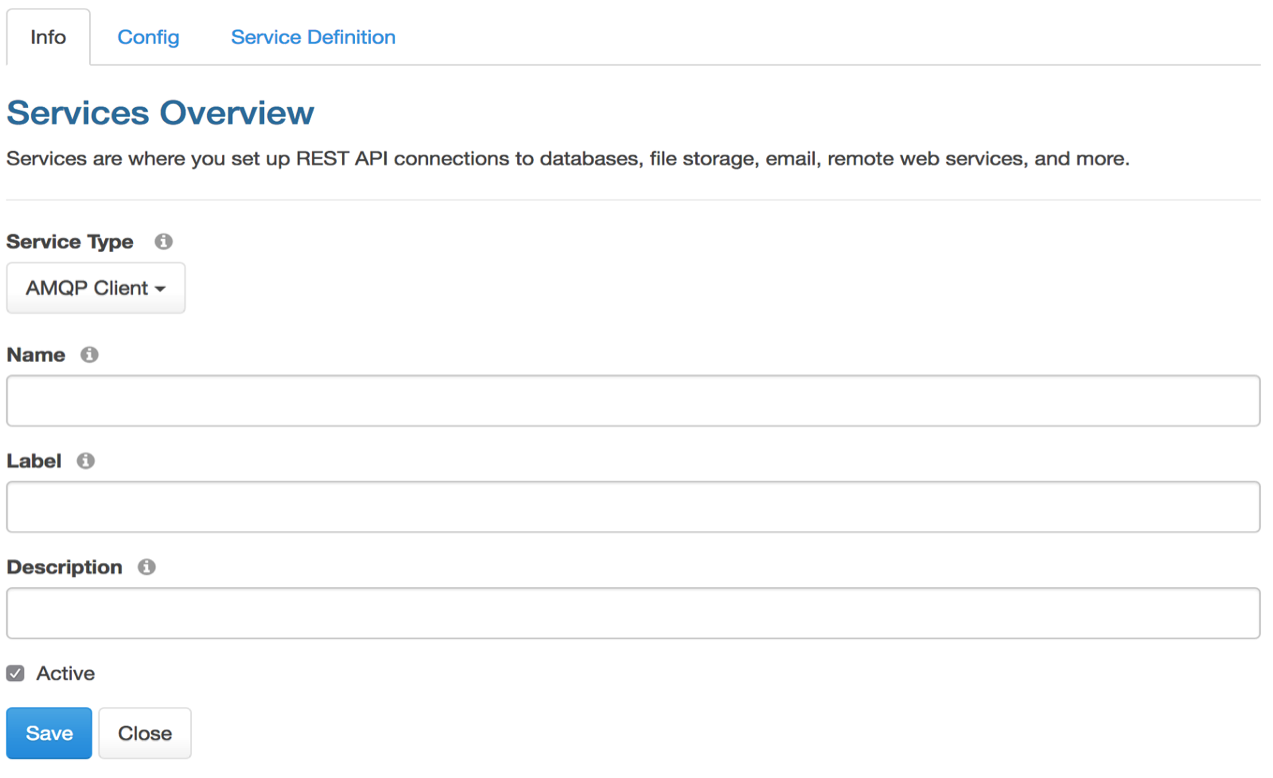
Configuring an AMQP client service is as simple as configuring any other service in the DreamFactory admin console. Start by logging into the admin console, head over to the ‘Services’ tab, and click on the ‘Create’ button on the left sidebar. Use the ‘Service Type’ drop down to select ‘IoT’ -> ‘AMQP Client’, complete the service configuration form and save it to create your service. Here’s what the AMQP service configuration looks like. In the ‘Info’ tab, provide basic service information – Name, Label, and Description.

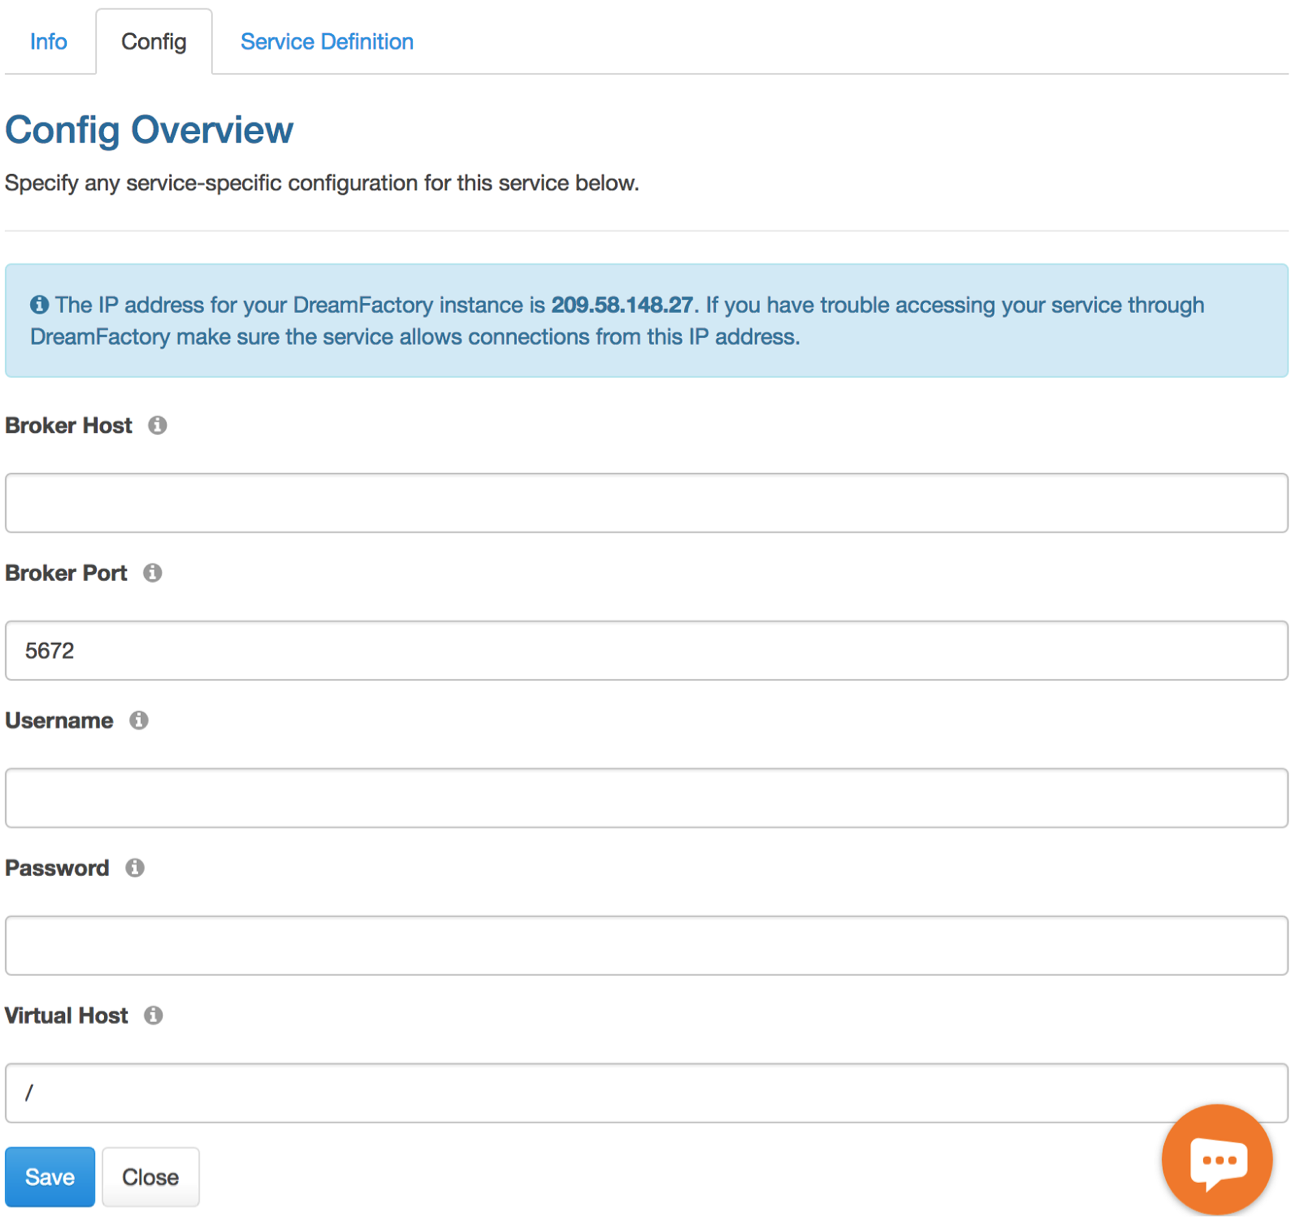
In the ‘Config’ tab, provide the following configuration information:
- Broker Host – String. Required. Hostname or IP address of your AMQP broker.
- Broker Port – Integer. Optional. Default 5672. Port number of your AMQP broker.
- Username – String. Optional. Provide username if your broker requires authentication.
- Password – String. Optional. Provide password for your username if your broker requires authentication.
- Virtual Host – String. Default ‘/’. Provide your virtual hostname.
Once you’ve configured the AMQP client service, you’re ready to publish and consume messages over your exchanges and queues to and from your AMQP broker. You can also head over to the ‘API Docs’ tab in DreamFactory admin app and choose your newly created AMQP client service to see all API endpoints ready for you to use.
Here “amqp” is the name of the service that was entered during service configuration. It can be any url safe string of your choice. Expand each of the endpoints to learn more about them.
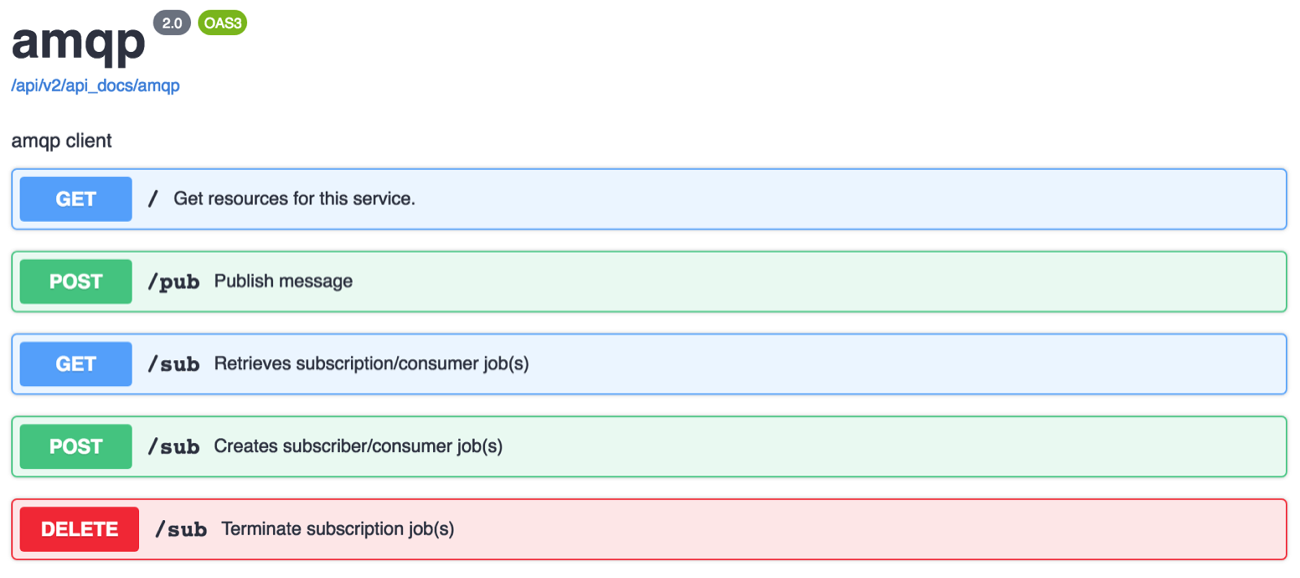
Publish Endpoint (POST amqp/pub)
Use the publish endpoint (amqp/pub) to publish a message to an exchange or queue. Here’s an example curl call to publish a message.
curl -i -k -X POST https://example.com/api/v2/amqp/pub -d {“queue”:”myqueue”,“message”:”Hello”}
Subscribe Endpoint (POST amqp/sub)
Subscribing to a queue requires a little understanding about how the subscription process works. When you subscribe to one or more queues, a separate process needs to continuously run in the background in order to check for any incoming messages and then handle that according to your request.
For this background process to run continuously, you’ll need to run a queue worker process. A queue worker process is simply a daemon service that you start up and run on the same server where your DreamFactory instance runs. You can use the Linux supervisor application (or a similar application on other operating systems) to automatically start and manage the lifecycle of this queue worker process.
The queue worker process constantly monitors any queue job from your DreamFactory instance. When you subscribe to an amqp queue using the DreamFactory AMQP client, it immediately creates a queued job which then is picked up by this queue worker process. DreamFactory is built on the Laravel framework and uses the Laravel queue worker for this purpose. You can learn more about the Laravel queue worker here. To start a queue worker manually, you can run the following command in the root directory of your DreamFactory installation.
php artisan queue:work
In order to subscribe to an AMQP queue, simply make a POST call to amqp/sub endpoint. Here’s a simple curl example.
curl -i -k -X POST https://example.com/api/v2/amqp/sub -d [{"queue":"myqueue","service":{"endpoint":"apn/push","verb":"POST","parameter":[{“api_key”:“abc123” }]}}]
Notice the request payload here. When you subscribe to a queue, you can provide DreamFactory service information as part of the subscription. When a message arrives in your subscribed queue, DreamFactory will automatically trigger this service and inject the incoming message to the service request as part of the payload by using the “message” key. This provides a ton of flexibility when you receive a message in your subscribed queue. You can always use a custom scripting service or a remote web service to perform simple or complex actions.
Another thing to notice is that the subscription request payload is an array. This means you can subscribe to multiple queues in one subscription request. However, each subscription requires a separate Laravel queue worker process. If you’re going to create a subscription on two queues, then you must have at least two Laravel queue workers running (each AMQP subscription is handled by a single Laravel queue worker). When you’re already subscribed to one or more queues and your subscription is running, you cannot add an additional subscription without terminating all your existing subscriptions first. Once you’ve terminated all your existing subscriptions, you can re-subscribe to one or more queues again.
To terminate all your subscriptions, simply make a DELETE call to the amqp/sub endpoint.
You can view all your active subscriptions anytime by making a GET call to amqp/sub endpoint.
This blog post quickly covered how to set up an AMPQ client service in DreamFactory. Check out the community forum to discuss this feature or let us know what you think in the comments!
Kevin McGahey is an accomplished solutions engineer and product lead with expertise in API generation, microservices, and legacy system modernization, as demonstrated by his successful track record of facilitating the modernization of legacy databases for numerous public sector organizations.